Thursday, August 29, 2013

Puttin' Up Tomatoes

This past weekend was one of epic tomato proportions. Led by the expertise of Chris's parents, we helped put up 500 pounds of tomatoes in two days. We'll have enough jarred tomatoes to last a year. Whew!

Putting up tomatoes


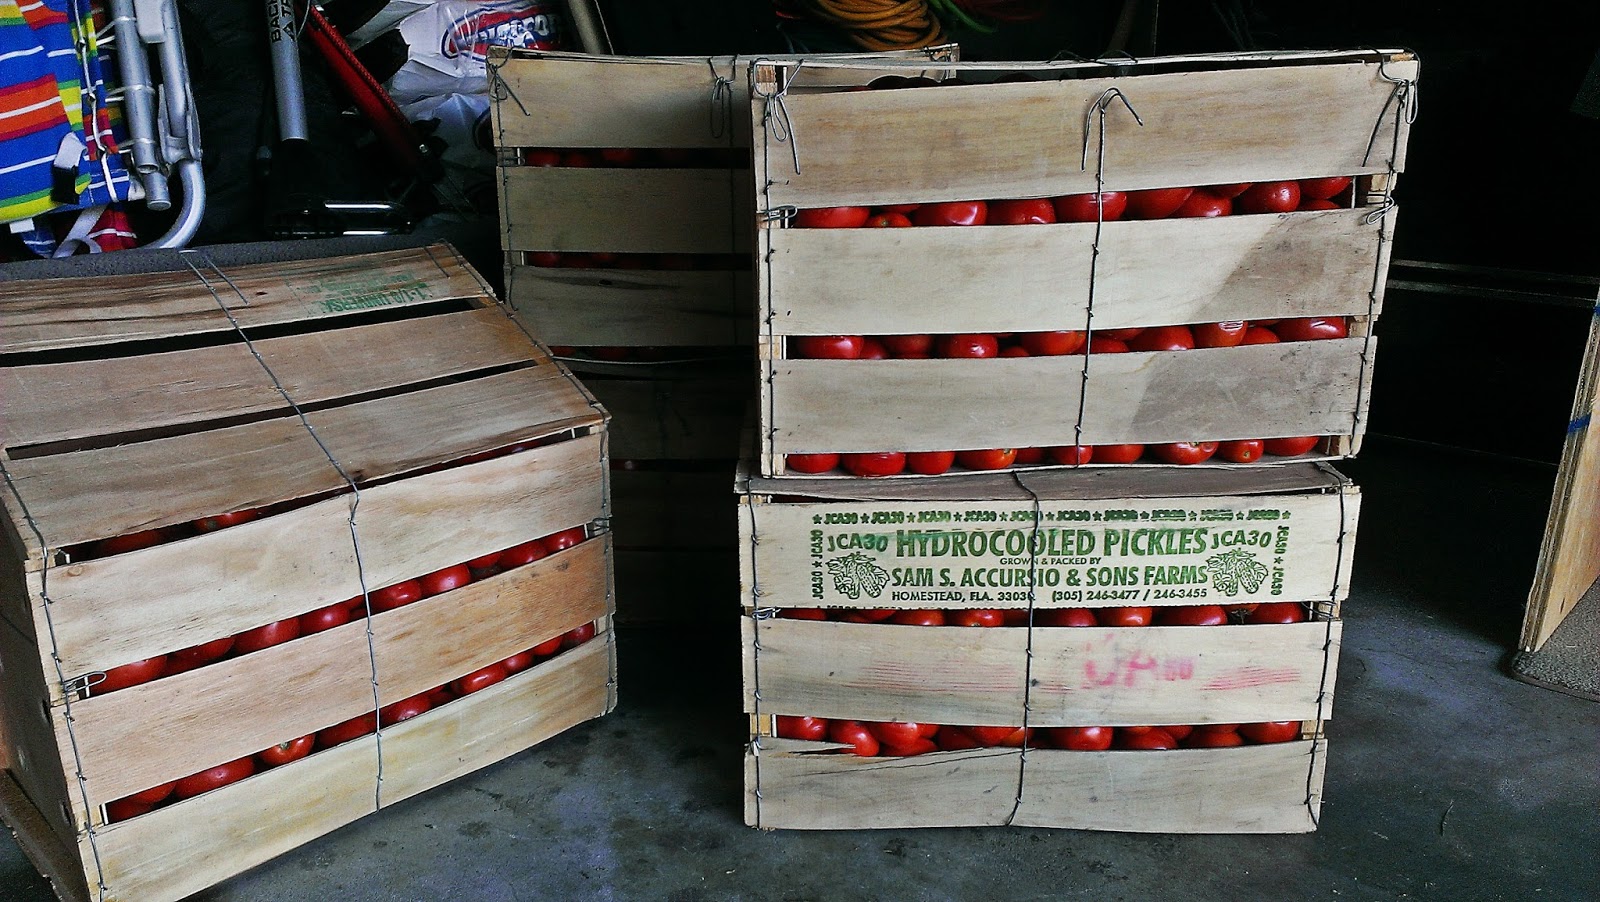
First off, we had to acquire tomatoes, because as prolific as our tomatoes were this year, we didn't have that many. After calling around to a few farms, Mellen found a place in Bordentown, NJ that had a good crop of plum tomatoes. Later that day they arrived, SUV filled to the brim with tomatoes, ten crates worth.

crates of tomatoes


For this tomato operation we borrowed a fancy Italian motorized grinder that actually skins and seeds the little fruits and extrudes the bright pink pulpy goodness. It's truly an amazing machine. Chris's parents, and plenty of those before them, used to process tomatoes with a hand crank. Yikes.

For any canning process there are certain preparations that need to happen. The first is gathering supplies, jars, lids, rings, stock pots, ladles, and plenty of towels. The work space should be clean and clear of non-essential items (here, wine to drink during the process is considered essential). We brought the crates into the kitchen, and set up a big table for cutting and grinding.

Putting up tomatoes


Putting up tomatoes

Emily and Chris unloaded the tomatoes into the kitchen sink filled with water and a little vinegar to
clean the tomatoes. They pulled out each one, gave it a once over and removed "any spots that you wouldn't eat". Overall, the tomatoes were beautifully ripe, with few spots needing removal. (Anything that was removed went to the chickens!). After they were inspected, they were brought to the cutting table where I quartered them and put them in line to be processed. They all go through the top of the grinder, down to an auger that turns and removes the skin and seeds.

tomato grinder


tomato puree

We did this for hours; collecting sauce in stock pots and removing the skin and seeds. As we neared time to jar, various pots were put on the stove to bring to a boil and reduce a bit. Any foaminess that bubbles up is scraped off. The lions share of the tomatoes remained plain so that later on it can be used in stews and chilis, or turned into a thicker sauce with other ingredients. Done this way, we have lots of options. (That's not even half of the jars shown below.)

canning supplies


I was always nervous to can things because I was convinced that I wouldn't do it properly, the jars wouldn't seal correctly, and disaster would ensue. However, after doing it with people who know what they're doing, I realized there is nothing to be afraid of! Don't get me wrong, canning is a science, but it's not rocket science.

The sauce is brought to a boil, which ensures that any bad bacteria is killed off. The jars and rings get dunked in boiling water to disinfect and to bring them up to temperature so that the hot sauce doesn't crack the glass. The lids are put in hot, but not boiling, water because it would destroy the rubber vacuum seal. We put a few leaves of basil in the bottom of each jar for a bit of flavor. The sauce is poured in with the help of  a funnel and the rim is wiped clean. It's important that nothing disrupts the lids seal. Using a magnetic lid lifter, a lid and ring are put on top, and twisted tightly. Done! Some people put the hot jars back into boiling water to process further, but we skipped that step because we boiled the rings before. After that, they slowly cool, and you hear the chorus of little "pops" as the lids seal down. If the lid can be pressed down then it goes in the fridge right away.

Putting up tomatoes Putting up tomatoes

I think after the eighth hour on Sunday night we were getting bit delirious. Chris fashioned the hot jar glove into a puppet... A weekend of hard work, but definitely worth it! Now I'm ready to can everything. No, really. I just bought a book called, Canning for a New Generation: Bold, Fresh Flavors for the Modern Pantry...


Tuesday, August 27, 2013

Meatless Mondays

I often joke that I would make a fantastic vegetarian if  I didn't love meat so much. And what I mean by that is simply that I relish eating plenty of fruits, vegetables, and whole grains, and can happily devour meals without meat. It's just that I really really love meat. I am quite aware that there are lots of arguments why we shouldn't eat meat, and have had many a philosophical discussion on the matter. But I always come back to the question, "do you eat to live, or live to eat", and I most definitely fall into the latter. Despite all the reasons, if I restricted myself from enjoying ALL the food in the culinary spectrum I think, truly, life would be a bit more dull for me. But the tiny tree hugger in me tugs at my heartstrings because she's worried about carbon footprints, water usage, ethical treatment of animals and such.

That said, as a household, we make efforts to eat in a more sustainable fashion; by choosing local produce and meat when we can, and raising our own chickens for eggs. We probably eat a vegetarian dinner two, three times a week, just because. But I'd like to try to establish a lifestyle less meat dependent for health, environmental, and economic reasons. In Michael Pollan's book, Food Rules: An Eater's Manual, he lists guidelines in which to eat balanced and healthfully. It's number twenty three that is applicable here...

23. Treat meat as a flavoring or special occasion food

I think that's a great guideline, viewing meat as a treat rather than a daily staple. And I can live with that (Chris too). So, my first step is to join in with the "Meatless Mondays" campaign. Weekly devoting a whole day to not eating animals! If anything, it will encourage me to plan meatless meals more often. We try our best to balance what's good for ourselves, the wellness of our environment, and the limits of our budget, which can be difficult at times! But living the lifestyle we do, we're very lucky to be able to make decisions such as these. So for our first Meatless Monday we had a coconut curry with a variety of beans, carrots, onions and heaps of Thai basil from the garden. The curry was made from simmering coconut milk and Penzey's Bangkok Blend, so fragrant!


UPDATE: I'm the worst! Only one week later I broke Meatless Monday for some IKEA meatballs at lunch. To be fair, I didn't do it knowingly, and it was Labor Day. But still, I need to be a little more conscious in the future...

Thursday, August 22, 2013

Orange Ginger Banana Bread

I've said a few times already, I'm not a great baker. My cookies are passable and cakes are questionable, so I was hesitant to try turning my spotty bananas into anything but future smoothies. Whatever it was that insisted I try my hand at banana bread, probably my stomach, I'm so glad I did. I finally baked something sweet and delicious! I started out with a simple recipe from the Food Network and added a few things.

orange ginger banana bread


Ingredients:

1 cup granulated sugar (or 2/3 agave nectar*)
8 tablespoons (1 stick) unsalted butter, room temperature
2 large eggs (or 3 Monica sized eggs)
3 ripe bananas
1 tablespoon milk
1 teaspoon ground cinnamon
2 cups all-purpose flour
1 teaspoon baking powder
1 teaspoon baking soda
1 teaspoon salt
2 teaspoon ground ginger 
1 teaspoon vanilla extract
2 teaspoons orange extract
1/2 cup of crushed pecans

*All About Agave has a helpful agave substitute guide here.

Preheat the oven to 325° F. Butter a 9 x 5 x 3 inch loaf pan.

Mix the butter and sugar in a mixer until it's fluffy. Add the eggs one at a time.

In another bowl, mash up the bananas, add the milk, and spices. In another bowl, mix the dry ingredients.

Add the banana mixture slowly to the mixing bowl, stirring slowly. Add the dry ingredients and mix until the flour disappears. Fold in the pecans.

Pour the batter into the greased pan, and bake for 1 hour and 10 minutes. Flip it out of the pan, and allow it to cool before you slice it up.

This turned out oh so chewy and moist. It's best fresh out of the oven with some melty butter. In the future, I think I'd splurge on some orange zest and freshly grated ginger. It would also be good with some ice cream on top, vanilla bean or dulce de leche... That reminds me, I should get some ice cream.

Tuesday, August 20, 2013

Recommended Listening: Kyla La Grange

Ashes, by Kyla La Grange has been on heavy rotation in the past few days. From the first song, I was smitten with her epic sound. If you love the pageantry of Florence Welch, or the mysteriousness of Bat for Lashes, you'll love the UK's Kyla La Grange. Gothic Folk Rock, is that a genre? You can definitely hear influences from the likes of Kate Bush, Joni Mitchell, and even Stevie Nicks.

Kyla La Grange

The entire album is a cohesive piece that I would highly recommend listen to from start to finish. "Walk Through Walls" is the energetic and passionate opener that gets you hooked. From then on the songs ebb and flow in a theatrical manner. Haunting lyrics in songs like "Vampire Smile" make her music that more interesting...

Baby I need a friend,
but I'm a vampire smile, you'll meet a sticky end.
I'm here trying not to bite your neck,
but it's beautiful and I'm gonna get...
...so drunk on you and kill your friends.
You'll need me and we can be obsessed.
And I can touch your hair and taste your skin,
the ghosts won't matter 'cause we'll hide in sin.
Oh oooo...


My favorites of the album include, "Been Better", "Vampire Smile" and "Walk". Although Ashes was released last July, it looks like she's back in the studio working on her sophomore album. Looking forward to what this brilliant artist comes out with next!

Watch "Been Better" below...


Friday, August 16, 2013

Scandalous Puttanesca Sauce

I say scandalous because Spaghetti alla Puttanesca in Italian translates to "whore's spaghetti". I have some ideas why it got it's name, but I'll save my speculations for later. In short, this sauce is spicy, salty and savory; not for the faint of heart, or palette!

Spaghetti alla puttanesca


For my version of this saucey sauce you'll need (serves 4-6):
  • Half an onion, diced
  • 3 minced garlic cloves
  • A tin of boneless, skinless sardines in olive oil
  • About 6 sun-dried tomatoes
  • 1 whole roasted red pepper, thinly slivered
  • About 2 tablespoons of capers
  • A can of black pitted olives, roughly chopped
  • A healthy dose of crushed red pepper flakes
  • A couple sloshes of red table wine
  • 3 heaping spoonfuls of tomato paste
  • A can of drained diced tomatoes

There's a lot of stuff in there, right? Like I said, this is my version, and you can tailor it to your liking, add or omit what you please. This is probably one of the few times I won't add salt to something. Trust me, it doesn't need it. Start boiling your salted pasta water. In a medium sized sauce pan start browning the onions and garlic in, wait for it, the olive oil from the tinned sardines.

sardines


(Okay, backtracking; I decided to make this because I just bought a great many tins of sardines from Costco. Why? Impulse buy, maybe? They're really good for you, right? Yeah, they are, look at all those omega 3's.) 

Sprinkle in some crushed red pepper flakes as well for the spicy component. Then get all the goodies prepped, the sun-dried tomatoes, roasted reds, olives, capers* and sardines. All of which would make for a kick ass antipasto on a later date.

*Helpful Hint: I learned that capers really can't go bad refrigerated. The brine that they soak in is so acidic that they're perfectly preserved for the most part. So, that jar that you bought two years ago in the back of your fridge is fair game!

Add everything to the browned onions and garlic. Give a stir or two, and add the tomato paste and diced tomatoes. Let it cook down while the water boils. The final product should be thick and textured.

puttanesca sauce


Add some of that red wine you're drinking. Let the sauce simmer until the spaghetti is ready. Top it all off with big ole' hunks of pecorino romano. Enjoy it with the rest of that wine you didn't put in the sauce.

Spaghetti alla puttanesca


So why's it called "whore's spaghetti"?
  1. Because you can put anything in it.
  2. It looks awful, but tastes amazing.
Ba-dum pssh. I'm done.

Wednesday, August 14, 2013

Do Your Laundry For Pennies Per Load

Okay maybe pennies are stretch if you consider the cost of water and energy to run your washer and dryer, BUT making your own detergent will cost you pennies. I was skeptical at first, because, let's be honest, not all do-it-yourself solutions have the best results, and I'm sort of used to having my clothes clean and smelling fresh. This little recipe actually gets your clothes clean, plain and simple, without dyes, and fragrances. AND it's "high efficiency" friendly because it creates a low amount of suds. I have super sensitive skin, and would usually buy fragrance free detergent anyway. As far as I can tell, this does the same amount of cleaning for pennies a load.

DIY laundry detergent

Chris prompted me to make this one because he read a few Reddit articles about cutting costs at home. This mixture is from DIY Natural.  I'm writing this post now because I just had to make a new batch yesterday. I made the first batch over a year ago.  It consists of the following ratio...
  • 1 bar (or 4.5 ounces) of shaved bar soap (Dr. Bronner’s, Ivory, ZOTE, Fels-Naptha)
  • 1 cup of borax
  • 1 cup of washing soda
Thoroughly mix. That's it. The links show you what the boxes look like because when I first read this I hadn't the faintest idea what borax and washing soda were. It turns out they were hiding out in the laundry aisle with everything else all along.

I use Fels-Naptha for the soap component. It has a clean laundry-like scent. My mom uses it for washing her hands and arms after working in the garden. She claims it's very gentle and will eliminate any trace of poison ivy or other irritant. It has the consistency of a thick bar of chocolate. The first batch I made, I grated it as they suggested, and it took a little longer than I would have hoped. My mother-in-law said she tried it, and used her spice grinder instead of grating. So much easier! I used my Cuisinart food processor to grind it into a homogeneous powder.

After that, all you need is a tablespoon for each regular sized load (shown above).  Amazing, but true!

Monday, August 12, 2013

Everything You Could Want To Know About Eggs

I realized that once the hens finally starting laying, I really didn't know what to do with the eggs. I got a cute ceramic egg carton and started storing them in there. Should I refrigerate them? How long do they last? For how long can they be outside in the coop? After some research I can answer all these questions and more!

fresh chicken eggs

What Are The Benefits of Fresh Eggs?

One of the primary reasons we started raising chickens is for the eggs. We eat eggs regularly, and it's nice to know where they come from. I know exactly what they chickens eat, and that they live without hormones or antibiotics. Additionally, it has been proven that free range eggs are arguably "healthier".

They contain:

Less Cholesterol: According to the study there was 1/3 less cholesterol in the free-range eggs.

Less Saturated Fat: Mother Earth News found 25% less saturated fat in the pastured chicken eggs. Saturated fat is a buzz word in the food world now, with reason, so anything with less is always a plus.

More Vitamin A and E: Vitamin A helps in all sorts of areas including vision, skin health, immune function, and so much more. There isn't as much information out there on Vitamin E, but I think we can assume it does have a purpose.

Extra Omega-3s: We are constantly learning more about the Omega-3s, but there has already been a lot of research pointing to benefits for people with heart concerns. Double the Omega-3s is a good thing!

Read the entire article here.

Chicken Egg Cycle

A hen's egg laying cycle is about 25 hours long, which is why they produce about an egg a day. That's amazing, especially when you compare that to a human egg cycle which is about a month! This little infographic explains why you don't need a rooster for eggs. We gave away all of our roosters because we don't want any of our egg fertilized, and they're just too noisy for our suburban environment.

chicken egg laying cycle

Chickens have about two good egg laying years in their life and after that they slow down production, because just like humans, they have a finite amount of eggs stored in them from the get-go.

Where Do The Chickens Lay?

The chickens will lay where they feel they are safe, wherever that may be. We built nesting boxes into our coop, so that we can easily access eggs. The problem is that you have to train them to lay there. The first egg I found was randomly in a bit of high grass, just waiting to be stepped on. It was suggested to us to put some golf balls or ping pong balls in the the nesting boxes to give them the hint, but what I really think helped was keeping them in the run all day. It sort of forced them to start laying in the nesting boxes. Now we get two eggs in the same box daily.

How To Store Fresh Eggs

Generally, fresh eggs should be collected daily, and stored in the refrigerator for up to 6 weeks. They can stay out on the counter for a week, if you'd like to display them. Washing eggs is unnecessary and actually harmful to the eggs. Eggs are naturally equipped with a porous membrane in the shell that keeps out bad bacteria. By washing an egg, you destroy the natural protection. Eggs bought at the store are refrigerated because they have been pasteurized, and their protection gone. There is special egg wash that you can buy, but I don't feel that it's necessary. When we collect the eggs they're relatively clean (Check out the top photo). Sometimes I might knock off some straw, but other than that they don't require any cleaning.

Bad Eggs?

If you're suspicious of an egg, there is a easy test to find out whether it's still safe to eat. Place the egg in a glass of water, if it floats, it's no good, if it's sinks, fry it up!

Friday, August 9, 2013

Pizza Night

I don't remember exactly when my mom started making pizza, but when she started, she didn't look back. Friday nights became pizza night, followed by some quality family television on TGIF on ABC. Remember Boy Meets World? Classic! I've mentioned before that I never took interest in learning to cook as a young'un, and I never thought to learn to make pizza. I just enjoyed being served the cheesy goodness on a weekly basis. Finally, I tried it out for myself, with some direction from my ma.


This dough recipe is quick and easy for relatively instant pizza gratification.

I use:

2 1/2 cups of bread flour
1 cup of warm water
1 teaspoon of sugar
1 teaspoon of salt
1 tablespoon of olive oil
1 packet of "Pizza Crust Yeast"
A pizza stone

Preheat the oven to 450ºF right away. In a bowl, empty the yeast packet, and add the sugar and warm water. Wait about 10 minutes and give it swirl in the bowl. It will get creamy looking.

Add the flour, salt and oil. Mix it right in the bowl with a wooden spoon. Add some more warm water if it looks too dry. When everything is mixed, take out the dough and knead it a few minutes on a lightly floured surface. Put it back in the bowl and let it rest for another 10 minutes. This is great time to prepare your toppings! For this pizza, I used some homemade marinara from our very own San Marzanos. I'll have to share that recipe shortly...


Using the heel of your palms, work the dough out from the center. Stretch and tug 'til you have about a 24" diameter. Sprinkle a light coating of cornmeal on the pizza stone, and transfer the dough carefully to the stone. Add toppings of your choice, get fancy or go simple. A general rule of thumb is no more than three toppings to balance flavor. A classic Margherita has tomato sauce, fresh mozzarella and fresh basil. Use the back of a large spoon to evenly distribute the sauce, I get about a half inch away from the crust. Slice the about a quarter inch thick for perfect cheese melting dispersal.


Put the pizza in the middle rack for 15 - 20 minutes. I put the timer on for 15, check on it and gauge from there. The crust should be golden brown, and the cheese should be bubbling. Remove it and let it cool a minute or two before you slice it up.


Wednesday, August 7, 2013

And Then There Were Five

It's time for a chicken update! Lots of things have happened in the Penncroft Hen House in the last week. Last Tuesday, I pulled up in our driveway and found a chicken outside of their fenced area. "Oh bugger", I thought. As I tried to lure her back through the gate, I happened upon a tiny light brown egg. Yay! Our first egg from our flock! My surprise was quickly replaced by worry when I started counting chickens, and came up short. Crap. At the same time my very sweet neighbor was walking up the driveway, and alerted me to the fact my missing chicken was in my adjacent neighbors yard. Double crap. Together we caught her and returned her to the fenced area. Naughty chickens!

Later that night as we observed them we quickly realized that the chickens have learned that they can fly the coop. Alighting onto the fence and hopping down, they pay no heed to our boundaries. This is a problem, we decided, for our future selves. In the meantime, they'll just go back to hanging out in their spacious run.

But if that weren't enough chicken drama, the very next day, whilst engaging in my morning pre-work routine, I heard a very loud, very distinct, "Cock-a-doodle-doooooo!" Seriously? My neighbors were probably already less than happy with us for the roaming chicken incident the day before, and now we've got roosters on our hands. Everything at once, right? Luckily that same day we were able to find a new home for the two roos, and then there were five...


Phoebe - Rhode Island Red, 19 weeks
Phoebe's egg was the first I found.  It's smaller and lighter in color, and she's laid about 3 in the last week. She was also the one in the neighbors yard.

Rachel - Rhode Island Red, 19 weeks
We can determine that Rachel isn't laying yet because of the three her comb isn't a brilliant crimson yet. She's one of the most brazen, by far. She's one of the escapees.

Monica - Speckled Sussex, 19 weeks
Monica is our egg laying superstar, already. Since she started last week, she's been delivering an egg a day.


Cybil - Americuana, 15 weeks
Cybil is secretly my favorite as the tiniest of the flock. She gets picked on, but she's learning to speak up for herself.

Rowena - Americuana, 15 weeks
Shy Rowena has beautiful iridescent green in her black feathers already.

Chris thinks it's crazy that I can tell them apart, well, just call me the Crazy Chicken Lady. Check back later for a post about all you could want to know about fresh eggs!

Monday, August 5, 2013

Upstate New York Family Reunion

There's nothing like some fresh mountain air to rejuvenate your spirit. This past weekend my mom's family had a family reunion at my grandparent's home nestled in the mountains between Lake George and Lake Champlain in New York State. They moved there initially to open a restaurant many years ago, before I was born. And although the restaurant dream didn't last very long they've stayed and continued to build their lives there. Growing up and visiting Gram, Pop, and the rest of my aunts uncles and cousins were always exciting adventures. This time around, Chris, Emily, Dante and myself packed up the Jeep and headed North.


Over the weekend the house was full of family I knew, some I haven't seen in years, and some I only just met. And of course, nothing brings family better than good food and drink. It was lovely to reconnect with people and catch up on each others lives. I love to hear stories about my grandparents when they were younger, or of ancestors long before me. And even though it's been two years since my gram has passed away, she is never forgotten when the house is full of merry makers.

The house at sunset. Currently everyone is watching the clay pigeon shoot out on the hill.
Middlebury Vermont is close by. We took a tour of the Woodchuck Cidery.

Frogs are just one of the many creatures that live nearby.

And tiny toads too.


Wildflowers stud the surrounding fields.

UPDATE: Emily has posted a bunch of beautiful photos on her blog from the weekend. Go check them out!