Wednesday, July 31, 2013

The Soup of the Summer: Gazpacho

So. Many. Tomatoes. Chris's mom tipped me off to growing San Marzano's, a type of plum tomato originally grown in the volcanic ashy soil around Mount Vesuvius. They are celebrated for their meaty quality, which makes for heavenly marinara. And I've made my fair share of marinara with these, but a hot bowl of pasta doesn't do it for me in these last days of July. Gazpacho. Now, that's the ticket.


Gazpacho turns a few people off from the words, "chilled soup". I feel like labeling it "soup" is just silly. Sure you can serve it in a bowl, and eat it with a spoon, but you can also just guzzle it straight out of the blender like Pepa, in that Pedro Almodovar film. It also makes for classy appetizer in tasting spoons or other small bowls. Gazpacho has origins all over Europe, but the most common is that it was a peasant dish from Spain. Making up fresh Gazpacho in the fields with a wooden dornillo would be a way to cool down, hydrate and energize. And it's fantastically delicious too.

I adapted my version from this recipe from a Slate article, You're doing it Wrong: Gazpacho. They'll also tell you all the wrong ways to do Gazpacho. But the most important ingredient should, and always will be, fresh ripe plum tomatoes.

You'll need:

2 pounds tomatoes, roughly chopped (about 10ish plum tomatoes)
1 medium red bell pepper, roughly chopped
½ medium cucumber, peeled and roughly chopped (always an English cucumber)
½ red onion, roughly chopped
⅓ cup extra-virgin olive oil
⅓ cup almonds
One ½-inch slice white bread, torn into 1-inch pieces
3 tablespoons sherry vinegar
1 medium fresh jalapeƱo, seeded and roughly chopped (Or any pepper with some heat)
2 garlic cloves
Salt and black pepper
1 avocado, thinly sliced (for presentation)

Start with the tomatoes. You'll halve them and scoop out the gooey seed center. Plum tomatoes shine in this role, because they have much less seediness about them.


Many people will add water to thin out the final Gazpacho product, but why use water when you can use the fresh tomato juice? Set up a bowl and a strainer over top. As you scoop out the seeds put them into the strainer. When you've got all the tomato guts, use a spoon to smoosh the juice through the strainer. It won't add up to too much, but it will be enough to add to the final product for a thinner quality. That's the most laborious part.


 Add the tomatoes, olive oil, and vinegar into the blender. Give it a pulse or two to puree. Then add all the chopped and seeded veggies. Blend again, then add the almonds and the bread, which gives it it's thickness and texture.


Blend everything until it's nice and smooth. Garnish with some sliced avocado. Easy, so you don't need to slave away in the fields of Spain to enjoy it. Mmm.


Monday, July 29, 2013

Whole Foods Cajun Pickle

I've been pulling carrots here and there all season. But didn't realize they should be harvested sooner than later before they start to get squishy. So out they went. And then we had a lot of carrots to eat. The overabundance of a particular food is the plight of many a gardener. And in a time like this I like to pickle things!


I tried out this Whole Foods recipe for a veggie pickle last year and it turned out wonderfully. The perfect balance of spicy, garlicky goodness.

Pickled Cajun Green Beans and Carrots: by Whole Foods
These amounts will make about 2 pint jars or one large jar, so plan accordingly for the quantity of veggies you have

Salt
1/2 pound green beans, trimmed
1/2 pound carrots, trimmed and cut into ½-inch wide sticks
3 cloves garlic, crushed
3 whole black peppercorns
1/2 teaspoon celery seeds
1/2 teaspoon coriander seeds
1/2 teaspoon yellow mustard seeds
1/4 teaspoon cayenne (or a small whole cayenne pepper)
1 dried bay leaf
1/2 small yellow onion, thinly sliced
1 1/2 cup distilled white vinegar
1/3 cup sugar

Start a large pot of salted boiling water to blanch the veggies. Put the cut and washed veggies into the boiling water and let them cook for 2-3 minutes, just until tender. Have a large bowl filled with ice ready. Strain the veggies and immediately put them over the ice, then fill the rest of the bowl with water. This will stop them from cooking any longer.

Slice up the onions super thin, I use a mandolin. And peel and crush the garlic cloves. Put all of the spices in your jar(s). 


Combine the vinegar and sugar in a pan and cook on low heat 'til the sugar dissolves. While you let the vinegar cool, strain the veggies and with clean hands or tongs pack the veg in the jar(s). When the vinegar solution has cooled you can add it to the jar leaving a quarter inch of room on top. Let them cool a bit more, lid them, give them a good shake, and refrigerate them. Don't crack into them for at least 24 hours.


These were a hit last year. They're great to bring with you to barbecues as a little gift (tie the lid with some raffia, so cute!) or just to snack on at home. Because they're not actually canned they won't last forever. But left unopened in the fridge I say they could keep for a few months. Use your best judgement, no fingers in the jar! And if you see signs of haziness then best to toss them. But we never got to that point because they went so fast!

Next post will be about too many tomatoes... (No such thing!)

Friday, July 26, 2013

Nancy Rose: Photographing Squirrels

I just thought I'd share these adorable photographs by Nancy Rose because it's Friday (woohoo) and they make me laugh. Need I say more? Rose creates these itty bitty sets in her backyard and waits for squirrels to interact with them. Here are the results of some genuine craftiness and a whole lot of patience...

Nancy Rose Squirrel Photography

Even though squirrels are one of the lesser favorites in the animal kingdom, I love them. I find them hilarious to watch when they're not deciding the best way to get hit by a car.

Nancy Rose Squirrel Photography

I actually miss our college campus squirrels who were so fat and brazen from a diet of cafeteria food, they'd scurry right up to you and ask for hand-outs.

Nancy Rose Squirrel Photography

Squirrels are now few and far between at our house with our ferocious nine pound chihuahua on the prowl, (or it's more likely the chickens that scare them off).

Nancy Rose Squirrel Photography

I can't believe I have this much to say about squirrels.

Nancy Rose Squirrel Photography

An artist and her muse. Damn, I wish I could get a squirrel to eat a peanut on my arm.


*All photos credited to Nancy Rose

Wednesday, July 24, 2013

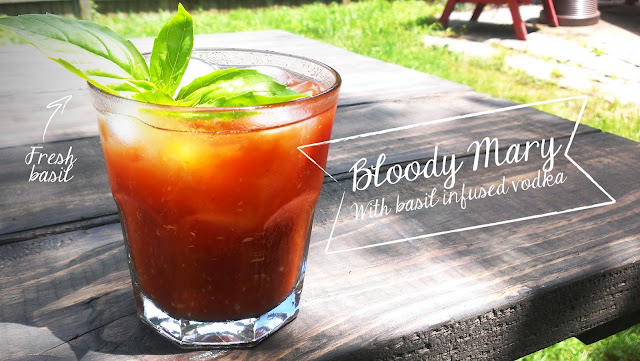
Basil Bloody Marys

With an overabundance of basil from the garden one can only make so much pesto and Caprese salads. I thought I might as well start soaking it in vodka! Now that I have this pungently basilicious liquor, what could I do with it? My first inclination was to make some sort of basil lemonade sort of cocktail, but after my dad tried a sip, he's like, "That would be great in a Bloody Mary", genius!

basil bloody mary

I LOVE Bloody Marys. Done right, it's like a meal and drink. It just so happens that I think my dad makes them best. And that's because he goes all out with these things; celery, stuffed olives, pickles, tiny onions, giardiniera, the works! All artfully arranged on skewers in the glass. And while I love being offered a drink that requires two hands to hold, sometimes it's nice to have a simpler version. This recipe is a just twist on a classic without the frills.

Basil Infused Vodka

I didn't realize how simple it is to infuse vodka. Literally take any sort of fruit of herb (in this case, a handful of basil) wash it, dry it thoroughly, and put it in a jar with some better quality vodka. Store it in a dark cool place, like a cupboard. Take it out daily, and give it a smell and a taste. When it's to your liking strain it's contents and re-jar it. Store it again in a cool dark place and it should last a few months.

Bloody Mary

V8 - Sorry if this offends anyone, but cans of V8 were a lunchtime staple growing up. I was all too pleased as an adult to discover I could use this to make even better lunchtime drinks!
lemon
Tabasco
A shot or two of basil infused vodka
Worcestershire sauce
A wee bit of horseradish
fresh basil - for an aromatic garnish

Fill the glass halfway with V8. Add a shot or two vodka (depending on your plans for the day). Add about a teaspoon of Tabasco and Worcestershire sauce, juice of half a lemon and a tiny bit of horseradish for an extra zing. Add some more ice and V8 if needed. Stir it up! Top it of with some more basil, a twist of crushed black pepper, and enjoy!

Monday, July 22, 2013

Lavender Foot Scrub

 After a long weekend of yard work a cold shower just wasn't enough. My feet were extra sore and needed some love, especially since I've given up nail polish for the summer, eek. I prepared a foot soak with Epsom salts and a little peppermint Dr. Bronner's soap, then used a lavender sugar foot scrub to slough away the... ugliness. The scrub is a quick preparation that will last for quite awhile stored in a jar.

lavender foot scrub


Start of with an exfoliant, either sea salt of sugar. I use a half cup of coarse turbinado sugar. Add a tablespoon of a carrier oil such as sweet almond oil, jojoba, or even olive oil. Top it off with 20 drops of an essential oil; lavender, peppermint, or rosemary. Mix it up evenly and use a handful on your feet or hands for a aromatic exfoliation. When you rinse off what's left, your skin will be renewed to softness. So, treat your feet!

butterfly bush bouquet
Pampering is always a little nicer in the company of fresh flowers!

Friday, July 19, 2013

DIY Framed Ferns

Just as I led you to believe in the title, today I framed some pressed ferns. Pressing flowers is something I remember doing with my grandmother. We'd collect flowers and press them in fat telephone books (perhaps one of the only things they're useful for anymore). I remember being so impatient! Waiting for them to dry was too much for me, and I'd always be tempted to take a peek. This year I picked a few ferns and pansies in the spring thinking it will be a project for a later day. I all but forgot about them until this week!

DIY Nature Wall Art


When pressing flora, start out with items that are generally flat to begin with, small flowers, ferns, or leaves. They're just easier to assemble and get a nice flat pressing. Pat them dry and remove any dirt from them. Then carefully lay them in between two sheets of waxed paper in a large heavy book.

pressed ferns


I didn't have any waxed paper at the time and used paper towels instead. Now you can see then texture in the pansies, rookie mistake. It takes about two weeks to get all the moisture out. Patience!

Pressed flowers
They're textured, but still cute! I'll use them later...
I had a white frame that would house the size of the fern. I removed the inside paper behind the mat to use as a template for my own mounting. I chose a thick water color weight paper with some texture. I've read that any sort of mild Elmer's glue, or wood glue is acceptable using on delicate pressed flowers. You could dab a bit on a toothpick and gently put it on. I just used my glue stick because the fern seemed pretty sturdy, and I didn't need much for this.

pressed ferns

I wanted to add a vintage botanical flair so I penned the fern's scientific name and where it was found in the corner.

pressed ferns
I brought out some pen and ink for this.


One helpful hint for lining up any photo with a mat is adhering a bit of tape behind the print face up, then placing the mat over top so you can align easily.

Pressed ferns

And that's it! Now, when I take Dante for walks in the park I keep my eye out for things that are "press worthy".  Soon enough I can create a little wall of botanicals.

DIY nature wall art
Chris thought I bought a print of a fern, surprise!


UPDATE: After 2 months, the little ends of my fern are yellowing, due to the sun, most likely. So, if you plan to hang this project in a sunny area, be sure to use a  frame with UV Protection. OR don't worry about it, and let it fade naturally!


Tuesday, July 16, 2013

I Am Not A Robot

I subscribe to a newsletter from an awesome illustrator that takes quotes and makes them come alive with graphic illustrations, Zen Pencils. You've probably seen some of them floating around the internet. They always make me stop and read, and many times bring new meaning to an overused quote. Today's really struck a chord with me, and I wanted to share it. It came from a high school valedictorian, Erica Goldson, her graduation speech*.
Zen Pencils: Erica Goldson

I wasn't valedictorian, but I was at the top of my class, participated in student government, sports, and array of extra-curriculars. I did all the right things to get me into college. Looking back, I didn't necessarily do my best, I did what I needed to get an "A". I studied no more and no less. I loved school, and I loved learning, but sadly I think I was just another academic robot. I don't think I even realized this until after finishing my masters program, and entering "the real world". What actual, useful skills do I have? I'm not getting graded anymore, no one is praising my work, I'm not winning any awards. How do I know if I'm getting "A"s in life?!

I think since graduation this has been a bit of a struggle for me, but I recognize it and I'm working on it. I'm working on being happy, and not being "successful". Oprah's best life and all that. I surround myself with supportive and inspirational friends and family. I work and I play. I'm learning new things that never interested me growing up; cooking, gardening, homesteading. I make terrible decisions and learn from my mistakes. And I'm starting to write and share it all here. I'm lucky enough to have a teammate in life that's ready and willing to take on these adventures with me. So instead of being regretful of past choices, or paths that I took, I'll learn from my experiences and continue to grow; a bit of advice I think we all could use!


*Read and watch her entire speech here.

Monday, July 15, 2013

Recommended Listening: Rose Windows

Rose Windows

"Wartime Lovers" by the Rose Windows has crept into my head since it's been getting air time on Philly's WPXN. The psychedelic, globally-influenced group from Seattle, released their debut album with, none other than, Sub Pop Records in June. The Sun Dogs is a collection of lyrical tales marked with "elements of The Band’s folk-infused rock, The Doors organ-driven psychedelia, and Black Sabbath’s blues-based dirges...". I think my favorite song is "Native Dreams". It has this epic prog rock feel about it with some Persian inspired melodies. I can't help but feel a power similar to Grace Slick of Jefferson Airplane from the lead female vocalist. Hypnotic and atmospheric, with considerable nods to the past, this is an album that deserves some attention. Listen Here.

The band includes talent from:

Chris Cheveyo – lead guitar/composer
Rabia Shaheen Qazi – lead vocalist
Richie Rekow – bass/ 1st male vocalist
Nils Petersen – rhythm guitar/2nd male vocalist
Pat Schowe – drums
David Davila – piano/organ
Veronica Dye – flute

This video for "Wartime Lovers" was collaborative effort with Fool's Road, planned and shot in only 8 days after having met, impressive!


Looks like they'll be hitting up Philly in October at MilkBoy Philly. And they're on the bill with a Philly-based band, The Bailey Hounds, who I've seen a few times, definitely recommend them as well!

Friday, July 12, 2013

Mischievous Chickens Caught in the Act

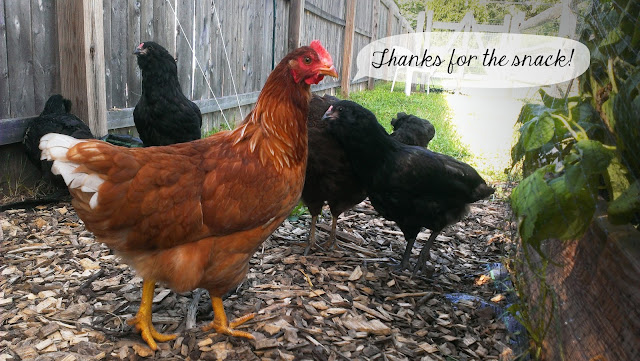
We were truly excited to attempt to grow our own hops this summer. We got three different varieties of hops rhizomes and planted them in the spring. Since then, the area around where they were planted has become a home to raised beds and the chickens.

We laid down a considerable amount of woodchips around the raised beds to hinder growth of weeds in and around the beds. But now that the chickens are "free ranging" they love to scratch up the woodchips and unearth bugs and creepy crawlies underneath. I was surprised that the netting around the beds is enough to keep out the hungry beaks, but it didn't even occur to me that they might get into the unprotected hops...

I had only just put up twine for the baby hops bines emerging from the ground, and the very next day there was only a hole left where I planted them. Who would do such a thing?!

suburban chickens


I caught them the other day in the act, scratching away at the hops that never were. How could I be so naive to think they wouldn't demolish them unprotected? Oh well, there's always next year. Naughty naughty chickens.

suburban chickens


Wednesday, July 10, 2013

Wurst At It's Best: Brauhaus Schmitz Review

In the past few years my mom and I have started to celebrate birthdays and holidays with a day of shopping and dining, rather than gift-giving. Since it was my mom's birthday last week, we set out last Friday for such an outing. We went to Brauhaus Schmitz (which is conveniently located on the same block as our favorite consignment shop, Greene Street).  I've been here before and I knew my mom would love it, given my parent's recent trip to Munich, and that it's "Philadelphia's only authentic bierhall and restaurant".

Despite my German heritage, I never really got into German food until I was older, besides the Snickerdoodle cookies my grandmother lovingly and expertly made. At age eleven, I went to an International Summer Camp in Hamburg, Germany, and unfortunately my immature palette found German food "yucky". Das ist shade! But now I love all the wursts, the pickles, the cabbage, and potatoes...

Brauhaus Schmitz Philadelphia


Brauhuas Schmitz gives off the German bierhall vibe straight away from it's exterior, with it's wooden arches beckoning you to come in. Inside, it's a towering space, with open second floor seating. The tall walls are bedecked with vintage posters from Germany. The massive bar is the central focus, a mecca of beers on draft and in bottles. Since we were there for lunch, the crowd was low key. But as I've been there on a Saturday night, I know this place gets packed, with traditionally dressed barmaids swinging giant liters of beer to their patrons.

Hofbrau Original at Brauhaus Schmitz

Of course after a laborious day of shopping we needed something to cool of off. A modest half liter of the Hofbrau Original on draft hit the spot, although it was hard to choose from the lengthy beer list. Prost!

Kaseplatte at Brauhaus Schmitz

We whet our appetite with a cheese plate, including various mustards, pickles, an bread. There was a Limburger, Camembert, a Stilton, and something hard and bitey. I most enjoyed the pine nut and honey spread, sweet and nutty. As well as the Hungarian paprika onion spread, sweet and smokey. We made little work of the cheese while we decided on lunch.

Wursts at Brauhaus Schmitz

I've mentioned before, there are few times when I like to share food (only child alert!) but meals like these, sharing is the way to go. The waiter informed me that if we got the "Two Wursts and Two Sides" we could choose two different wursts. So we got four different wursts, and sides to share between ourselves!

It's hard to choose favorites, but my mom and I admitted we liked the Ungarischewurst the best. It's description reads "Hungarian paprika, red wine vinegar, and garlic", and you could certainly taste all of these. The Bratwurst was probably the most recognizable of flavors, with caraway and majoram. Speckwurst is made with bacon, and Baurenwurst with beef. I definitely recommend getting the sauerkraut, it's a traditonal side for a reason, it pairs so nicely with the wursts, a little bit with each bite. The Kartoffelpuffer, or potato panacke was dense, in a good way, and not greasy. The Rotkohl, red cabbage, was sweet and delicious, again it pairs nicely with the wursts. And personally, I usually could take or leave Spatzle, which is sort of a noodle dough riced into little nubs, but this was also very tasty.

Wursts at Brauhaus Schmitz

Needless to say we had a lovely, and filling, lunch. We enjoyed leisurely dining and watching the afternoon happenings of South Street through the large front windows. Our waiter was a superstar, as he was the only one waiting on the entire lunch crowd. And the food was tremendous. I think I prefer to dine here at night with a crowd and the true bierhall experience, but I suppose that's just another reason to come back!

Read more about the Brauhaus here!

Monday, July 8, 2013

Classic Basil Pesto

There is nothing like the smell or taste of fresh basil. I have three basil plants in our garden this year and I've been using it almost daily, in Caprese salads, on sandwiches and of course, in pesto.

basil pesto

If you've never made pesto before, here is a foolproof classic pesto recipe. It makes a "jar's-worth", shown above:
  • 3 large bunches of fresh basil
  • 1/2 cup olive oil
  • 2 largeish garlic cloves
  • About 1/3 cup pine nuts
  • 1/2 cup of grated Parmesan or Pecorino Romano cheese
  • 1 teaspoon coarse kosher salt
  • Juice of a lemon
In a food processor, pack the basil leaves inside and add the olive oil. Give it a pulse or two, enough reduce the volume of the basil. Then you have room to add the garlic, pine nuts, cheese, lemon and salt. A word on pine nuts. Don't be surprised at their price, they're pretty expensive, but a little does go a long way. And they definitely make a difference in the taste of the pesto. Blend everything together until the pesto is smooth. You can store it in the refrigerator for about two days but because of the cheese it won't last too long. Once your pesto is ready you can add it so so many things beyond pasta. Add it to fish, chicken, shrimp, on zucchini or potatoes, as a pizza sauce or in a grilled cheese sandwich. It's so versatile! 

Friday, July 5, 2013

Breakfast For Your Face

It just so happens that one of my favorite breakfasts is also great for your skin! Plain Greek yogurt and honey, that's it. This post is gonna be short...

greek yogurt face mask


If you haven't tried eating Greek yogurt and honey, you're in for a treat. It's so rich and sweet I feel like I'm cheating and eating something high in fat. But Greek yogurt is naturally fat free, bonus! Put a mixture of it on your face, nice and thick, and let it moisture your skin. Let it sit for 10 minutes then wipe it off with a warm towel. The yogurt moisturizes and the honey is a natural antibacterial.

A little trick with storing Greek yogurt: I keep a large container on it's side in the fridge. When I open it, I drain off the liquid on the top, so with each time I use it, the yogurt gets thicker (and more delicious). Now I just have to start making my own yogurt...

Wednesday, July 3, 2013

Tres Tasty Tacos

If you're new to this blog you might not have picked up on the fact that we love Mexican flavors. Just peruse the eating/drinking section and you'll see. Today I'm sharing tips on making delicious tacos with soft corn tortillas. I make no claims of authenticity, only tastiness!

Tacos 101:
We prefer soft corn tortillas for a number of reasons. 
  1. They're cheap
  2. They're much less calories than their flour counterpart
  3. And they last a long time
A lot of people dislike the corn tacos, and I think it's because they're not preparing them correctly. I speak from trial and error, I was doing it wrong for awhile! These little corn tortillas, right out of the bag, will flake and crumble if you look at them the wrong way. They actually need to be fried a little bit before they are fit to be called a taco...

Depending on how many I'm making, I use a small non stick pan or a big 'ol griddle. I use a little oil misto and VERY lightly coat the surface and turn the heat on to medium low. Heat up the pan and place the tortillas inside. Let them cook about a minute or so on each side. They might get some brown fry marks, but that's good. I usually prepare them last minute so they're ready to be plated right out of the pan. Once they're cooked they no longer have that flaky-tear-apart-while-you-eat-it texture. I've tried steaming them, microwaving them, baking them; I promise you, this is the best technique.

Taco Ideas:
In the summer we probably eat a taco variation at least twice a week. A favorite is breakfast tacos, black beans, scrambled eggs, cilantro and avocado, and some salsa roja. They're just so fast and fresh! And here are a few other ideas...

Spicy Ground Beef


Sour cream base
Sauteed onions
Ground beef with cumin, cinnamon, annato, salt, pepper, hot chili powder, dried oregano
Cilantro, lime, and Cholula hot sauce

Shredded Chicken Thighs and Jalapeno Lime Slaw


Black beans, lime, and a little chicken broth, heated and pureed
Shredded crock pot chicken thighs with adobo, cumin, chili powder, pepper
Thinly shredded cabbage, red cabbage, carrots, red onions, lime juice, fresh jalapenos, cilantro, olive oil, salt and sugar
Queso fresco

Sesame Ginger Beef and Thai Basil


Thin cut rib eye steaks marinated in teriyaki, soy sauce, ginger, garlic, sesame seeds and sesame oil
Red peppers and red onions, sauteed
Chopped Thai basil & Sriracha sauce

Hope this inspires some taco creations!