

Showing posts with label decor. Show all posts
Showing posts with label decor. Show all posts
Tuesday, November 12, 2013
DIY Mason Jar Pendant Lamp
If you're ever on Pinterest surely you've seen a version of this, a million times. But I liked the look, and we wanted to replace the pendants that came with the kitchen without spending too much. I looked into changing just the glass shade but nothing would fit properly. A decent-looking full pendant assembly costs at least $50 per lamp, and we needed three. Making our own mason jar lamps looked like a good alternative at a cost of $20 a piece. Worth it!


Friday, July 19, 2013
DIY Framed Ferns
Just as I led you to believe in the title, today I framed some pressed ferns. Pressing flowers is something I remember doing with my grandmother. We'd collect flowers and press them in fat telephone books (perhaps one of the only things they're useful for anymore). I remember being so impatient! Waiting for them to dry was too much for me, and I'd always be tempted to take a peek. This year I picked a few ferns and pansies in the spring thinking it will be a project for a later day. I all but forgot about them until this week!
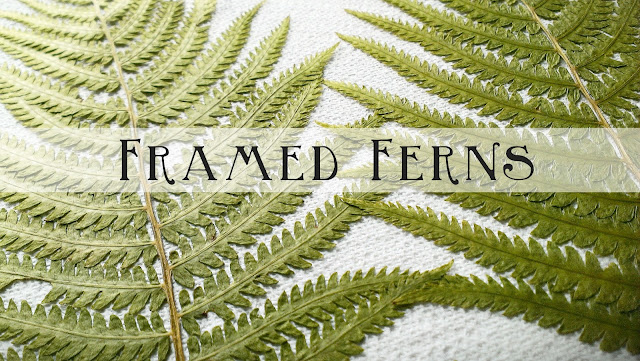
When pressing flora, start out with items that are generally flat to begin with, small flowers, ferns, or leaves. They're just easier to assemble and get a nice flat pressing. Pat them dry and remove any dirt from them. Then carefully lay them in between two sheets of waxed paper in a large heavy book.

I didn't have any waxed paper at the time and used paper towels instead. Now you can see then texture in the pansies, rookie mistake. It takes about two weeks to get all the moisture out. Patience!
I had a white frame that would house the size of the fern. I removed the inside paper behind the mat to use as a template for my own mounting. I chose a thick water color weight paper with some texture. I've read that any sort of mild Elmer's glue, or wood glue is acceptable using on delicate pressed flowers. You could dab a bit on a toothpick and gently put it on. I just used my glue stick because the fern seemed pretty sturdy, and I didn't need much for this.

I wanted to add a vintage botanical flair so I penned the fern's scientific name and where it was found in the corner.
One helpful hint for lining up any photo with a mat is adhering a bit of tape behind the print face up, then placing the mat over top so you can align easily.

And that's it! Now, when I take Dante for walks in the park I keep my eye out for things that are "press worthy". Soon enough I can create a little wall of botanicals.

When pressing flora, start out with items that are generally flat to begin with, small flowers, ferns, or leaves. They're just easier to assemble and get a nice flat pressing. Pat them dry and remove any dirt from them. Then carefully lay them in between two sheets of waxed paper in a large heavy book.

I didn't have any waxed paper at the time and used paper towels instead. Now you can see then texture in the pansies, rookie mistake. It takes about two weeks to get all the moisture out. Patience!
 |
| They're textured, but still cute! I'll use them later... |

I wanted to add a vintage botanical flair so I penned the fern's scientific name and where it was found in the corner.
 |
| I brought out some pen and ink for this. |
One helpful hint for lining up any photo with a mat is adhering a bit of tape behind the print face up, then placing the mat over top so you can align easily.

And that's it! Now, when I take Dante for walks in the park I keep my eye out for things that are "press worthy". Soon enough I can create a little wall of botanicals.
 |
| Chris thought I bought a print of a fern, surprise!
UPDATE: After 2 months, the little ends of my fern are yellowing, due to the sun, most likely. So, if you plan to hang this project in a sunny area, be sure to use a frame with UV Protection. OR don't worry about it, and let it fade naturally!
|
Wednesday, April 10, 2013
Bathroom Renovation: Ideas
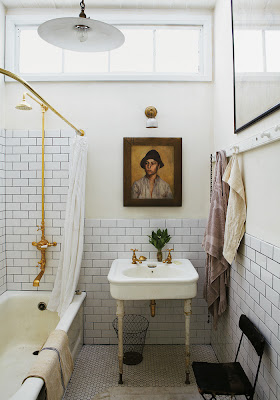
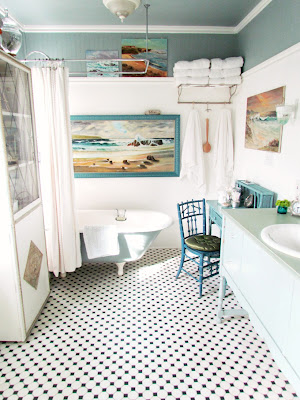
I hate our bathroom. It's both a style and health hazard. Moldy grout just won't get white no matter how much scrubbing, the paint on the ceiling chips because there's no fan ventilation, and the faux wood linoleum bubbles up around the edges. Ugh. It's the one room in the house that has needed a total renovation, so of course we've put it off the longest. Even though we'll be doing it ourselves, and doing it in the most economical way possible, it's still a big spend for us. Additionally we've only just put in a half bath in the basement, so going a week or so without a usable bathroom wasn't feasible. But now there's no more excuses! The bathroom is getting a makeover this summer and here are a few of my design inspirations.
Things I definitely want:
- Black and White honeycomb floor tiles
- White Subway tiles in the bath
- Dark grout
- Marine blue walls
- A plant stand in the window
|
|

 |
| Dark wood shelving and vanities and contrast against the white |
|
|

 |
 |
We hope to get started in the next month before the weather gets all summery and hot and the prospect of indoor renovation becomes too daunting. I'll keep you posted on the progress!
Tuesday, March 5, 2013
Embroidery is Back
 |
| Etsy Shop: JerseyMaid |
 |
| Etsy Shop: NisseWorks |
 |
| Etsy Shop: SamPGibson |
 |
| Etsy Shop: oktak |
Etsy, of course, has an array of handcrafted items, but if you'd like to try it out for yourself, it's extraordinarily easy to do. I find it a relaxing activity that you can just pick up and work on for minutes if that's all you've got. But more on that later...
Subscribe to:
Posts (Atom)