

Showing posts with label diy. Show all posts
Showing posts with label diy. Show all posts
Thursday, January 30, 2014
DIY Beauty Oil
It looks like beauty oils are getting a lot of hype recently at the beauty counter. The initial idea of applying oils directly to your face probably horrifies most, but the big secret is: using oils as a moisturizer doesn't make your skin oily. Period.

Tuesday, November 19, 2013
Homemade Horseradish Sauce
My aunt gave me a horseradish plant in the spring. Fun, I like horseradish. I planted it in a sunny spot outside of the garden beds because I was warned that it will take up a lot of space. The plant flourished throughout the growing season, producing long large leaves that sprouted into a big dome shape. I never watered it or tended to it, it just grew in the corner of the yard. Yesterday as we prepped the lawn for winter, mowing, raking and mulching, I figured it was time to unearth the horseradish that I had all but forgotten about.

Tuesday, November 12, 2013
DIY Mason Jar Pendant Lamp
If you're ever on Pinterest surely you've seen a version of this, a million times. But I liked the look, and we wanted to replace the pendants that came with the kitchen without spending too much. I looked into changing just the glass shade but nothing would fit properly. A decent-looking full pendant assembly costs at least $50 per lamp, and we needed three. Making our own mason jar lamps looked like a good alternative at a cost of $20 a piece. Worth it!


Thursday, October 31, 2013
Pumpkin Peanut Butter Dog Treats
Happy Halloween! I already posted about all the treats I was making for myself, so today here's a little something festive for all the puppies in our lives. Emily made Dante homemade dog treats last year for Christmas and he went berserk for them, which says a lot because he is extraordinarily picky about his treats. The one store-bought treat he loves is a duck jerky, but unfortunately there's been a lot of warnings going around about harmful chemicals used aging the jerky made in China and making many dogs very ill. Yup, ours is made in China, into the trash it goes!
When I was in the pet store looking for new treats I saw a stack of pumpkin puree for doggies. I read the label and it's meant to be good for their digestion. The ingredients read: organic pumpkin puree. Hmmm, why would I pay extra for this can because there is a cute dog on the front? I went home and baked these with the canned pumpkin I had, for humans. These are easy enough to make for the baking impaired, like myself.

When I was in the pet store looking for new treats I saw a stack of pumpkin puree for doggies. I read the label and it's meant to be good for their digestion. The ingredients read: organic pumpkin puree. Hmmm, why would I pay extra for this can because there is a cute dog on the front? I went home and baked these with the canned pumpkin I had, for humans. These are easy enough to make for the baking impaired, like myself.

Tuesday, October 29, 2013
Professor Sibyll Trelawney Costume
I love Halloween. Dressing up in homemade costumes is so much fun for me and I kinda wish I had an excuse do it more often. So I usually jump at any opportunity where it's socially acceptable to get my geek on. This get-up was for a Harry Potter weekend in Chestnut Hill. If you already own a lot of bangles, you're half-way to a decent Professor Trelawney costume! I chose to imitate Emma Thompson's version of the character in film, Harry Potter and the Prisoner of Azkaban. You don't have to be spot on, but there are a few must-haves to convey the look of the looney Divination teacher... or be mistaken for a new-age ceramics instructor living in Tucson*.
 |
 |
Thursday, October 24, 2013
Homemade Halloween Candy
As a kid it was a cardinal Trick-or-Treating rule to not eat any homemade or opened items. Which is a shame now because I love the idea of making my own Halloween candy. But who says you have to make it for the Trick-or-Treaters? Instead, be a hit in the office or at a party. Here's a few recipes for better-than-store-bought-candy. Although I've only attempted the peanut butter cups (my favorite) I hope to be indulging my sweet tooth in the next week, and maybe getting a stomachache or two.


Friday, October 18, 2013
Tea Treatments for Your Hair

Tuesday, October 15, 2013
Using Natural Dyes
I have the pleasure of volunteering with Greener Partners, a non-profit in the Greater Philly area. I'm working specifically with their organic farm, Longview Farm and Market. Basically I get to hang out around the farm and attend awesome events and workshops! I was excited to attend this one, presented by the Marafiki Arts, about dyeing with natural plant dyes. It's one of those things that I've wanted to try but haven't got around to it. It turns out that the process is pretty simple...
The instructor already had three colors going. Big stainless steel pots simmering with the "dye", water and vinegar. The vinegar acts as a fixative to the fabric. Shown below are marigold flowers, which yield a brilliant golden yellow. They also have a magnificent fragrance as they simmer. In true sustainable fashion, the marigolds were grown at Longview over the summer. It makes me want to grow my own marigolds next year. I'm pretty certain chickens are fans of them as well, bonus!


There also was a brilliant purple made from a crushed South American insect, ew, but it made a gorgeous color. The third color was indigo, that was also harvested from the farm. I knew what the color looked like, but not the plant. The color is made from the dried leaves of the plant, below. The color in the pot looks like a dark sea green, but when the dyed fabric hits the air and oxidizes it turns into that bright blue.

These little wooden flowers made a cute pattern. After the dyeing process, you set the color by rinsing it in cold water, then allowing it to dry.

This is most definitely an art. Because of the nature of the method you could spend a lot of trial and error tweaking your process to achieve the perfect colors. I think I'd like to use natural dyes to do some batiks, where you use wax to draw your patterns. Pioneer Thinking has an extensive list of dye sources and the color they produce, here. Think of all the colors you can create!
The instructor already had three colors going. Big stainless steel pots simmering with the "dye", water and vinegar. The vinegar acts as a fixative to the fabric. Shown below are marigold flowers, which yield a brilliant golden yellow. They also have a magnificent fragrance as they simmer. In true sustainable fashion, the marigolds were grown at Longview over the summer. It makes me want to grow my own marigolds next year. I'm pretty certain chickens are fans of them as well, bonus!

We started off with white pieces of cloth and used various techniques to create patterns. Ah, brings me back to the childhood days of messy tie-dying... We used rubber bands, washers and clamps to make designs. the tiny clamps were really handy and effective at securing the pattern.

Look at that color! You can achieve an endless amount of hues by leaving the fabric in the dye for varying times.

There also was a brilliant purple made from a crushed South American insect, ew, but it made a gorgeous color. The third color was indigo, that was also harvested from the farm. I knew what the color looked like, but not the plant. The color is made from the dried leaves of the plant, below. The color in the pot looks like a dark sea green, but when the dyed fabric hits the air and oxidizes it turns into that bright blue.

These little wooden flowers made a cute pattern. After the dyeing process, you set the color by rinsing it in cold water, then allowing it to dry.

This is most definitely an art. Because of the nature of the method you could spend a lot of trial and error tweaking your process to achieve the perfect colors. I think I'd like to use natural dyes to do some batiks, where you use wax to draw your patterns. Pioneer Thinking has an extensive list of dye sources and the color they produce, here. Think of all the colors you can create!
Tuesday, October 8, 2013
8 Things I'm Glad We Did For Our Wedding
Today is my two year anniversary of marriage to my awesome husband, Chris. And as with most annual celebrations I can't help but to think back and reminisce about the day. To anyone planning a wedding on their own, it's tough, though extremely rewarding. We tried to be as realistic as possible, and kept reminding ourselves that we don't have to conform to traditions, and that this was just one giant party. I'm not going to give a play by play of the planning process, but rather share the highlights of things I'm happy we did. Perhaps a little perspective for any future "big party" you might have.
1. We set our priorities - Right from the get go we knew we wanted have great food and drink and good music. It seems simple enough, but because we were working with a tight budget, we allotted most of our money to a fabulous "classy BBQ" caterer, Tommy Gunns. The buffet style food was a hit, guests raved about the food. You don't need a sit down meal with a steak option to be delicious! Of course, we also wanted an open bar because anything else is just not right. And after we agreed on what was most important us, the rest of the budget fell into place.
2. We made our own playlist - Our music component cost zero dollars because from January to October of 2011 we crafted our entire playlist, from cocktail hour to departure. There's nothing like loving every single song that's played on your wedding day. We used a laptop and a PA system, as well as our friend, and Chris' former band mate, who played emcee. The biggest floor filler of the evening? Chumbawumba, I Get Knocked Down. Go figure.
3. We incorporated friends and family - We're extraordinarily lucky to be in the company of so many talented friends and family, and we did our best to exploit that! As I mentioned, we had Chris' former band mate emcee, we had a friend do the photography, Chris' mom expertly did the entire bridal party's hair and makeup, Chris' uncle supplied us with his amazing homemade bottled hot sauce, "Botto's Bitchin'" as favors, and lastly our friend, Sean, added a trumpet solo onto our first dance song. Did I already say we're lucky? Everyone, especially our super bridal party, was ready and willing to help us set up the space the day before. Having friends and family help us in so many ways made the day that more special and uniquely "us".
4. I bought a dress that I was comfortable in - This probably goes against all womanly instincts, but I opted for a dress that was flattering, yes, but I was comfortable in it. I didn't have to re-position things, I didn't have to worry about eating too much and sucking in my gut. And it had pockets! I firmly believe that all dresses should have pockets, even big white ones. I danced all night in it without the slightest concern. And speaking of dancing...
5. I danced with my husband - After all the introductions, speeches and first dances, I danced with Chris all night long. Sure we made rounds and thanked guests, but I remember having fun with him. Although we planned everything ourselves, we actually enjoyed the wedding like guests and not hosts.
6. We had the guests leave us messages - This is the gift that keeps on giving! I most likely saw this on Pinterest; we asked guests to write messages to us on the inside of the table number card. Now we open and read the card on our corresponding anniversary. So tonight we'll read what table #2 had to say! It's a fun time capsule that we can openly yearly until our 23rd anniversary.
7. We left for our honeymoon the next day - I was worried it would be too stressful to jet off to Ireland the day after. But it wasn't! I found it quite romantic to just have a big chunk of time dedicated to wedding and honeymoon. We still were on a wedding high, and it felt more special than just another vacation.
8. We spent less than $10K - That includes everything! Honeymoon, rings, attire for ourselves and the bridal party etc. With a little under 200 guests, I thought it was quite the financial accomplishment. The last thing we wanted to do was to start our married life in "wedding debt". Because we stuck to our priorities, it was much easier to make decisions. It also helped that we did ALL of the decor and invites ourselves. So what didn't cost us money, cost a whole lot of time. Worth it! Wedding high-five!

In the end, it was a reflection of us. We had fun planning it, living it and now remembering it!
1. We set our priorities - Right from the get go we knew we wanted have great food and drink and good music. It seems simple enough, but because we were working with a tight budget, we allotted most of our money to a fabulous "classy BBQ" caterer, Tommy Gunns. The buffet style food was a hit, guests raved about the food. You don't need a sit down meal with a steak option to be delicious! Of course, we also wanted an open bar because anything else is just not right. And after we agreed on what was most important us, the rest of the budget fell into place.
2. We made our own playlist - Our music component cost zero dollars because from January to October of 2011 we crafted our entire playlist, from cocktail hour to departure. There's nothing like loving every single song that's played on your wedding day. We used a laptop and a PA system, as well as our friend, and Chris' former band mate, who played emcee. The biggest floor filler of the evening? Chumbawumba, I Get Knocked Down. Go figure.
3. We incorporated friends and family - We're extraordinarily lucky to be in the company of so many talented friends and family, and we did our best to exploit that! As I mentioned, we had Chris' former band mate emcee, we had a friend do the photography, Chris' mom expertly did the entire bridal party's hair and makeup, Chris' uncle supplied us with his amazing homemade bottled hot sauce, "Botto's Bitchin'" as favors, and lastly our friend, Sean, added a trumpet solo onto our first dance song. Did I already say we're lucky? Everyone, especially our super bridal party, was ready and willing to help us set up the space the day before. Having friends and family help us in so many ways made the day that more special and uniquely "us".
4. I bought a dress that I was comfortable in - This probably goes against all womanly instincts, but I opted for a dress that was flattering, yes, but I was comfortable in it. I didn't have to re-position things, I didn't have to worry about eating too much and sucking in my gut. And it had pockets! I firmly believe that all dresses should have pockets, even big white ones. I danced all night in it without the slightest concern. And speaking of dancing...
 |
 |
5. I danced with my husband - After all the introductions, speeches and first dances, I danced with Chris all night long. Sure we made rounds and thanked guests, but I remember having fun with him. Although we planned everything ourselves, we actually enjoyed the wedding like guests and not hosts.
6. We had the guests leave us messages - This is the gift that keeps on giving! I most likely saw this on Pinterest; we asked guests to write messages to us on the inside of the table number card. Now we open and read the card on our corresponding anniversary. So tonight we'll read what table #2 had to say! It's a fun time capsule that we can openly yearly until our 23rd anniversary.
7. We left for our honeymoon the next day - I was worried it would be too stressful to jet off to Ireland the day after. But it wasn't! I found it quite romantic to just have a big chunk of time dedicated to wedding and honeymoon. We still were on a wedding high, and it felt more special than just another vacation.
8. We spent less than $10K - That includes everything! Honeymoon, rings, attire for ourselves and the bridal party etc. With a little under 200 guests, I thought it was quite the financial accomplishment. The last thing we wanted to do was to start our married life in "wedding debt". Because we stuck to our priorities, it was much easier to make decisions. It also helped that we did ALL of the decor and invites ourselves. So what didn't cost us money, cost a whole lot of time. Worth it! Wedding high-five!

In the end, it was a reflection of us. We had fun planning it, living it and now remembering it!
Wednesday, August 14, 2013
Do Your Laundry For Pennies Per Load
Okay maybe pennies are stretch if you consider the cost of water and energy to run your washer and dryer, BUT making your own detergent will cost you pennies. I was skeptical at first, because, let's be honest, not all do-it-yourself solutions have the best results, and I'm sort of used to having my clothes clean and smelling fresh. This little recipe actually gets your clothes clean, plain and simple, without dyes, and fragrances. AND it's "high efficiency" friendly because it creates a low amount of suds. I have super sensitive skin, and would usually buy fragrance free detergent anyway. As far as I can tell, this does the same amount of cleaning for pennies a load.

Chris prompted me to make this one because he read a few Reddit articles about cutting costs at home. This mixture is from DIY Natural. I'm writing this post now because I just had to make a new batch yesterday. I made the first batch over a year ago. It consists of the following ratio...
I use Fels-Naptha for the soap component. It has a clean laundry-like scent. My mom uses it for washing her hands and arms after working in the garden. She claims it's very gentle and will eliminate any trace of poison ivy or other irritant. It has the consistency of a thick bar of chocolate. The first batch I made, I grated it as they suggested, and it took a little longer than I would have hoped. My mother-in-law said she tried it, and used her spice grinder instead of grating. So much easier! I used my Cuisinart food processor to grind it into a homogeneous powder.
After that, all you need is a tablespoon for each regular sized load (shown above). Amazing, but true!

Chris prompted me to make this one because he read a few Reddit articles about cutting costs at home. This mixture is from DIY Natural. I'm writing this post now because I just had to make a new batch yesterday. I made the first batch over a year ago. It consists of the following ratio...
- 1 bar (or 4.5 ounces) of shaved bar soap (Dr. Bronner’s, Ivory, ZOTE, Fels-Naptha)
- 1 cup of borax
- 1 cup of washing soda
I use Fels-Naptha for the soap component. It has a clean laundry-like scent. My mom uses it for washing her hands and arms after working in the garden. She claims it's very gentle and will eliminate any trace of poison ivy or other irritant. It has the consistency of a thick bar of chocolate. The first batch I made, I grated it as they suggested, and it took a little longer than I would have hoped. My mother-in-law said she tried it, and used her spice grinder instead of grating. So much easier! I used my Cuisinart food processor to grind it into a homogeneous powder.
After that, all you need is a tablespoon for each regular sized load (shown above). Amazing, but true!
Monday, July 22, 2013
Lavender Foot Scrub
After a long weekend of yard work a cold shower just wasn't enough. My feet were extra sore and needed some love, especially since I've given up nail polish for the summer, eek. I prepared a foot soak with Epsom salts and a little peppermint Dr. Bronner's soap, then used a lavender sugar foot scrub to slough away the... ugliness. The scrub is a quick preparation that will last for quite awhile stored in a jar.

Start of with an exfoliant, either sea salt of sugar. I use a half cup of coarse turbinado sugar. Add a tablespoon of a carrier oil such as sweet almond oil, jojoba, or even olive oil. Top it off with 20 drops of an essential oil; lavender, peppermint, or rosemary. Mix it up evenly and use a handful on your feet or hands for a aromatic exfoliation. When you rinse off what's left, your skin will be renewed to softness. So, treat your feet!

Start of with an exfoliant, either sea salt of sugar. I use a half cup of coarse turbinado sugar. Add a tablespoon of a carrier oil such as sweet almond oil, jojoba, or even olive oil. Top it off with 20 drops of an essential oil; lavender, peppermint, or rosemary. Mix it up evenly and use a handful on your feet or hands for a aromatic exfoliation. When you rinse off what's left, your skin will be renewed to softness. So, treat your feet!
 |
| Pampering is always a little nicer in the company of fresh flowers! |
Friday, July 19, 2013
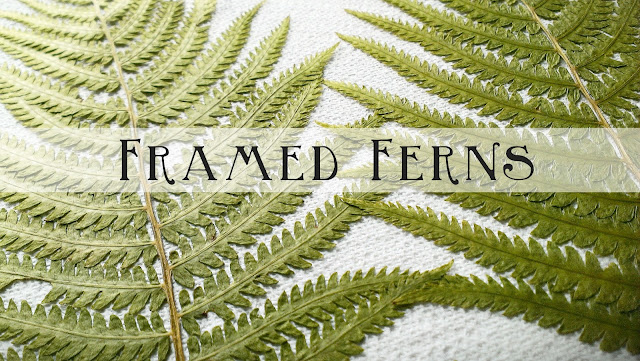
DIY Framed Ferns
Just as I led you to believe in the title, today I framed some pressed ferns. Pressing flowers is something I remember doing with my grandmother. We'd collect flowers and press them in fat telephone books (perhaps one of the only things they're useful for anymore). I remember being so impatient! Waiting for them to dry was too much for me, and I'd always be tempted to take a peek. This year I picked a few ferns and pansies in the spring thinking it will be a project for a later day. I all but forgot about them until this week!
When pressing flora, start out with items that are generally flat to begin with, small flowers, ferns, or leaves. They're just easier to assemble and get a nice flat pressing. Pat them dry and remove any dirt from them. Then carefully lay them in between two sheets of waxed paper in a large heavy book.

I didn't have any waxed paper at the time and used paper towels instead. Now you can see then texture in the pansies, rookie mistake. It takes about two weeks to get all the moisture out. Patience!
I had a white frame that would house the size of the fern. I removed the inside paper behind the mat to use as a template for my own mounting. I chose a thick water color weight paper with some texture. I've read that any sort of mild Elmer's glue, or wood glue is acceptable using on delicate pressed flowers. You could dab a bit on a toothpick and gently put it on. I just used my glue stick because the fern seemed pretty sturdy, and I didn't need much for this.

I wanted to add a vintage botanical flair so I penned the fern's scientific name and where it was found in the corner.
One helpful hint for lining up any photo with a mat is adhering a bit of tape behind the print face up, then placing the mat over top so you can align easily.

And that's it! Now, when I take Dante for walks in the park I keep my eye out for things that are "press worthy". Soon enough I can create a little wall of botanicals.

When pressing flora, start out with items that are generally flat to begin with, small flowers, ferns, or leaves. They're just easier to assemble and get a nice flat pressing. Pat them dry and remove any dirt from them. Then carefully lay them in between two sheets of waxed paper in a large heavy book.

I didn't have any waxed paper at the time and used paper towels instead. Now you can see then texture in the pansies, rookie mistake. It takes about two weeks to get all the moisture out. Patience!
 |
| They're textured, but still cute! I'll use them later... |

I wanted to add a vintage botanical flair so I penned the fern's scientific name and where it was found in the corner.
 |
| I brought out some pen and ink for this. |
One helpful hint for lining up any photo with a mat is adhering a bit of tape behind the print face up, then placing the mat over top so you can align easily.

And that's it! Now, when I take Dante for walks in the park I keep my eye out for things that are "press worthy". Soon enough I can create a little wall of botanicals.
 |
| Chris thought I bought a print of a fern, surprise!
UPDATE: After 2 months, the little ends of my fern are yellowing, due to the sun, most likely. So, if you plan to hang this project in a sunny area, be sure to use a frame with UV Protection. OR don't worry about it, and let it fade naturally!
|
Friday, July 5, 2013
Breakfast For Your Face

If you haven't tried eating Greek yogurt and honey, you're in for a treat. It's so rich and sweet I feel like I'm cheating and eating something high in fat. But Greek yogurt is naturally fat free, bonus! Put a mixture of it on your face, nice and thick, and let it moisture your skin. Let it sit for 10 minutes then wipe it off with a warm towel. The yogurt moisturizes and the honey is a natural antibacterial.
A little trick with storing Greek yogurt: I keep a large container on it's side in the fridge. When I open it, I drain off the liquid on the top, so with each time I use it, the yogurt gets thicker (and more delicious). Now I just have to start making my own yogurt...
Friday, June 28, 2013
DIY Mug Art
(This post was updated on 02/26/14)
I saw these nifty markers that write on ceramic awhile ago, but have only just tried it out, very exciting! I'm always a little nervous using a new medium because there always is a bit of a learning curve, but this Porcelaine marker was very easy to use the first time.

I picked up this pen off Amazon for $7. It claims to be dishwasher safe which is pretty neat (after letting it air dry for 24 hours, bake in the oven for 35 minutes at 300°F). This brand has an assortment of colors and sizes, fine and broad tips. I went with standard black and a broad tip to try it out. It writes like any paint pen, you've got to shake it well and let the ink descend to the tip the first time you use it. The mugs I got from the dollar store, plain and white, the perfect canvas.

Even though I've had the supplies for a awhile I think I took so long to make it because I didn't have anything in mind to put on it! As you can see I got some design inspiration from a box I had covered with this awesome flocked wrapping paper.

You can see in the close up it's smooth overall but it does get tiny bubbles, and I'm not sure if it's a user error or just they way it is. Luckily I have three more mugs to decorate! I'd love to get more colors and try it out on plates or bowls. I think it would make a really sweet and personal gift for someone, maybe some monograms perhaps?
UPDATE:
One day I splurged and bought the 9 pack of colored Pabeo Porcelaine broad tip markers! I added some color flair to the above mug...


I saw these nifty markers that write on ceramic awhile ago, but have only just tried it out, very exciting! I'm always a little nervous using a new medium because there always is a bit of a learning curve, but this Porcelaine marker was very easy to use the first time.

I picked up this pen off Amazon for $7. It claims to be dishwasher safe which is pretty neat (after letting it air dry for 24 hours, bake in the oven for 35 minutes at 300°F). This brand has an assortment of colors and sizes, fine and broad tips. I went with standard black and a broad tip to try it out. It writes like any paint pen, you've got to shake it well and let the ink descend to the tip the first time you use it. The mugs I got from the dollar store, plain and white, the perfect canvas.

Even though I've had the supplies for a awhile I think I took so long to make it because I didn't have anything in mind to put on it! As you can see I got some design inspiration from a box I had covered with this awesome flocked wrapping paper.

You can see in the close up it's smooth overall but it does get tiny bubbles, and I'm not sure if it's a user error or just they way it is. Luckily I have three more mugs to decorate! I'd love to get more colors and try it out on plates or bowls. I think it would make a really sweet and personal gift for someone, maybe some monograms perhaps?
UPDATE:
One day I splurged and bought the 9 pack of colored Pabeo Porcelaine broad tip markers! I added some color flair to the above mug...
The markers performed just as well as the black had, although some colors seems less opaque at first pass. I loved the ingenuity of the teardrop shaped cap to keep them from rolling, genius!
The color selection is fabulous as well...
Wednesday, June 12, 2013
All Natural Bug Spray
I don't know about you, but mosquitoes love me. Each summer I will inevitably become covered with golf ball sized welts. Additionally, I hate the thought of covering myself in a choking haze of bug spray. So now my first line of defense is some homemade spray.

There are actually plants that bugs don't like. Citronella is a big one. Yes, citronella is a plant, not just a type of candle! And if you add the right combo of things bugs don't like to smell, then they'll stay away for the most part.
You don't need too many supplies, but once you have everything you can make enough for yourself and others. You could also use the same essential oils for bug repelling candles, but that's a post for another day. You'll need...
- A 2 oz, dark spray bottle in blue or brown. They sell them in Whole Foods or a site like, Specialty Bottle
- Witch Hazel, which you can pick up at any drug store
- Essential Oils: Citronella, Cedarwood, Tea Tree and Lavender
Fill the bottle 3/4 of the way with witch hazel. Then add 20 drops of citronella, 10 of cedarwood, 10 of tea tree and 10 lavender. You can spray it liberally on your legs and arms, but I wouldn't spray it close to your face and eyes. I keep this by the door so it's handy for a spritz on my legs before I go in the garden or take the dog for a walk. I won't tout that it works as well as any chemically enhanced stuff, but if you're concerned about what goes on your skin, this is a great alternative.
Tuesday, May 21, 2013
DIY Detox Mask
Last week I shared a toning facial steam recipe, and today I've got an oil banishing, moisturizing, make you look like a green monster so even your dog won't recognize you, mask. Whew.

A year back when I started going all natural for my skin routine I bought a one pound bag of French green clay. It cost me $17, and I've been doing at least one mask per week. So that works out to about 30 cents per mask. All natural and thrifty!
This sort of clay literally sucks the impurities out of your pores, so it's really good for acne prone skin. It's okay for everyone else, you just don't need to use it as often. It also works well with a bunch of other things: apple cider vinegar, aloe vera, Greek yogurt, or just plain water works too. I use it with apple cider vinegar as spot treatment. Mix a little in your hand to make a paste, dab it on any unsightly blemish, and let it dry. I promise it will reduce the size and redness and shorten it's time on your face. For more frequent whole face detoxing, I mix it with Thayer's Rose Petal Witch Hazel with Aloe Vera. Alone it's a moisturizing toner, but with this mask it brings a moisturizing balance to the clay's detoxifying properties.

If you want to get fancy with this mask, start with a about half a tablespoon of clay in a small ramekin. Start adding squirts of the Witch Hazel and mix it with a clean paint brush (preferably and facial dedicated brush). Mix till you get a nice smooth paste and just paint it on, avoiding sensitive areas. The paintbrush truly is an upgrade from just fingertips, the brush feels really nice on your skin, spa-worthy!

Let it dry for 15 or so minutes, so that it's all dry and crackly. I always make sure to give Chris some warning when I put on a mask , I have startled him more than a few times... Behold, the Green Monster!

Let it dry for 15 or so minutes, so that it's all dry and crackly. I always make sure to give Chris some warning when I put on a mask , I have startled him more than a few times... Behold, the Green Monster!
 |
| I added this photo by request! Not my best look. |
Thursday, May 16, 2013
An Herbal Skin Pick Me Up

It's been a particularly stressful work week for me, so last night I decided to
give my face a little pampering. Steams are wonderfully refreshing; they
are good for your skin and breathing in the herby goodness helps me to
unwind. For this steam I used...
- juice of a fresh lemon
- two sprigs of rosemary
- two drops of tea tree oil
NOTE: If you're wondering where to get essential oils from, Whole Foods always has a great selection, but the best resource for botanicals great and small is Mountain Rose Herbs.
 | ||||||||||||||||
Monday, May 6, 2013


Tuesday, April 23, 2013
Building Our Chicken Coop

A few weeks ago I was posting about how I have "Chicken Envy" of people with backyard chickens. The chicks we got around Easter have officially come our way, and we made them a pretty sweet home this past weekend. Emily and Chrissy have been graciously brooding the chicks for the past month in their home, probably a little messier than we anticipated. But now that they have their feathers and the nights aren't too cold, they are ready to move outside! They've been living in a giant plastic storage container, so I'm sure they were ready to feel some grass under their little feet. We needed to put our coop plans into action. We still have a bit of finishing touches left, but it's fully functional for the chickens now. Eventually I'll put up plans if anyone would like to try to replicate, "The Penncroft Hen House". (See the building progression after the jump).
Wednesday, April 17, 2013
DIY Colorful Wrapped Hoop Earrings

I've been seeing these around, and thought, "I can do that!". I have a few pairs of hoops that I don't wear anyway. I wanted to try these first because the shape is a bit more interesting than regular hoops. They're a little rough at the ends, but I was happy with how they turned out for a first attempt.

- Start with long lengths (2') of whatever colors you'd like to work with. (I wouldn't suggest any more than 3 colors because it will make your beginning knot too large). Put a the tiniest dab of hot glue at the top, just to hold 'em in place, then knot the threads at the top of the earring.
- Tuck the fringe and begin wrapping your first color around them tightly and evenly. You'll be wrapping around the other threads, but you won't see them because you're wrapping so evenly.
- When you want to change colors just pick up the next color and begin wrapping. Remember to consistently wrap in the same direction. Work you way around the hoop.
- When you get near the end put another teeny dab at the end and wrap it up before it dries. Tie another knot.
- Use small sharp scissors or an Xacto knife to trim the fringe.
- Dab a little clear nail polish on the ends.
- I used 2 coats of hairspray all over to keep the thread in place, and I think, to make them slightly more durable without messing with the color or texture of the thread.
Easy huh? I'm thinking of wrapping a plastic bangle next with some thicker thread.
Subscribe to:
Posts (Atom)