Showing posts with label pull. Show all posts

Tuesday, March 25, 2014

Fresh and Local: Stryker Farm

For years I've been buying meat, like anyone else, from the supermarket. Always working within a tight budget, cheap cuts of meats were my go-to. And until recently I didn't really care about where it came from, or how it got to the supermarket, or how it was raised. I just didn't have the time to worry about that sort of stuff. Now, "that sort of stuff" is what I'm most interested in. "That sort of stuff" shapes and affects my health and lifestyle. In time, I've graduated from regular supermarket meat to organic meats. It was only last year I discovered I could get delicious, locally raised meat for less than, say, Whole Foods prices and support my local economy at the same time. Affordable and sustainable? Sign me up!

I learned that buying directly from the farm saves your wallet money and puts more directly towards the farmer's. Only one catch; most often you have to buy the whole animal or a large portion of it. Is that a grisly way of putting it? Oh, well. So, last December we bought an eighth of a cow for Verdant Farms and a quarter of a pig from Stryker Farm in Pennsylvania. Everything came portioned, labeled and frozen, how convenient? Our great meat adventure! We acquired a chest freezer and stocked it with a little under 100 pounds of the freshest meat we could get our paws on and we've been savoring every bite since.

Tonight I made beer brats from Stryker Farms in Saylorsburg, PA. As I pulled them out to defrost, I noticed the ingredients, "Pork ,Weyebacher Ale, Sea Salt, Spices, Turbinado Sugar". No nitrates, no fillers, no unrecognizable ingredients. And not only is the pork fresh and local, but the ale flavor is too!


So far, every cut that we've eaten from Stryker farm has been superb. This post singing it's praise is long overdue. The housemade sausages are fabulous. We've had the breakfast sausages (scrumptious), Irish bangers (bangin') and now the brats. I let them simmer in a pot of "quick" sauerkraut.

My Quick Sauerkraut:
  • A medium sized head of green cabbage
  • 4 strips of thick cut bacon
  • 4 tablespoons of butter
  • 1/3 cup apple cider vinegar
  • 1 tablespoon of juniper berries (optional)
  • Salt and pepper to taste

1.   Start with a heavy bottomed pan. Cut the bacon up into pieces and fry it up.

2.   Slice the head of cabbage into thin ribbons.

3.   When the bacon is cooked, but not crispy, remove it from the pan... and leave all the fatty goodness in there.

4.   On a medium flame add the cabbage and saute for a minute. Add the butter and apple cider vinegar. Traditional sauerkraut is a fermented food, but the vinegar makes this recipe quick, giving it that sour flavor.

5.  There should be a good amount of liquid at the bottom. Add the juniper berries. Add a sprinke of salt and pepper. Let it simmer for a few minutes uncovered.

6.   Make a hole in the middle for the brats to simmer. Turn the heat way down and let the flavors do their thing for a half hour or so, covered. I don't think you can actually overcook this, but personally, I like when the cabbage still has the slightest crunch left to it.

7.   Add the bacon. Did you forget about that bacon? Oh yeah, it's going back in there. I never said this was low cal.

8.   I try to pick out the juniper berries before serving because they're bastards to chomp down on.
I served this with some roasted carrots and onions and a dry white wine. These brats are flavored so nicely, tender and juicy. I'm sure they'd be great grilled on a toasted bun. With fried onions. And mustard. Mmm.

(As I write this Chris moans that I'm making him hungry again. He's threatening to go eat the leftovers before bed. Not on my watch.)


Our friends Mike and Gayla organized the group of people to share all of these wholesale meats, so they also went to the actual farm to pick up the piggie when it was ready. They had nothing but wonderful things to report about the farm and the owners. You can read more about the farm, here. I'm pretty certain there's no going back to "supermarket meat" for us. When we run out of pork, we'll be headed back to Saylorsburg!

Friday, February 7, 2014

Homemade Whiskey Beef Jerky

I have a confession. I love jerky. There's something about a dried piece of salty meat that I find so satisfying as a snack. But as much as I love it, I rarely buy it except on the rare festival or camping trip, where it's dried nature actually fulfills it's purpose. I came across this recipe for homemade jerky and I gathered my supplies to make it the same day. Whiskey infused jerky.

Because I also like to eat my alcohol.

homemade whiskey beef jerky

Thursday, January 30, 2014

DIY Beauty Oil

It looks like beauty oils are getting a lot of hype recently at the beauty counter. The initial idea of applying oils directly to your face probably horrifies most, but the big secret is: using oils as a moisturizer doesn't make your skin oily. Period.

argan oil on your face


Monday, January 20, 2014

Penncroft Attic Photoshoot

Back in June of last year, sister-in-law, Emily, and myself started a vintage Etsy shop. After a few sales and a lot of New Years motivation we are kickstarting the shop! Today we took a little trip across the street to the State Park by my house. We wanted to showcase this beautiful fox fur collar coat we picked up at a vintage warehouse in Philly. A simple dress form didn't do this stylishly mod coat justice, but Emily is rockin' it!

Want it for yourself? Hurry up before it's gone! Penncroft Attic

vintage fur collar coatvintage fur collar coat
vintage fur collar coat

vintage fur collar coat

vintage fur collar coat


Wednesday, December 11, 2013

Backyard Chickens in the Snow

Now that most people know we have chickens, the number one question we get is, "Are they okay in the cold?!" And the short answer is, "yes, they're fine".

Generally chickens are hardy little beasts, and just like other wild animals they have ways to keep themselves warm in the winter. They mainly use body heat from one another to stay warm in the coop, which is enough. We also took note to get breeds that are relatively "cold hardy". Our two Rhode Island Reds will venture out in yard with a light coating of snow, brave little girls they are. But 2 inches and above, all five of them hang out in the run and coop. Here are a few things that we're doing for the flock to help them get through the winter weather.

chicken in snow
You can see the girls poking their heads out of the run.

Wednesday, November 27, 2013

Thanksgivingworthy Apple Pie

Apple pie is a Thanksgiving staple in my book. Although I'm an expert at eating them, I'm not an expert at baking them, yet. Emily was with me on Saturday night and walked me through this recipe because she clearly possesses superior baking skills and she's also admitted to making mini versions of this for herself from time to time, check it out here. Why did we make an apple pie a whole week before Thanksgiving? Because we can, that's why.


Tuesday, November 19, 2013

Homemade Horseradish Sauce

My aunt gave me a horseradish plant in the spring. Fun, I like horseradish. I planted it in a sunny spot outside of the garden beds because I was warned that it will take up a lot of space. The plant flourished throughout the growing season, producing long large leaves that sprouted into a big dome shape. I never watered it or tended to it, it just grew in the corner of the yard. Yesterday as we prepped the lawn for winter, mowing, raking and mulching, I figured it was time to unearth the horseradish that I had all but forgotten about.

homemade horseradish

Tuesday, November 12, 2013

DIY Mason Jar Pendant Lamp

If you're ever on Pinterest surely you've seen a version of this, a million times. But I liked the look, and we wanted to replace the pendants that came with the kitchen without spending too much. I looked into changing just the glass shade but nothing would fit properly. A decent-looking full pendant assembly costs at least $50 per lamp, and we needed three. Making our own mason jar lamps looked like a good alternative at a cost of $20 a piece. Worth it!

mason jar pendant lamp


Friday, November 8, 2013

Coconut Curry Acorn Squash: Two Days, Two Ways

It's the season of the squash! One of my favorite, the acorn squash, is a staple in the supermarket and I always tend to throw a few in the cart. Unlike the unyielding butternut, acorn squashes are easily halved and roasted. Wednesday I wanted to make a mild side to go with Rogan Josh spiced chicken and lentils (very similar to the Maharajah Curry). A smooth and coconutty mashed squash would compliment the heat nicely. Since I had two squashes I roasted them both to make enough for two meals.


DAY ONE:

Friday, October 18, 2013

Tea Treatments for Your Hair

I remember the day I colored my hair for the first time and essentially lost my natural highlights forever. Sigh. My mother warned me, but I did it anyway. My natural color is a dirty blonde, and growing up playing sports year round, I maintained golden blonde highlights. But that wasn't enough for me, I wanted something different and new! I wanted something dark. After I made up my mind my friend spent a fair amount of time coloring my hair in our apartment kitchen, and I loved it! Until I wanted my golden highlights back...

chamomile tea for blonde hair

Tuesday, October 15, 2013

Using Natural Dyes

I have the pleasure of volunteering with Greener Partners, a non-profit in the Greater Philly area. I'm working specifically with their organic farm, Longview Farm and Market. Basically I get to hang out around the farm and attend awesome events and workshops! I was excited to attend this one, presented by the Marafiki Arts, about dyeing with natural plant dyes. It's one of those things that I've wanted to try but haven't got around to it. It turns out that the process is pretty simple...

The instructor already had three colors going. Big stainless steel pots simmering with the "dye", water and vinegar. The vinegar acts as a fixative to the fabric. Shown below are marigold flowers, which yield a brilliant golden yellow. They also have a magnificent fragrance as they simmer. In true sustainable fashion, the marigolds were grown at Longview over the summer. It makes me want to grow my own marigolds next year. I'm pretty certain chickens are fans of them as well, bonus!

marigold natural dye
We started off with white pieces of cloth and used various techniques to create patterns. Ah, brings me back to the childhood days of messy tie-dying... We used rubber bands, washers and clamps to make designs. the tiny clamps were really handy and effective at securing the pattern.

clamps and washers to dye
Look at that color! You can achieve an endless amount of hues by leaving the fabric in the dye for varying times. 

marigold natural dye

There also was a brilliant purple made from a crushed South American insect, ew, but it made a gorgeous color. The third color was indigo, that was also harvested from the farm.  I knew what the color looked like, but not the plant. The color is made from the dried leaves of the plant, below. The color in the pot looks like a dark sea green, but when the dyed fabric hits the air and oxidizes it turns into that bright blue.

indigo plant


These little wooden flowers made a cute pattern. After the dyeing process, you set the color by rinsing it in cold water, then allowing it to dry.

natural fabric dye


This is most definitely an art. Because of the nature of the method you could spend a lot of trial and error tweaking your process to achieve the perfect colors. I think I'd like to use natural dyes to do some batiks, where you use wax to draw your patterns. Pioneer Thinking has an extensive list of dye sources and the color they produce, here. Think of all the colors you can create!

Thursday, September 26, 2013

When Peppers Attack

The other day I was on a roll in the kitchen. It was a leisurely Sunday afternoon, I had already baked some bread, roasted some squash for dinner and was in the middle of canning some salsa verde. We got a good amount of poblano peppers this year and I thought I'd add them to some salsa verde in lieu of jalapenos.

poblano pepper


Things were going well, the house smelled of deliciousness and I had nowhere else to be. Unfortunately I was in for a turn of events. This story is going in the misadventure column.

I've previously posted a recipe for salsa verde. Using tomatillos, jalapenos, lime, cilantro, salt and sugar. Check it out here. I decided to double, maybe triple, the amount of poblanos because, to my recollection, they're rather mild. I set up all my canning gear. Stock pot, jar grabbers, jars, lids rings. This would be a small batch, about 5 pints worth. As I let the tomatillos boil, I halved the peppers and started roasting them.

As many peppers as I have cut up, I've never had a problem with pepper oil burning me in awful places. I've heard horror stories of burning hands, eyes, and even genitalia... BUT it's never happened to me. Until then. As it's allergy season, I rub my nose a lot. Suddenly I felt the burning at the top of my lip, then at the base of my nose, around my nose, and up inside my nose. Oh, crap. As I breathe in, I can feel the intense burning travelling further up my nose. All I knew was that attempting to wash it off would only spread it further. I quickly left everything that was happening in the kitchen and flew upstairs to where Chris was enjoying his afternoon. "Quick, Google something to counteract pepper oil on your skin!", I say in a panic. In my hypochondriac mind, I'd be asphyxiating in mere minutes...

I'll save you from the drama in between. The lesson learned here, is that lemon juice will relieve your skin from a run in with peppers on your skin. Chris's dad was the hero in the end, telling me to just go ahead and rub that lemon juice all up my nose. As the juice dried it put out the flames in and around my nose. Phew.

Don't worry, I continued to can the salsa! It was totally worth it.
salsa verde

Thursday, September 19, 2013

Chickens and Yogurt

Chris's mom told me to give our chickens yogurt, "it's hilarious to watch"...

Why, yes, it is quite hilarious.

chickens eating yogurt


chickens eating yogurt
Well, besides being a hoot to watch them get it all over themselves, it is a good source of probiotics. Poultry probiotics are sold as a supplement, but why spend so much when my plain Greek yogurt has the same cultures? However, it is important to remember that it is a treat. Too many treats, of anything, isn't great for them. It's best to offer feed that has been specially designed for a balanced diet, and to let them forage for insects naturally. Here's the most comprehensive resource I've found  for what, and what not, to feed your flock.

Thursday, September 12, 2013

Grapefruit Gin & Tonic

I've been enjoying G & T's recently during (hopefully) our last muggy weeks of the season. When I ran out of limes, I used lemons, and when I ran out of lemons, I bought a grapefruit. Probably one of the lesser favorites of the citrus family, I really enjoy it's flavor and tartness. As I mixed this, I recalled a lovely cocktail served to me before the ceremony of an outdoor summer wedding. It definitely was grapefruit based, maybe with champagne? But what stuck me was the sprig of lavender that stuck out. It was so delicately fragrant as you sipped the drink, and went so well with the grapefruit. I had just clipped out bunch of lavender to dry, so I popped one in the glass for a little fanciness.

To make you own incredibly refreshing cocktail you'll need...

  • A glass half full of ice
  • About a shot of gin
  • A shot or two of freshly squeezed grapefruit 
  • Top off the glass with tonic
  • A sprig of lavender for fragrance
Best enjoyed outside with a good book!

Thursday, August 29, 2013

Puttin' Up Tomatoes

This past weekend was one of epic tomato proportions. Led by the expertise of Chris's parents, we helped put up 500 pounds of tomatoes in two days. We'll have enough jarred tomatoes to last a year. Whew!

Putting up tomatoes


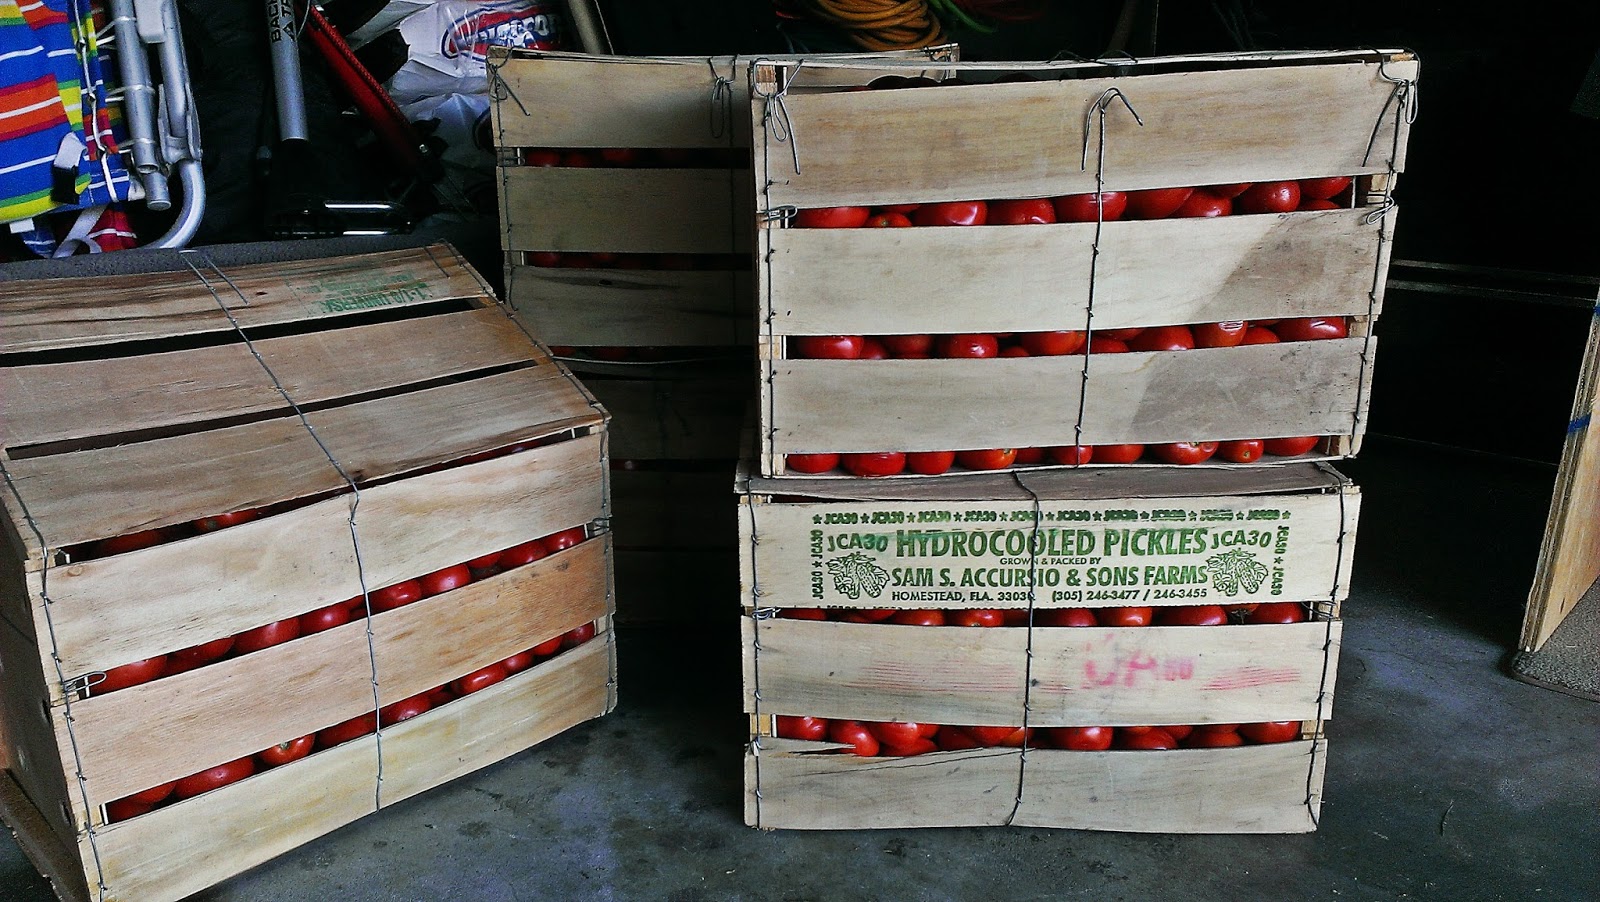
First off, we had to acquire tomatoes, because as prolific as our tomatoes were this year, we didn't have that many. After calling around to a few farms, Mellen found a place in Bordentown, NJ that had a good crop of plum tomatoes. Later that day they arrived, SUV filled to the brim with tomatoes, ten crates worth.

crates of tomatoes


For this tomato operation we borrowed a fancy Italian motorized grinder that actually skins and seeds the little fruits and extrudes the bright pink pulpy goodness. It's truly an amazing machine. Chris's parents, and plenty of those before them, used to process tomatoes with a hand crank. Yikes.

For any canning process there are certain preparations that need to happen. The first is gathering supplies, jars, lids, rings, stock pots, ladles, and plenty of towels. The work space should be clean and clear of non-essential items (here, wine to drink during the process is considered essential). We brought the crates into the kitchen, and set up a big table for cutting and grinding.

Putting up tomatoes


Putting up tomatoes

Emily and Chris unloaded the tomatoes into the kitchen sink filled with water and a little vinegar to
clean the tomatoes. They pulled out each one, gave it a once over and removed "any spots that you wouldn't eat". Overall, the tomatoes were beautifully ripe, with few spots needing removal. (Anything that was removed went to the chickens!). After they were inspected, they were brought to the cutting table where I quartered them and put them in line to be processed. They all go through the top of the grinder, down to an auger that turns and removes the skin and seeds.

tomato grinder


tomato puree

We did this for hours; collecting sauce in stock pots and removing the skin and seeds. As we neared time to jar, various pots were put on the stove to bring to a boil and reduce a bit. Any foaminess that bubbles up is scraped off. The lions share of the tomatoes remained plain so that later on it can be used in stews and chilis, or turned into a thicker sauce with other ingredients. Done this way, we have lots of options. (That's not even half of the jars shown below.)

canning supplies


I was always nervous to can things because I was convinced that I wouldn't do it properly, the jars wouldn't seal correctly, and disaster would ensue. However, after doing it with people who know what they're doing, I realized there is nothing to be afraid of! Don't get me wrong, canning is a science, but it's not rocket science.

The sauce is brought to a boil, which ensures that any bad bacteria is killed off. The jars and rings get dunked in boiling water to disinfect and to bring them up to temperature so that the hot sauce doesn't crack the glass. The lids are put in hot, but not boiling, water because it would destroy the rubber vacuum seal. We put a few leaves of basil in the bottom of each jar for a bit of flavor. The sauce is poured in with the help of  a funnel and the rim is wiped clean. It's important that nothing disrupts the lids seal. Using a magnetic lid lifter, a lid and ring are put on top, and twisted tightly. Done! Some people put the hot jars back into boiling water to process further, but we skipped that step because we boiled the rings before. After that, they slowly cool, and you hear the chorus of little "pops" as the lids seal down. If the lid can be pressed down then it goes in the fridge right away.

Putting up tomatoes Putting up tomatoes

I think after the eighth hour on Sunday night we were getting bit delirious. Chris fashioned the hot jar glove into a puppet... A weekend of hard work, but definitely worth it! Now I'm ready to can everything. No, really. I just bought a book called, Canning for a New Generation: Bold, Fresh Flavors for the Modern Pantry...


Wednesday, August 14, 2013

Do Your Laundry For Pennies Per Load

Okay maybe pennies are stretch if you consider the cost of water and energy to run your washer and dryer, BUT making your own detergent will cost you pennies. I was skeptical at first, because, let's be honest, not all do-it-yourself solutions have the best results, and I'm sort of used to having my clothes clean and smelling fresh. This little recipe actually gets your clothes clean, plain and simple, without dyes, and fragrances. AND it's "high efficiency" friendly because it creates a low amount of suds. I have super sensitive skin, and would usually buy fragrance free detergent anyway. As far as I can tell, this does the same amount of cleaning for pennies a load.

DIY laundry detergent

Chris prompted me to make this one because he read a few Reddit articles about cutting costs at home. This mixture is from DIY Natural.  I'm writing this post now because I just had to make a new batch yesterday. I made the first batch over a year ago.  It consists of the following ratio...
  • 1 bar (or 4.5 ounces) of shaved bar soap (Dr. Bronner’s, Ivory, ZOTE, Fels-Naptha)
  • 1 cup of borax
  • 1 cup of washing soda
Thoroughly mix. That's it. The links show you what the boxes look like because when I first read this I hadn't the faintest idea what borax and washing soda were. It turns out they were hiding out in the laundry aisle with everything else all along.

I use Fels-Naptha for the soap component. It has a clean laundry-like scent. My mom uses it for washing her hands and arms after working in the garden. She claims it's very gentle and will eliminate any trace of poison ivy or other irritant. It has the consistency of a thick bar of chocolate. The first batch I made, I grated it as they suggested, and it took a little longer than I would have hoped. My mother-in-law said she tried it, and used her spice grinder instead of grating. So much easier! I used my Cuisinart food processor to grind it into a homogeneous powder.

After that, all you need is a tablespoon for each regular sized load (shown above).  Amazing, but true!

Monday, August 12, 2013

Everything You Could Want To Know About Eggs

I realized that once the hens finally starting laying, I really didn't know what to do with the eggs. I got a cute ceramic egg carton and started storing them in there. Should I refrigerate them? How long do they last? For how long can they be outside in the coop? After some research I can answer all these questions and more!

fresh chicken eggs

What Are The Benefits of Fresh Eggs?

One of the primary reasons we started raising chickens is for the eggs. We eat eggs regularly, and it's nice to know where they come from. I know exactly what they chickens eat, and that they live without hormones or antibiotics. Additionally, it has been proven that free range eggs are arguably "healthier".

They contain:

Less Cholesterol: According to the study there was 1/3 less cholesterol in the free-range eggs.

Less Saturated Fat: Mother Earth News found 25% less saturated fat in the pastured chicken eggs. Saturated fat is a buzz word in the food world now, with reason, so anything with less is always a plus.

More Vitamin A and E: Vitamin A helps in all sorts of areas including vision, skin health, immune function, and so much more. There isn't as much information out there on Vitamin E, but I think we can assume it does have a purpose.

Extra Omega-3s: We are constantly learning more about the Omega-3s, but there has already been a lot of research pointing to benefits for people with heart concerns. Double the Omega-3s is a good thing!

Read the entire article here.

Chicken Egg Cycle

A hen's egg laying cycle is about 25 hours long, which is why they produce about an egg a day. That's amazing, especially when you compare that to a human egg cycle which is about a month! This little infographic explains why you don't need a rooster for eggs. We gave away all of our roosters because we don't want any of our egg fertilized, and they're just too noisy for our suburban environment.

chicken egg laying cycle

Chickens have about two good egg laying years in their life and after that they slow down production, because just like humans, they have a finite amount of eggs stored in them from the get-go.

Where Do The Chickens Lay?

The chickens will lay where they feel they are safe, wherever that may be. We built nesting boxes into our coop, so that we can easily access eggs. The problem is that you have to train them to lay there. The first egg I found was randomly in a bit of high grass, just waiting to be stepped on. It was suggested to us to put some golf balls or ping pong balls in the the nesting boxes to give them the hint, but what I really think helped was keeping them in the run all day. It sort of forced them to start laying in the nesting boxes. Now we get two eggs in the same box daily.

How To Store Fresh Eggs

Generally, fresh eggs should be collected daily, and stored in the refrigerator for up to 6 weeks. They can stay out on the counter for a week, if you'd like to display them. Washing eggs is unnecessary and actually harmful to the eggs. Eggs are naturally equipped with a porous membrane in the shell that keeps out bad bacteria. By washing an egg, you destroy the natural protection. Eggs bought at the store are refrigerated because they have been pasteurized, and their protection gone. There is special egg wash that you can buy, but I don't feel that it's necessary. When we collect the eggs they're relatively clean (Check out the top photo). Sometimes I might knock off some straw, but other than that they don't require any cleaning.

Bad Eggs?

If you're suspicious of an egg, there is a easy test to find out whether it's still safe to eat. Place the egg in a glass of water, if it floats, it's no good, if it's sinks, fry it up!

Wednesday, July 24, 2013

Basil Bloody Marys

With an overabundance of basil from the garden one can only make so much pesto and Caprese salads. I thought I might as well start soaking it in vodka! Now that I have this pungently basilicious liquor, what could I do with it? My first inclination was to make some sort of basil lemonade sort of cocktail, but after my dad tried a sip, he's like, "That would be great in a Bloody Mary", genius!

basil bloody mary

I LOVE Bloody Marys. Done right, it's like a meal and drink. It just so happens that I think my dad makes them best. And that's because he goes all out with these things; celery, stuffed olives, pickles, tiny onions, giardiniera, the works! All artfully arranged on skewers in the glass. And while I love being offered a drink that requires two hands to hold, sometimes it's nice to have a simpler version. This recipe is a just twist on a classic without the frills.

Basil Infused Vodka

I didn't realize how simple it is to infuse vodka. Literally take any sort of fruit of herb (in this case, a handful of basil) wash it, dry it thoroughly, and put it in a jar with some better quality vodka. Store it in a dark cool place, like a cupboard. Take it out daily, and give it a smell and a taste. When it's to your liking strain it's contents and re-jar it. Store it again in a cool dark place and it should last a few months.

Bloody Mary

V8 - Sorry if this offends anyone, but cans of V8 were a lunchtime staple growing up. I was all too pleased as an adult to discover I could use this to make even better lunchtime drinks!
lemon
Tabasco
A shot or two of basil infused vodka
Worcestershire sauce
A wee bit of horseradish
fresh basil - for an aromatic garnish

Fill the glass halfway with V8. Add a shot or two vodka (depending on your plans for the day). Add about a teaspoon of Tabasco and Worcestershire sauce, juice of half a lemon and a tiny bit of horseradish for an extra zing. Add some more ice and V8 if needed. Stir it up! Top it of with some more basil, a twist of crushed black pepper, and enjoy!

Monday, July 22, 2013

Lavender Foot Scrub

 After a long weekend of yard work a cold shower just wasn't enough. My feet were extra sore and needed some love, especially since I've given up nail polish for the summer, eek. I prepared a foot soak with Epsom salts and a little peppermint Dr. Bronner's soap, then used a lavender sugar foot scrub to slough away the... ugliness. The scrub is a quick preparation that will last for quite awhile stored in a jar.

lavender foot scrub


Start of with an exfoliant, either sea salt of sugar. I use a half cup of coarse turbinado sugar. Add a tablespoon of a carrier oil such as sweet almond oil, jojoba, or even olive oil. Top it off with 20 drops of an essential oil; lavender, peppermint, or rosemary. Mix it up evenly and use a handful on your feet or hands for a aromatic exfoliation. When you rinse off what's left, your skin will be renewed to softness. So, treat your feet!

butterfly bush bouquet
Pampering is always a little nicer in the company of fresh flowers!

Friday, July 19, 2013

DIY Framed Ferns

Just as I led you to believe in the title, today I framed some pressed ferns. Pressing flowers is something I remember doing with my grandmother. We'd collect flowers and press them in fat telephone books (perhaps one of the only things they're useful for anymore). I remember being so impatient! Waiting for them to dry was too much for me, and I'd always be tempted to take a peek. This year I picked a few ferns and pansies in the spring thinking it will be a project for a later day. I all but forgot about them until this week!

DIY Nature Wall Art


When pressing flora, start out with items that are generally flat to begin with, small flowers, ferns, or leaves. They're just easier to assemble and get a nice flat pressing. Pat them dry and remove any dirt from them. Then carefully lay them in between two sheets of waxed paper in a large heavy book.

pressed ferns


I didn't have any waxed paper at the time and used paper towels instead. Now you can see then texture in the pansies, rookie mistake. It takes about two weeks to get all the moisture out. Patience!

Pressed flowers
They're textured, but still cute! I'll use them later...
I had a white frame that would house the size of the fern. I removed the inside paper behind the mat to use as a template for my own mounting. I chose a thick water color weight paper with some texture. I've read that any sort of mild Elmer's glue, or wood glue is acceptable using on delicate pressed flowers. You could dab a bit on a toothpick and gently put it on. I just used my glue stick because the fern seemed pretty sturdy, and I didn't need much for this.

pressed ferns

I wanted to add a vintage botanical flair so I penned the fern's scientific name and where it was found in the corner.

pressed ferns
I brought out some pen and ink for this.


One helpful hint for lining up any photo with a mat is adhering a bit of tape behind the print face up, then placing the mat over top so you can align easily.

Pressed ferns

And that's it! Now, when I take Dante for walks in the park I keep my eye out for things that are "press worthy".  Soon enough I can create a little wall of botanicals.

DIY nature wall art
Chris thought I bought a print of a fern, surprise!


UPDATE: After 2 months, the little ends of my fern are yellowing, due to the sun, most likely. So, if you plan to hang this project in a sunny area, be sure to use a  frame with UV Protection. OR don't worry about it, and let it fade naturally!