

Showing posts with label main course. Show all posts
Showing posts with label main course. Show all posts
Tuesday, October 22, 2013
Beet and Spinach Orzo
So I have to admit I haven't been stellar at keeping up with Meatless Mondays, but we do have a lot of meatless other days. I feel like I've significantly reduced our meat consumption, which is the end goal anyway. And now that the chickens are laying we can get a lot of our protein from eggs. I got some tasty beets from the farmer's market and wanted them to be the star of something. I found this recipe on Food52, I know, I'm on there a lot, but I had this recipe saved and decided to make it last night.


Tuesday, September 24, 2013
Microwaved Eggplant: I'm a Believer
If the title of this didn't scare you away, but rather intrigued you, I promise you won't be disappointed. This was another recipe I found through Food52, one of "genius" proportions that involves microwaving eggplant. It was quite timely because I found this the day after I wrote the post on Baba Ganoush, and the neediness of eggplant, for lack of a better word. Eggplant ripens just at the end of the summer and most times it's still way too hot to be using your oven. Enter, the microwave. Barbara Kafka's Marinated Eggplant Recipe has made a believer out of me; you can microwave eggplant, and it will be glorious.

You'll need:


You'll need:
- 1/4 cup tamari or soy sauce
- 2 tablespoons loosely packed cilantro leaves
- 1 tablespoon rice wine vinegar
- 1 tablespoon toasted sesame oil
- 1 1/2 medium-size cloves garlic
- 3/8 ounces fresh peeled ginger (a 1-by- 1/4-inch piece), cut crosswise into 1/4-inch slices
- 4 small Chinese eggplants (2 to 3 ounces each)
Method:
- Combine all ingredients, except eggplants, in a blender. Process until smooth.
- Prick the eggplants several times with a fork and pull off the leaves. Cut in half lengthwise. On the open side of each half, make three deep diagonal slashes in each direction. Place eggplants skin side down in a 13-by-9-by-2-inch microwave-safe oval dish.
- Spoon 1 1/2 teaspoons of the marinade over each eggplant half. Rub the marinade into the flesh so that it runs into the cuts. Turn eggplants skin side up. Pour remaining marinade into dish. Let stand for 45 minutes.
- Turn eggplants skin side down. Cover tightly with lid or microwave plastic wrap. Cook at 100 percent power in a high-power oven for 10 minutes. Prick plastic to release steam.
- Remove from microwave and uncover. Serve warm or at room temperature.
In my excitement to try this out, I failed to notice the "marinate for 45 minutes". At the time, I was really impatient, but I think it's a crucial part.

After the eggplant is microwaved, it comes out looking like it's been roasted for a long time. They're not spongy, they're smooth and completely infused with the marinade. Wow. I decided to make some soba noodles and extra cilantroed shrimp with this. Shrimp wouldn't be my first choice, but it was all I had, and it tasted mighty fine. In the future, I might include some marinated, pan-fried tofu. OR just eat the eggplant on it's own because it was DE-lish.
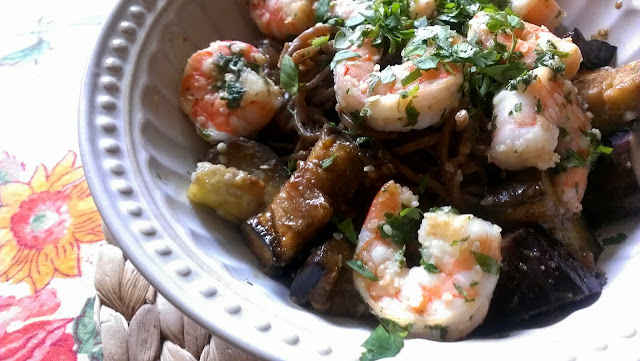
Now I know we're at the end of September, and you can probably use your ovens without sweating all over the kitchen, but this dish will still be awesome. Quick, go out and get some eggplant before you start spending all your days making roasts and stews!

Now I know we're at the end of September, and you can probably use your ovens without sweating all over the kitchen, but this dish will still be awesome. Quick, go out and get some eggplant before you start spending all your days making roasts and stews!
Friday, August 16, 2013
Scandalous Puttanesca Sauce
I say scandalous because Spaghetti alla Puttanesca in Italian translates to "whore's spaghetti". I have some ideas why it got it's name, but I'll save my speculations for later. In short, this sauce is spicy, salty and savory; not for the faint of heart, or palette!
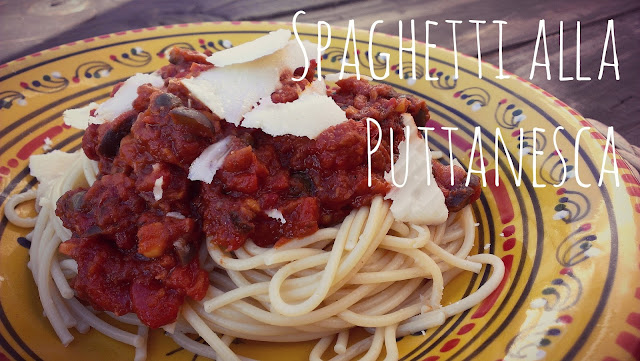
For my version of this saucey sauce you'll need (serves 4-6):
There's a lot of stuff in there, right? Like I said, this is my version, and you can tailor it to your liking, add or omit what you please. This is probably one of the few times I won't add salt to something. Trust me, it doesn't need it. Start boiling your salted pasta water. In a medium sized sauce pan start browning the onions and garlic in, wait for it, the olive oil from the tinned sardines.
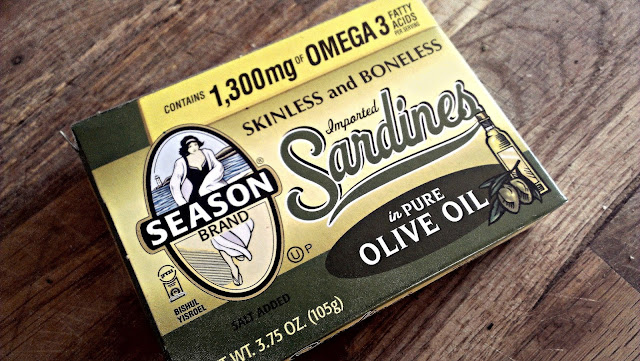
(Okay, backtracking; I decided to make this because I just bought a great many tins of sardines from Costco. Why? Impulse buy, maybe? They're really good for you, right? Yeah, they are, look at all those omega 3's.)
Sprinkle in some crushed red pepper flakes as well for the spicy component. Then get all the goodies prepped, the sun-dried tomatoes, roasted reds, olives, capers* and sardines. All of which would make for a kick ass antipasto on a later date.
*Helpful Hint: I learned that capers really can't go bad refrigerated. The brine that they soak in is so acidic that they're perfectly preserved for the most part. So, that jar that you bought two years ago in the back of your fridge is fair game!
Add everything to the browned onions and garlic. Give a stir or two, and add the tomato paste and diced tomatoes. Let it cook down while the water boils. The final product should be thick and textured.
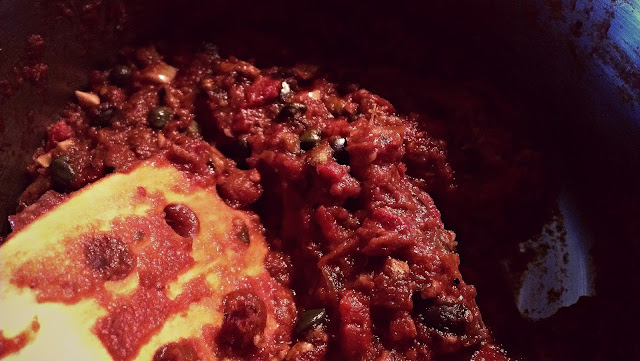
Add some of that red wine you're drinking. Let the sauce simmer until the spaghetti is ready. Top it all off with big ole' hunks of pecorino romano. Enjoy it with the rest of that wine you didn't put in the sauce.

So why's it called "whore's spaghetti"?

For my version of this saucey sauce you'll need (serves 4-6):
- Half an onion, diced
- 3 minced garlic cloves
- A tin of boneless, skinless sardines in olive oil
- About 6 sun-dried tomatoes
- 1 whole roasted red pepper, thinly slivered
- About 2 tablespoons of capers
- A can of black pitted olives, roughly chopped
- A healthy dose of crushed red pepper flakes
- A couple sloshes of red table wine
- 3 heaping spoonfuls of tomato paste
- A can of drained diced tomatoes
There's a lot of stuff in there, right? Like I said, this is my version, and you can tailor it to your liking, add or omit what you please. This is probably one of the few times I won't add salt to something. Trust me, it doesn't need it. Start boiling your salted pasta water. In a medium sized sauce pan start browning the onions and garlic in, wait for it, the olive oil from the tinned sardines.

(Okay, backtracking; I decided to make this because I just bought a great many tins of sardines from Costco. Why? Impulse buy, maybe? They're really good for you, right? Yeah, they are, look at all those omega 3's.)
Sprinkle in some crushed red pepper flakes as well for the spicy component. Then get all the goodies prepped, the sun-dried tomatoes, roasted reds, olives, capers* and sardines. All of which would make for a kick ass antipasto on a later date.
*Helpful Hint: I learned that capers really can't go bad refrigerated. The brine that they soak in is so acidic that they're perfectly preserved for the most part. So, that jar that you bought two years ago in the back of your fridge is fair game!
Add everything to the browned onions and garlic. Give a stir or two, and add the tomato paste and diced tomatoes. Let it cook down while the water boils. The final product should be thick and textured.

Add some of that red wine you're drinking. Let the sauce simmer until the spaghetti is ready. Top it all off with big ole' hunks of pecorino romano. Enjoy it with the rest of that wine you didn't put in the sauce.

So why's it called "whore's spaghetti"?
- Because you can put anything in it.
- It looks awful, but tastes amazing.
Ba-dum pssh. I'm done.
Friday, August 9, 2013
Pizza Night
I don't remember exactly when my mom started making pizza, but when she started, she didn't look back. Friday nights became pizza night, followed by some quality family television on TGIF on ABC. Remember Boy Meets World? Classic! I've mentioned before that I never took interest in learning to cook as a young'un, and I never thought to learn to make pizza. I just enjoyed being served the cheesy goodness on a weekly basis. Finally, I tried it out for myself, with some direction from my ma.

This dough recipe is quick and easy for relatively instant pizza gratification.
I use:
2 1/2 cups of bread flour
1 cup of warm water
1 teaspoon of sugar
1 teaspoon of salt
1 tablespoon of olive oil
1 packet of "Pizza Crust Yeast"
A pizza stone
Preheat the oven to 450ºF right away. In a bowl, empty the yeast packet, and add the sugar and warm water. Wait about 10 minutes and give it swirl in the bowl. It will get creamy looking.
Add the flour, salt and oil. Mix it right in the bowl with a wooden spoon. Add some more warm water if it looks too dry. When everything is mixed, take out the dough and knead it a few minutes on a lightly floured surface. Put it back in the bowl and let it rest for another 10 minutes. This is great time to prepare your toppings! For this pizza, I used some homemade marinara from our very own San Marzanos. I'll have to share that recipe shortly...

Using the heel of your palms, work the dough out from the center. Stretch and tug 'til you have about a 24" diameter. Sprinkle a light coating of cornmeal on the pizza stone, and transfer the dough carefully to the stone. Add toppings of your choice, get fancy or go simple. A general rule of thumb is no more than three toppings to balance flavor. A classic Margherita has tomato sauce, fresh mozzarella and fresh basil. Use the back of a large spoon to evenly distribute the sauce, I get about a half inch away from the crust. Slice the about a quarter inch thick for perfect cheese melting dispersal.

Put the pizza in the middle rack for 15 - 20 minutes. I put the timer on for 15, check on it and gauge from there. The crust should be golden brown, and the cheese should be bubbling. Remove it and let it cool a minute or two before you slice it up.


This dough recipe is quick and easy for relatively instant pizza gratification.
I use:
2 1/2 cups of bread flour
1 cup of warm water
1 teaspoon of sugar
1 teaspoon of salt
1 tablespoon of olive oil
1 packet of "Pizza Crust Yeast"
A pizza stone
Preheat the oven to 450ºF right away. In a bowl, empty the yeast packet, and add the sugar and warm water. Wait about 10 minutes and give it swirl in the bowl. It will get creamy looking.
Add the flour, salt and oil. Mix it right in the bowl with a wooden spoon. Add some more warm water if it looks too dry. When everything is mixed, take out the dough and knead it a few minutes on a lightly floured surface. Put it back in the bowl and let it rest for another 10 minutes. This is great time to prepare your toppings! For this pizza, I used some homemade marinara from our very own San Marzanos. I'll have to share that recipe shortly...

Using the heel of your palms, work the dough out from the center. Stretch and tug 'til you have about a 24" diameter. Sprinkle a light coating of cornmeal on the pizza stone, and transfer the dough carefully to the stone. Add toppings of your choice, get fancy or go simple. A general rule of thumb is no more than three toppings to balance flavor. A classic Margherita has tomato sauce, fresh mozzarella and fresh basil. Use the back of a large spoon to evenly distribute the sauce, I get about a half inch away from the crust. Slice the about a quarter inch thick for perfect cheese melting dispersal.

Put the pizza in the middle rack for 15 - 20 minutes. I put the timer on for 15, check on it and gauge from there. The crust should be golden brown, and the cheese should be bubbling. Remove it and let it cool a minute or two before you slice it up.

Wednesday, July 31, 2013
The Soup of the Summer: Gazpacho
So. Many. Tomatoes. Chris's mom tipped me off to growing San Marzano's, a type of plum tomato originally grown in the volcanic ashy soil around Mount Vesuvius. They are celebrated for their meaty quality, which makes for heavenly marinara. And I've made my fair share of marinara with these, but a hot bowl of pasta doesn't do it for me in these last days of July. Gazpacho. Now, that's the ticket.

Gazpacho turns a few people off from the words, "chilled soup". I feel like labeling it "soup" is just silly. Sure you can serve it in a bowl, and eat it with a spoon, but you can also just guzzle it straight out of the blender like Pepa, in that Pedro Almodovar film. It also makes for classy appetizer in tasting spoons or other small bowls. Gazpacho has origins all over Europe, but the most common is that it was a peasant dish from Spain. Making up fresh Gazpacho in the fields with a wooden dornillo would be a way to cool down, hydrate and energize. And it's fantastically delicious too.
I adapted my version from this recipe from a Slate article, You're doing it Wrong: Gazpacho. They'll also tell you all the wrong ways to do Gazpacho. But the most important ingredient should, and always will be, fresh ripe plum tomatoes.
 You'll need:
2 pounds tomatoes, roughly chopped (about 10ish plum tomatoes)
1 medium red bell pepper, roughly chopped
½ medium cucumber, peeled and roughly chopped (always an English cucumber)
½ red onion, roughly chopped
⅓ cup extra-virgin olive oil
⅓ cup almonds
One ½-inch slice white bread, torn into 1-inch pieces
3 tablespoons sherry vinegar
1 medium fresh jalapeño, seeded and roughly chopped (Or any pepper with some heat)
2 garlic cloves
Salt and black pepper
1 avocado, thinly sliced (for presentation)

Gazpacho turns a few people off from the words, "chilled soup". I feel like labeling it "soup" is just silly. Sure you can serve it in a bowl, and eat it with a spoon, but you can also just guzzle it straight out of the blender like Pepa, in that Pedro Almodovar film. It also makes for classy appetizer in tasting spoons or other small bowls. Gazpacho has origins all over Europe, but the most common is that it was a peasant dish from Spain. Making up fresh Gazpacho in the fields with a wooden dornillo would be a way to cool down, hydrate and energize. And it's fantastically delicious too.
I adapted my version from this recipe from a Slate article, You're doing it Wrong: Gazpacho. They'll also tell you all the wrong ways to do Gazpacho. But the most important ingredient should, and always will be, fresh ripe plum tomatoes.

2 pounds tomatoes, roughly chopped (about 10ish plum tomatoes)
1 medium red bell pepper, roughly chopped
½ medium cucumber, peeled and roughly chopped (always an English cucumber)
½ red onion, roughly chopped
⅓ cup extra-virgin olive oil
⅓ cup almonds
One ½-inch slice white bread, torn into 1-inch pieces
3 tablespoons sherry vinegar
1 medium fresh jalapeño, seeded and roughly chopped (Or any pepper with some heat)
2 garlic cloves
Salt and black pepper
1 avocado, thinly sliced (for presentation)
Start with the tomatoes. You'll halve them and scoop out the gooey seed center. Plum tomatoes shine in this role, because they have much less seediness about them.

Many people will add water to thin out the final Gazpacho product, but why use water when you can use the fresh tomato juice? Set up a bowl and a strainer over top. As you scoop out the seeds put them into the strainer. When you've got all the tomato guts, use a spoon to smoosh the juice through the strainer. It won't add up to too much, but it will be enough to add to the final product for a thinner quality. That's the most laborious part.

Add the tomatoes, olive oil, and vinegar into the blender. Give it a pulse or two to puree. Then add all the chopped and seeded veggies. Blend again, then add the almonds and the bread, which gives it it's thickness and texture.

Blend everything until it's nice and smooth. Garnish with some sliced avocado. Easy, so you don't need to slave away in the fields of Spain to enjoy it. Mmm.


Many people will add water to thin out the final Gazpacho product, but why use water when you can use the fresh tomato juice? Set up a bowl and a strainer over top. As you scoop out the seeds put them into the strainer. When you've got all the tomato guts, use a spoon to smoosh the juice through the strainer. It won't add up to too much, but it will be enough to add to the final product for a thinner quality. That's the most laborious part.

Add the tomatoes, olive oil, and vinegar into the blender. Give it a pulse or two to puree. Then add all the chopped and seeded veggies. Blend again, then add the almonds and the bread, which gives it it's thickness and texture.

Blend everything until it's nice and smooth. Garnish with some sliced avocado. Easy, so you don't need to slave away in the fields of Spain to enjoy it. Mmm.

Wednesday, July 3, 2013
Tres Tasty Tacos
If you're new to this blog you might not have picked up on the fact that we love Mexican flavors. Just peruse the eating/drinking section and you'll see. Today I'm sharing tips on making delicious tacos with soft corn tortillas. I make no claims of authenticity, only tastiness!
Spicy Ground Beef

Sour cream base
Sauteed onions
Ground beef with cumin, cinnamon, annato, salt, pepper, hot chili powder, dried oregano
Cilantro, lime, and Cholula hot sauce
Shredded Chicken Thighs and Jalapeno Lime Slaw

Black beans, lime, and a little chicken broth, heated and pureed
Shredded crock pot chicken thighs with adobo, cumin, chili powder, pepper
Thinly shredded cabbage, red cabbage, carrots, red onions, lime juice, fresh jalapenos, cilantro, olive oil, salt and sugar
Queso fresco
Tacos 101:
We prefer soft corn tortillas for a number of reasons.
- They're cheap
- They're much less calories than their flour counterpart
- And they last a long time
A lot of people dislike the corn tacos, and I think it's because they're not preparing them correctly. I speak from trial and error, I was doing it wrong for awhile! These little corn tortillas, right out of the bag, will flake and crumble if you look at them the wrong way. They actually need to be fried a little bit before they are fit to be called a taco...
Depending on how many I'm making, I use a small non stick pan or a big 'ol griddle. I use a little oil misto and VERY lightly coat the surface and turn the heat on to medium low. Heat up the pan and place the tortillas inside. Let them cook about a minute or so on each side. They might get some brown fry marks, but that's good. I usually prepare them last minute so they're ready to be plated right out of the pan. Once they're cooked they no longer have that flaky-tear-apart-while-you-eat-it texture. I've tried steaming them, microwaving them, baking them; I promise you, this is the best technique.
Taco Ideas:
In the summer we probably eat a taco variation at least twice a week. A favorite is breakfast tacos, black beans, scrambled eggs, cilantro and avocado, and some salsa roja. They're just so fast and fresh! And here are a few other ideas...
Spicy Ground Beef

Sour cream base
Sauteed onions
Ground beef with cumin, cinnamon, annato, salt, pepper, hot chili powder, dried oregano
Cilantro, lime, and Cholula hot sauce
Shredded Chicken Thighs and Jalapeno Lime Slaw

Black beans, lime, and a little chicken broth, heated and pureed
Shredded crock pot chicken thighs with adobo, cumin, chili powder, pepper
Thinly shredded cabbage, red cabbage, carrots, red onions, lime juice, fresh jalapenos, cilantro, olive oil, salt and sugar
Queso fresco
Sesame Ginger Beef and Thai Basil

Thin cut rib eye steaks marinated in teriyaki, soy sauce, ginger, garlic, sesame seeds and sesame oil
Red peppers and red onions, sauteed
Chopped Thai basil & Sriracha sauce
Hope this inspires some taco creations!

Thin cut rib eye steaks marinated in teriyaki, soy sauce, ginger, garlic, sesame seeds and sesame oil
Red peppers and red onions, sauteed
Chopped Thai basil & Sriracha sauce
Hope this inspires some taco creations!
Wednesday, June 26, 2013
Chorizo Corn Chowder
Last night was a dinner of leftovers turned into something I'll definitely try to make again. Earlier this week I had made chorizo tacos and corn on the grill. The chorizo was from a Mexican market, super spicy with that alarming orange hue. We had lots of meat leftover as well and grilled corn that I removed from the cob. So last night I decided to make a chowder of sorts because I also had some cream leftover from a weekend adventure with a Grand Marnier ganache. The result was deliciously spicy and chowdery...

I used:
- About 2 links worth of chorizo, removed from their casing and minced in a pan
- 2-3 cups of grilled or roasted sweet corn, the grilling brings out the sweetness
- 2 smallish red skinned potatoes
- 1 bell pepper (orange)
- 1 yellow onion
- 1 quart of chicken broth
- 1/2 cup of milk
- 1/2 cup of *heavy cream
- Dried thyme, oregano, Adobo seasoning and black pepper
- A handful of cilantro roughly chopped
- Crumbled queso fresco
The part I did the night before:
Remove the chorizo from it's casing and start mincing in a pan as you would ground beef. Because of it's crazy spicy orange color it's difficult to tell when it's done by a color change, so take note of the texture. I doubt you can over cook it anyway. I grilled about 4 ears of corn on medium heat with olive oil, salt and pepper. Keep and eye on the corn and rotate it to evenly grill the kernels. It's okay if they get a little charred.
Making the chowder:
Dice the potatoes into small bite sized pieces, put in a large pot and cover with some broth. Put a lid on it and let them boil 'til soft. Dice the pepper and onion and cook in a lightly oiled pan 'til the onions are translucent and soft. Turn the heat off on them and wait until the potatoes are soft to add them in to the pot. Then add the rest of the broth and the corn. At this point I used my handy immersion blender to blend about half of the soup for a thicker texture. Then I added my chorizo and spices. Let them all simmer together for about 10 minutes. Minutes before you serve it, add the milk, cream and cilantro. Garnish with more fresh cilantro and crumbled queso fresco.
We ate ours with some corn chips. The chorizo is a nice flavorful addition to the creamy corn chowder. It's spicy but doesn't overtake the sweetness of the corn. It's smooth, but still has a healthy amount of chunks. I feel like this would be a nice fall dish. I think it's a little too sweaty outside to fully appreciate it's heartiness. So when corn is in season, I'll grill a bunch, remove the kernels and freeze them for later, preserving that fresh grilled taste!
*If the thought of heavy cream scares you, you could forego diary altogether, I think it would still taste nice. You could also use just milk or fat free greek yogurt, it will just yield some varying textures, experiment!
Friday, May 31, 2013
Mangoes for Dinner
My favorite part of cooking is coming up with awesome meals with whatever you've got. Yeah, I could probably plan out even better meals, but where's the fun in that? Last night I had two mangoes that were going to spoil if I didn't use them that second. Okay, Mangoes, you're coming with me.

- 4 tablespoons of avocado oil
- 4 tablespoons of fresh orange ( about the juice of one orange)
- 2 tablespoons of balsamic vinegar
- 1 tablespoon of honey
Here's a Tip! If you haven't done anything to clean your garbage disposal recently, cut up some leftover citrus rinds and toss them in with some coarse salt and ice cubes. Run hot water and let the ice and salt scour, and the citrusy rinds clean and freshen.
 |
| This avocado oil must be amazing in your hair, gotta try that sometime... |

I also made coconut mango paletas (fancy mexican ice pops) right away so they could freeze in time for dessert. I highly recommend investing in a popsicle mold for healthy refreshing treats. I could easily eat a gallon of a salted caramel ice cream in one sitting, but when there's nothing but fruity popsicles in the fridge, it helps slake my indulgent ice cream tooth. These were made from...
- One and a half mangoes
- A 1/4 cup of coconut cream, not milk. You can buy in it in a teeny carton, or just scrape the creamy top off a can of coconut milk, then you're left with low fat coconut milk for later.
- About a tablespoon of agave for extra sweetness
- Juice from two limes
Blend away and pop them in the molds! (Best enjoyed with an accompanying margarita.)
 |
| Ooo look at that newly mowed lawn! |
Thursday, April 25, 2013
Chili and Polenta: Two Days, Two Ways
DAY ONE:
Chili is one of my favorite things to make mostly because I don't think I make the same batch twice. My chili foundations, if you will, are meat, bell peppers, onions, canned tomatoes, beans, and spices. Pretty obvious. I usually will start with ground turkey because it's tender and low in fat. But I had some local grass fed ground beef leftover from our CSA. So last night I made this chili concoction...
I used:
2 tablespoons of Canola oil
1 lb ground beef
2 red bell peppers
1 red onion
2 tablespoons minced garlic
1 can chili style tomatoes
1 can black beans
About 1 cup of leftover pork shoulder stock, skimmed of fat
1 big glug of Sweet Baby Ray's BBQ sauce
A heaping mound of the following spices in descending order:

Add everything else. Turn the heat down, so that the chili is just bubbling. Simmer, uncovered for about 20 minutes, allowing it to thicken.
In the meantime I made a batch of polenta. I've heard a lot of smack talk about polenta, how it's hard to cook. Apart from a whisking work out, it could not be easier.
Start off with a medium sized pot. In my kitchen, there is no measuring with polenta! I use a quart of low sodium chicken broth. Bring it to a boil. When it's boiling turn the heat down to a simmer. Ground corn meal in it's jar in one hand and whisk in the other, I start to sprinkle in the corn meal. Whisk whisk whisk, until it's dissolved. I keep adding corn meal and whisking until I have to put the corn meal down and hold the pot handle in order to stir. It should be a pudding like consistency. At this point I add some salt, a glug of milk and generous helping of Parmesan cheese. Stir everything together. If you turn off the heat, the mixture will stiffen pretty quickly, so I make sure I make my polenta last, right before I'm ready to serve it up. If there is extra, like tonight, line a baking sheet with parchment and pour out the polenta. It will stiffen quickly. Let it cool and and refrigerate it for later.
Now for this dish, I poured a little polenta in the bottom of the bowl, ladled chili on top, and garnished with crumbled queso fresco and roughly chopped cilantro. When you dig in, it's kinda like a Mexican parfait. Creamy and mild polenta underneath the spicy and textured chili with the fragrant cilantro. Yum.
DAY TWO:
Here's a secret, leftover chili is the best. I guess because all the flavors have time to marinate with one another. Tonight I used leftover chili and polenta. Reheat the chili on the stove top. Start warming a griddle or pan with some oil or butter. I prefer a griddle whenever flipping is involved, gives me lots of space to work with. Take the leftover polenta out of the fridge and using a knife or pizza cutter, slice it up into squares, or pieces. Place the squares on the sizzly griddle and fry each side. The polenta will get more crumbly as it fries so be gentle when flipping. Get each side lightly browned.
Make some lime crema for extra zing. Just mix sour cream and lime juice, bazinga!

Poach the eggs. If you've never poached an egg, (like me!), I found these directions helpful. In the past I've put a fried egg on top, but a poached egg is much more sophisticated and appropriate for this meal. Plate, chili, polenta, egg. Garnish with roughly chopped cilantro and a drizzle of lime crema. Stab the yolky goodness and let it get all over the chili and polenta. Go ahead and just try not to lick the plate clean, impossible!
Chili is one of my favorite things to make mostly because I don't think I make the same batch twice. My chili foundations, if you will, are meat, bell peppers, onions, canned tomatoes, beans, and spices. Pretty obvious. I usually will start with ground turkey because it's tender and low in fat. But I had some local grass fed ground beef leftover from our CSA. So last night I made this chili concoction...
 |
| The polenta is hiding underneath! |
2 tablespoons of Canola oil
1 lb ground beef
2 red bell peppers
1 red onion
2 tablespoons minced garlic
1 can chili style tomatoes
1 can black beans
About 1 cup of leftover pork shoulder stock, skimmed of fat
1 big glug of Sweet Baby Ray's BBQ sauce
A heaping mound of the following spices in descending order:
- Adobo
- Cumin
- Hot Chili Powder
- Oregano
- Cinnamon

Add everything else. Turn the heat down, so that the chili is just bubbling. Simmer, uncovered for about 20 minutes, allowing it to thicken.
In the meantime I made a batch of polenta. I've heard a lot of smack talk about polenta, how it's hard to cook. Apart from a whisking work out, it could not be easier.
Start off with a medium sized pot. In my kitchen, there is no measuring with polenta! I use a quart of low sodium chicken broth. Bring it to a boil. When it's boiling turn the heat down to a simmer. Ground corn meal in it's jar in one hand and whisk in the other, I start to sprinkle in the corn meal. Whisk whisk whisk, until it's dissolved. I keep adding corn meal and whisking until I have to put the corn meal down and hold the pot handle in order to stir. It should be a pudding like consistency. At this point I add some salt, a glug of milk and generous helping of Parmesan cheese. Stir everything together. If you turn off the heat, the mixture will stiffen pretty quickly, so I make sure I make my polenta last, right before I'm ready to serve it up. If there is extra, like tonight, line a baking sheet with parchment and pour out the polenta. It will stiffen quickly. Let it cool and and refrigerate it for later.
Now for this dish, I poured a little polenta in the bottom of the bowl, ladled chili on top, and garnished with crumbled queso fresco and roughly chopped cilantro. When you dig in, it's kinda like a Mexican parfait. Creamy and mild polenta underneath the spicy and textured chili with the fragrant cilantro. Yum.
DAY TWO:
Here's a secret, leftover chili is the best. I guess because all the flavors have time to marinate with one another. Tonight I used leftover chili and polenta. Reheat the chili on the stove top. Start warming a griddle or pan with some oil or butter. I prefer a griddle whenever flipping is involved, gives me lots of space to work with. Take the leftover polenta out of the fridge and using a knife or pizza cutter, slice it up into squares, or pieces. Place the squares on the sizzly griddle and fry each side. The polenta will get more crumbly as it fries so be gentle when flipping. Get each side lightly browned.
Make some lime crema for extra zing. Just mix sour cream and lime juice, bazinga!

Poach the eggs. If you've never poached an egg, (like me!), I found these directions helpful. In the past I've put a fried egg on top, but a poached egg is much more sophisticated and appropriate for this meal. Plate, chili, polenta, egg. Garnish with roughly chopped cilantro and a drizzle of lime crema. Stab the yolky goodness and let it get all over the chili and polenta. Go ahead and just try not to lick the plate clean, impossible!
 |
| This would have have been better served in a bowl. |
Monday, April 15, 2013
Beef Stroga-knock-off
Friday night was rainy and a bit miserable. Chris was also feeling under the weather, exhibiting flu-like symptoms. Blerg. I wanted to make some chicken soup, but didn't have any chicken, kinda a key ingredient. So I made up something, I think, equally comforting. My mom used to make Beef Stroganoff covering broad egg noodles. Mmm a delicious excerpt from my childhood. And although I didn't have any tenderloin, I did have ground beef. I could work with this... hence the "Stroga-knock-off".

I used:
1 lb ground beef
1 lb white button mushrooms
1 lb of egg noodles
2 sliced garlic gloves
1/2 cup of frozen peas
1/2 stick of butter
1/3 cup Cinzano, red vermouth
2 cups chicken broth
3/4 sour cream
2 tablespoons Dijon mustard
2 teaspoons onion powder
Salt & Pepper to taste
*This made a lot. About 6-8 servings. I would have liked to use beef broth, onions and fresh dill, but didn't have them on hand.
In a pan melt the butter and add halved mushrooms and sliced garlic. Flip all the mushrooms onto their flat side and on medium heat, allow them to brown. When the flat side is browned, scrape up everything and brown them all over. Also start boiling water for the noodles.

While the mushrooms did their thing I started my new book, Relish. A graphic novel detailing the authors memories of food throughout her life. She also inserts illustrated recipes throughout. Such an enjoyable read! But back to the beef.

Cook the noodles when the water is ready. Add the ground beef, there should be enough juice and butter leftover so that the beef doesn't stick. Push the mushrooms and garlic to the edge of the pan while you brown and mince the beef.

Add the peas, red vermouth, chicken broth, and let it simmer for a bit, until the peas are unfrozen. Then add the sour cream, mustard, onion powder and salt and pepper. Give a stir and let everything simmer together for a few minutes. Adjust the thickness of the sauce by adding more broth or sour cream.

Your noodles should be ready and waiting to be topped off with the beefy creaminess. Liberally apply cracked pepper.

Wednesday, April 3, 2013
Maharajah Lentil Curry
I will preface this by saying, this is by no means "Indian Cuisine". This dinner is a quick and easy creation when we've run out of fresh veggies and I'm too lazy to stop at the market. The key ingredient lies with the Penzey's Maharajah Curry powder. I highly recommend all of their Indian spice blends. I usually get overwhelmed by ingredients in Indian recipes; I'll rarely have half the items on hand. However, Penzey's spice blends let me fake it! I sound like I'm on a commercial, but seriously, it's great. This curry is hand mixed from turmeric, coriander, cumin, cardamom, fenugreek, ginger, nutmeg, fennel, cinnamon, white pepper, black pepper, cloves, red pepper and saffron.

For this dinner I used...


For this dinner I used...
- A pound of boneless, skinless chicken thighs
- A package of Tasty Bite Madras Lentils
- A can of diced tomatoes
- About of cup of frozen chopped spinach
- 3 tablespoons of Penzey's Maharajah Curry powder
- 1 cup of Jasmine rice

Preheat the oven to 450°. In a 2 inch deep roasting dish mix your chicken thighs with the curry, lentils and tomatoes. Cook uncovered for a half hour, add the spinach and cook for another 10 minutes.

While that's in the oven, make a perfect batch of rice. And serve while it's hot!
Like I said the spice is really what makes this meal. I will always start with the chicken thighs and end with the spice, the veggies depend on what I have in the fridge.
Penzey's Indian Spice Collection contains:
Like I said the spice is really what makes this meal. I will always start with the chicken thighs and end with the spice, the veggies depend on what I have in the fridge.
Penzey's Indian Spice Collection contains:
- Sweet Curry Powder
- Hot Curry Powder
- Maharajah Curry Powder (with saffron)
- Tandoori Chicken Seasoning
- Rogan Josh
- Balti Seasoning
- Punjabi Style Garam Masala
- Vindaloo Seasoning
Wednesday, March 27, 2013
(Don't Think About the Calories) Mushroom Soup
The most indulgent thing I make, and love to eat, is mushroom soup. I adore mushrooms to begin with, but this soup is creamy and earthy and sinfully good. I say "sinfully" because butter and heavy cream are it's main components. My mom used to make this soup, but not often, making it more desired. When I finally asked her how to make it she said, "Oh, it's real easy, just do mushrooms and onions softened in butter, vermouth, beef broth, flour to thicken it, salt and pepper and finish with heavy cream." My mother is an extraordinary cook, but she's not the best at explaining how she makes things. Since then, I think I have perfected my variation. Last night we binged on soup and homemade bread. We barely had to wash the dishes.


Start with deep pan. Put a stick of butter in and start warming it. Slice the mushrooms thinly. I cheat and use a mandolin on it's middle setting. Slice the onion as well (same thickness). Add these to your warm butter, heat on medium high. We're not trying to get the mushrooms browned, just infused with butter.
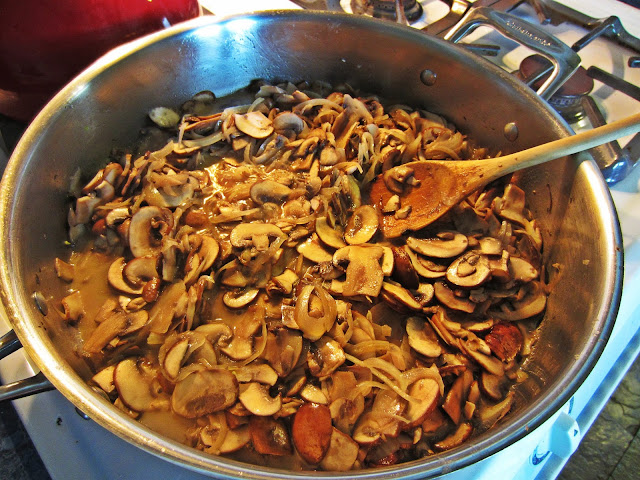
They'll cook down, about 10 minutes, and leave a mushroom and butter infused liquid. Use a slotted spoon to scoop out half of the mushrooms and onions, they'll be reserved for more texture.
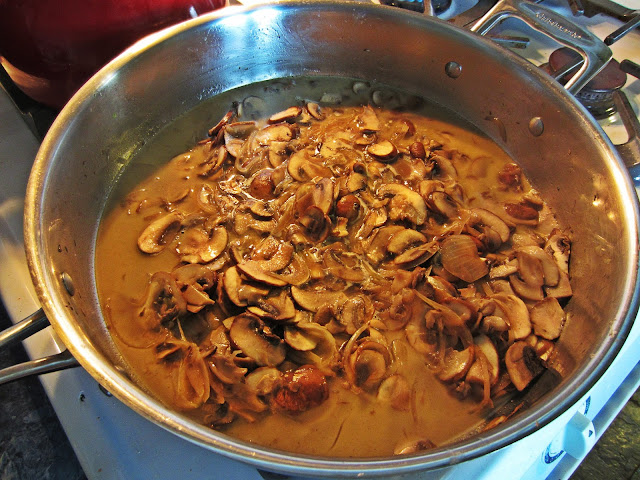
Turn the heat down to a low simmer, add the vermouth, and let it cook off for a minute. Then add the broth. Then the flour. Give it a stir. Then I use an immersion blender right in the pan and puree everything. If you don't have a blender, or you want all chunks, I would whisk the flour into the broth in a separate pan before you add it to the soup. Otherwise you won't be able to efficiently whisk out the flour lumps.

Add salt, pepper and onion powder to taste. And make sure you do taste it before the cream is added.
Add the reserved fungi. Add the heavy cream, and taste again. This should make about 4 respectable portions, or 2 ravenous portions. What it lacks in presentation, it makes up for 10 fold in flavor. Enjoy immediately with warm crusty bread and a Sauvignon Blanc.


- 2 Packages of Cremini mushrooms
- 1 onion
- 1 stick of unsalted butter
- 3/4 cup Dry Vermouth
- 3 Cups of beef broth
- 2 tablespoons of flour
- 1/4 cup heavy cream
- Teaspoon of onion powder
- Salt & Pepper
Start with deep pan. Put a stick of butter in and start warming it. Slice the mushrooms thinly. I cheat and use a mandolin on it's middle setting. Slice the onion as well (same thickness). Add these to your warm butter, heat on medium high. We're not trying to get the mushrooms browned, just infused with butter.

They'll cook down, about 10 minutes, and leave a mushroom and butter infused liquid. Use a slotted spoon to scoop out half of the mushrooms and onions, they'll be reserved for more texture.

Turn the heat down to a low simmer, add the vermouth, and let it cook off for a minute. Then add the broth. Then the flour. Give it a stir. Then I use an immersion blender right in the pan and puree everything. If you don't have a blender, or you want all chunks, I would whisk the flour into the broth in a separate pan before you add it to the soup. Otherwise you won't be able to efficiently whisk out the flour lumps.

Add salt, pepper and onion powder to taste. And make sure you do taste it before the cream is added.
Add the reserved fungi. Add the heavy cream, and taste again. This should make about 4 respectable portions, or 2 ravenous portions. What it lacks in presentation, it makes up for 10 fold in flavor. Enjoy immediately with warm crusty bread and a Sauvignon Blanc.
Saturday, July 28, 2012
Tequila Lime Chicken (and perfecting stove top rice)

We got some interesting peppers in our last CSA, Anaheim Chiles and pretty purple peppers. I sliced them up with a red onion and sauteed them in some oil. I like my peppers and onions a little charred, so I start them on higher heat, then reduce to get them all soft and flavorful.
Meanwhile, I started a pot of white rice. I finally found my perfect rice making process..
- Start off a with a pot that you know has a corresponding, tight fitting lid.
- Fill it with double the amount of water that you want to make rice. For two of us, I usually do 1 cup of rice (which leaves a bit for leftovers). So, that’s two cups of water.
- Bring the water to a boil, but don’t let it boil too long, or else you evaporate too much water, and your water to rice ratio gets off balance!
- Add your rice, stir it up, otherwise you get clumpy uneven cooking. Put the lid on, and turn the heat waaaaay down. As you cook the rice, it should not bubble over at any point.
- Stir periodically, I stir about twice in the cooking process. About 20 minutes. Turn the heat off when you can’t see any more water, but the rice still looks “wet”. If you waited to long and the rice is beginning to stick to the bottom, don’t worry. This is when you can season it or add butter or herbs or what have you. Tonight, I liberally added Adobe seasoning, lime juice and fresh chopped cilantro.
- Now that the heat is off, put the lid back on, and don’t touch! This is the secret. Just let the rice sit and steam and get delicious. I start my rice first thing, then let it sit and steam while I cook right up til it’s time to plate up. I should also mention, I mostly use Jasmine rice, so cooking times may vary with different types of rice.
Back to the chicken. I sliced up some chicken breasts and added them to my half cooked peppers and onions. When the chicken was almost cooked through, I added salt, pepper, cumin. Then juice of a whole lime and a healthy douse of tequila. Let it simmer.
I also opened a can of black beans, drained them and put them in a put on low heat, just to warm them. I added some chicken pan juice and pureed them for the side.
This pretty much comes out like Fajitas without the tortillas, so enjoy however you please. The beans make a nice dipper for mouthful of chicken and veggies. Or, mix everything up together, like my male counterpart. Either way, it’s got good textures and tangy lime and tequila flavors.
I also opened a can of black beans, drained them and put them in a put on low heat, just to warm them. I added some chicken pan juice and pureed them for the side.
This pretty much comes out like Fajitas without the tortillas, so enjoy however you please. The beans make a nice dipper for mouthful of chicken and veggies. Or, mix everything up together, like my male counterpart. Either way, it’s got good textures and tangy lime and tequila flavors.
Tuesday, June 5, 2012
Chicken Tikka Masala with Spinach and Curried Cauliflower

My husband refers to Cauliflower as “Ghost Broccoli”. If you can imagine, he’s not a fan. So this weekend my mission was to get him to enjoy Ghost Broccoli…
I put boneless skinless chicken thighs in the crockpot on high for 3 hours. Combined with 5 tablespoons of a Tikka Masala paste. In the last 10 minutes I added thawed frozen spinach that I squeezed the excess water from.
I cut up a full head of cauliflower put in a big pan with some vegetable oil. I added…
- Curry Powder
- Chili Powder
- Celery seeds
- Cumin
- and Salt to taste
I warmed up some chapatis, but you could have naan or rice too.
Success! Ghost Broccoli was eaten and enjoyed by all! (leftovers were also sought after).
Friday, June 1, 2012
Vietnamese(ish) Noodle Salad


I attempted to recreate a dish we have at our favorite Vietnamese Restaurant. I had leftover rice noodles and it made a delicious hot weather meal.
I started off toasting some sesame seeds in sesame oil, then adding a shredded head of Napa cabbage, just to wilt the leaves a bit.
The layer of cabbage goes first then the leftover rice noodles with ginger and chili oil on top. Then the fun part. I already had pickled silvered carrots, sliced cucumbers, fresh torn mint leaves, and jalapenos.
I went the extra mile and crushed some cashews and mixed them with Whole Foods Ginger Soy Marinade to make a saucey topping over everything.
Douse with fresh lime and Sriracha and devour.
Thursday, May 17, 2012
BOK-pocalypse!

BOK-pocalypse!
(Justly named because when you put the Bok Choy in the wok last to steam, it looks like it takes over everything. But don’t worry, it dramatically reduces in size post-steam)
- Sesame Oil
- Onion
- Carrot
- Boneless Skinless Chicken Thighs
- BOK CHOY!
- Scallions
- Garlic
- Ginger
- Soy Sauce
- Jasmine Rice
- Sriracha to taste
Subscribe to:
Posts (Atom)