Apple pie is a Thanksgiving staple in my book. Although I'm an expert at eating them, I'm not an expert at baking them, yet. Emily was with me on Saturday night and walked me through this recipe because she clearly possesses superior baking skills and she's also admitted to making mini versions of this for herself from time to time, check it out here. Why did we make an apple pie a whole week before Thanksgiving? Because we can, that's why.
Showing posts with label food. Show all posts
Wednesday, November 27, 2013
Thursday, October 24, 2013
Homemade Halloween Candy
As a kid it was a cardinal Trick-or-Treating rule to not eat any homemade or opened items. Which is a shame now because I love the idea of making my own Halloween candy. But who says you have to make it for the Trick-or-Treaters? Instead, be a hit in the office or at a party. Here's a few recipes for better-than-store-bought-candy. Although I've only attempted the peanut butter cups (my favorite) I hope to be indulging my sweet tooth in the next week, and maybe getting a stomachache or two.
Tuesday, October 22, 2013
Beet and Spinach Orzo
So I have to admit I haven't been stellar at keeping up with Meatless Mondays, but we do have a lot of meatless other days. I feel like I've significantly reduced our meat consumption, which is the end goal anyway. And now that the chickens are laying we can get a lot of our protein from eggs. I got some tasty beets from the farmer's market and wanted them to be the star of something. I found this recipe on Food52, I know, I'm on there a lot, but I had this recipe saved and decided to make it last night.
Thursday, October 3, 2013
Easy as No Bake Vegan Granola Bars
I don't know where the expression "easy as pie" came from, but making pie isn't exactly easy. However, I'll tell you what is easy, this granola recipe by Gena Hamshaw.
I've tried to take my own advice and start snacking on healthy things throughout the day, rather than just eating a container of leftover dinner from the night before. This recipe caught my eye because of the "no bake" factor. The last time I attempted baking granola (late at night) after hours of super low temperature baking, I took it out and was immediately puzzled by the fact that it wasn't hard and chewy. Oh, impatience, you strike again.
Do you want your granola ASAP? Quick, to the cupboard! I used:
2 1/2 cups rolled oats
1/2 cup raw pumpkin seeds (pepitas)
I've tried to take my own advice and start snacking on healthy things throughout the day, rather than just eating a container of leftover dinner from the night before. This recipe caught my eye because of the "no bake" factor. The last time I attempted baking granola (late at night) after hours of super low temperature baking, I took it out and was immediately puzzled by the fact that it wasn't hard and chewy. Oh, impatience, you strike again.
Do you want your granola ASAP? Quick, to the cupboard! I used:
2 1/2 cups rolled oats
1/2 cup raw pumpkin seeds (pepitas)
1/2 cup of sliced almonds
1/4 cup raisins
NUTRITION FACTS
Serving Size: 1 bars
Amount per Serving: Calories 123, Calories from Fat 83.4
1/4 cup raisins
1/4 cup dried cranberries
2/3 cups almond butter
1 teaspoon of cinnamon
1/2 cup agave nectar (adjust based on how well things stick together)
1/8 teaspoon sea salt (adjust based on which nut butter you use)
1/2 cup agave nectar (adjust based on how well things stick together)
1/8 teaspoon sea salt (adjust based on which nut butter you use)
Mix the nut butter and agave separately at first to get a homogeneous mixture. Then stir everything together and shape it into a square on a wax paper lined baking sheet.
Pop in the refrigerator for an hour, or so, to harden it up before you cut it into little bars. I got about 16 bars from this square.
Healthy snack accomplished! They are a tad sticky and if you hold them in your hand for too long they start to fall apart. But if you're holding onto granola for that long you deserve to get messy ;)
Serving Size: 1 bars
Amount per Serving: Calories 123, Calories from Fat 83.4
Total Fat 9.27g
Saturated Fat 0.93g
Cholesterol 0mg
Sodium 10.76mg
Total Carbohydrate 22.91g
Dietary Fiber 2.71g
Sugars 9.25g
Protein 4.48g
Thursday, September 26, 2013
When Peppers Attack
The other day I was on a roll in the kitchen. It was a leisurely Sunday afternoon, I had already baked some bread, roasted some squash for dinner and was in the middle of canning some salsa verde. We got a good amount of poblano peppers this year and I thought I'd add them to some salsa verde in lieu of jalapenos.
Things were going well, the house smelled of deliciousness and I had nowhere else to be. Unfortunately I was in for a turn of events. This story is going in the misadventure column.
I've previously posted a recipe for salsa verde. Using tomatillos, jalapenos, lime, cilantro, salt and sugar. Check it out here. I decided to double, maybe triple, the amount of poblanos because, to my recollection, they're rather mild. I set up all my canning gear. Stock pot, jar grabbers, jars, lids rings. This would be a small batch, about 5 pints worth. As I let the tomatillos boil, I halved the peppers and started roasting them.
As many peppers as I have cut up, I've never had a problem with pepper oil burning me in awful places. I've heard horror stories of burning hands, eyes, and even genitalia... BUT it's never happened to me. Until then. As it's allergy season, I rub my nose a lot. Suddenly I felt the burning at the top of my lip, then at the base of my nose, around my nose, and up inside my nose. Oh, crap. As I breathe in, I can feel the intense burning travelling further up my nose. All I knew was that attempting to wash it off would only spread it further. I quickly left everything that was happening in the kitchen and flew upstairs to where Chris was enjoying his afternoon. "Quick, Google something to counteract pepper oil on your skin!", I say in a panic. In my hypochondriac mind, I'd be asphyxiating in mere minutes...
I'll save you from the drama in between. The lesson learned here, is that lemon juice will relieve your skin from a run in with peppers on your skin. Chris's dad was the hero in the end, telling me to just go ahead and rub that lemon juice all up my nose. As the juice dried it put out the flames in and around my nose. Phew.
Don't worry, I continued to can the salsa! It was totally worth it.
Things were going well, the house smelled of deliciousness and I had nowhere else to be. Unfortunately I was in for a turn of events. This story is going in the misadventure column.
I've previously posted a recipe for salsa verde. Using tomatillos, jalapenos, lime, cilantro, salt and sugar. Check it out here. I decided to double, maybe triple, the amount of poblanos because, to my recollection, they're rather mild. I set up all my canning gear. Stock pot, jar grabbers, jars, lids rings. This would be a small batch, about 5 pints worth. As I let the tomatillos boil, I halved the peppers and started roasting them.
As many peppers as I have cut up, I've never had a problem with pepper oil burning me in awful places. I've heard horror stories of burning hands, eyes, and even genitalia... BUT it's never happened to me. Until then. As it's allergy season, I rub my nose a lot. Suddenly I felt the burning at the top of my lip, then at the base of my nose, around my nose, and up inside my nose. Oh, crap. As I breathe in, I can feel the intense burning travelling further up my nose. All I knew was that attempting to wash it off would only spread it further. I quickly left everything that was happening in the kitchen and flew upstairs to where Chris was enjoying his afternoon. "Quick, Google something to counteract pepper oil on your skin!", I say in a panic. In my hypochondriac mind, I'd be asphyxiating in mere minutes...
I'll save you from the drama in between. The lesson learned here, is that lemon juice will relieve your skin from a run in with peppers on your skin. Chris's dad was the hero in the end, telling me to just go ahead and rub that lemon juice all up my nose. As the juice dried it put out the flames in and around my nose. Phew.
Don't worry, I continued to can the salsa! It was totally worth it.
Tuesday, September 24, 2013
Microwaved Eggplant: I'm a Believer
If the title of this didn't scare you away, but rather intrigued you, I promise you won't be disappointed. This was another recipe I found through Food52, one of "genius" proportions that involves microwaving eggplant. It was quite timely because I found this the day after I wrote the post on Baba Ganoush, and the neediness of eggplant, for lack of a better word. Eggplant ripens just at the end of the summer and most times it's still way too hot to be using your oven. Enter, the microwave. Barbara Kafka's Marinated Eggplant Recipe has made a believer out of me; you can microwave eggplant, and it will be glorious.
You'll need:
You'll need:
- 1/4 cup tamari or soy sauce
- 2 tablespoons loosely packed cilantro leaves
- 1 tablespoon rice wine vinegar
- 1 tablespoon toasted sesame oil
- 1 1/2 medium-size cloves garlic
- 3/8 ounces fresh peeled ginger (a 1-by- 1/4-inch piece), cut crosswise into 1/4-inch slices
- 4 small Chinese eggplants (2 to 3 ounces each)
Method:
- Combine all ingredients, except eggplants, in a blender. Process until smooth.
- Prick the eggplants several times with a fork and pull off the leaves. Cut in half lengthwise. On the open side of each half, make three deep diagonal slashes in each direction. Place eggplants skin side down in a 13-by-9-by-2-inch microwave-safe oval dish.
- Spoon 1 1/2 teaspoons of the marinade over each eggplant half. Rub the marinade into the flesh so that it runs into the cuts. Turn eggplants skin side up. Pour remaining marinade into dish. Let stand for 45 minutes.
- Turn eggplants skin side down. Cover tightly with lid or microwave plastic wrap. Cook at 100 percent power in a high-power oven for 10 minutes. Prick plastic to release steam.
- Remove from microwave and uncover. Serve warm or at room temperature.
In my excitement to try this out, I failed to notice the "marinate for 45 minutes". At the time, I was really impatient, but I think it's a crucial part.
After the eggplant is microwaved, it comes out looking like it's been roasted for a long time. They're not spongy, they're smooth and completely infused with the marinade. Wow. I decided to make some soba noodles and extra cilantroed shrimp with this. Shrimp wouldn't be my first choice, but it was all I had, and it tasted mighty fine. In the future, I might include some marinated, pan-fried tofu. OR just eat the eggplant on it's own because it was DE-lish.
Now I know we're at the end of September, and you can probably use your ovens without sweating all over the kitchen, but this dish will still be awesome. Quick, go out and get some eggplant before you start spending all your days making roasts and stews!
Tuesday, September 17, 2013
End of Summer Apple and Fennel Soup
I recently purchased some fennel from the farmers market with the intent on grilling them, but I came across this soup on Food52. A tart apple and fennel soup sounded perfect for a Meatless Monday meal. This soup was so light and sweet. With apple season at our door, I'll certainly be making this again!
I used:
2 tablespoons unsalted butter
1 large shallot, diced
1 garlic clove, minced
1 large bulb fennel, cored and cut into 1/2-inch chunks
2 large Granny Smith, cut into 1/2-inch chunks
2 stalks celery, sliced in 1/2-inch pieces, leaves and all
1 tablespoon lemon juice
1 tablespoon honey
I used:
2 tablespoons unsalted butter
1 large shallot, diced
1 garlic clove, minced
1 large bulb fennel, cored and cut into 1/2-inch chunks
2 large Granny Smith, cut into 1/2-inch chunks
2 stalks celery, sliced in 1/2-inch pieces, leaves and all
1 tablespoon lemon juice
1 tablespoon honey
1/2 teaspoon kosher salt plus more to taste
3 cups chicken stock
1 cup watercress
3 tablespoons chopped fresh mint
1 teaspoon chopped fresh thyme
2 tablespoons chopped fennel fronds
1/2 cup Greek yogurt (I didn't have any heavy cream as suggested, but I thought this was an acceptable lighter option)
3 cups chicken stock
1 cup watercress
3 tablespoons chopped fresh mint
1 teaspoon chopped fresh thyme
2 tablespoons chopped fennel fronds
1/2 cup Greek yogurt (I didn't have any heavy cream as suggested, but I thought this was an acceptable lighter option)
As it says in the title, this soup really did only take 20 minutes. Saute the minced shallot, garlic and butter in a heavy bottomed sauce pan. After a minute or two, add the cubed fennel, apple, celery, chicken stock, honey, lemon. Simmer for 10 -15 minutes so that everything gets soft. Add the herbs and puree. The recipe says to strain the puree, but I prefer a little texture. Stir in the yogurt last, and garnish with more herbs. In the future I might swap butter for reserved bacon fat. I think a lil' hint 'o bacon will give it extra oompf. But for Meatless Monday it was perfection!
Thursday, August 29, 2013
Puttin' Up Tomatoes
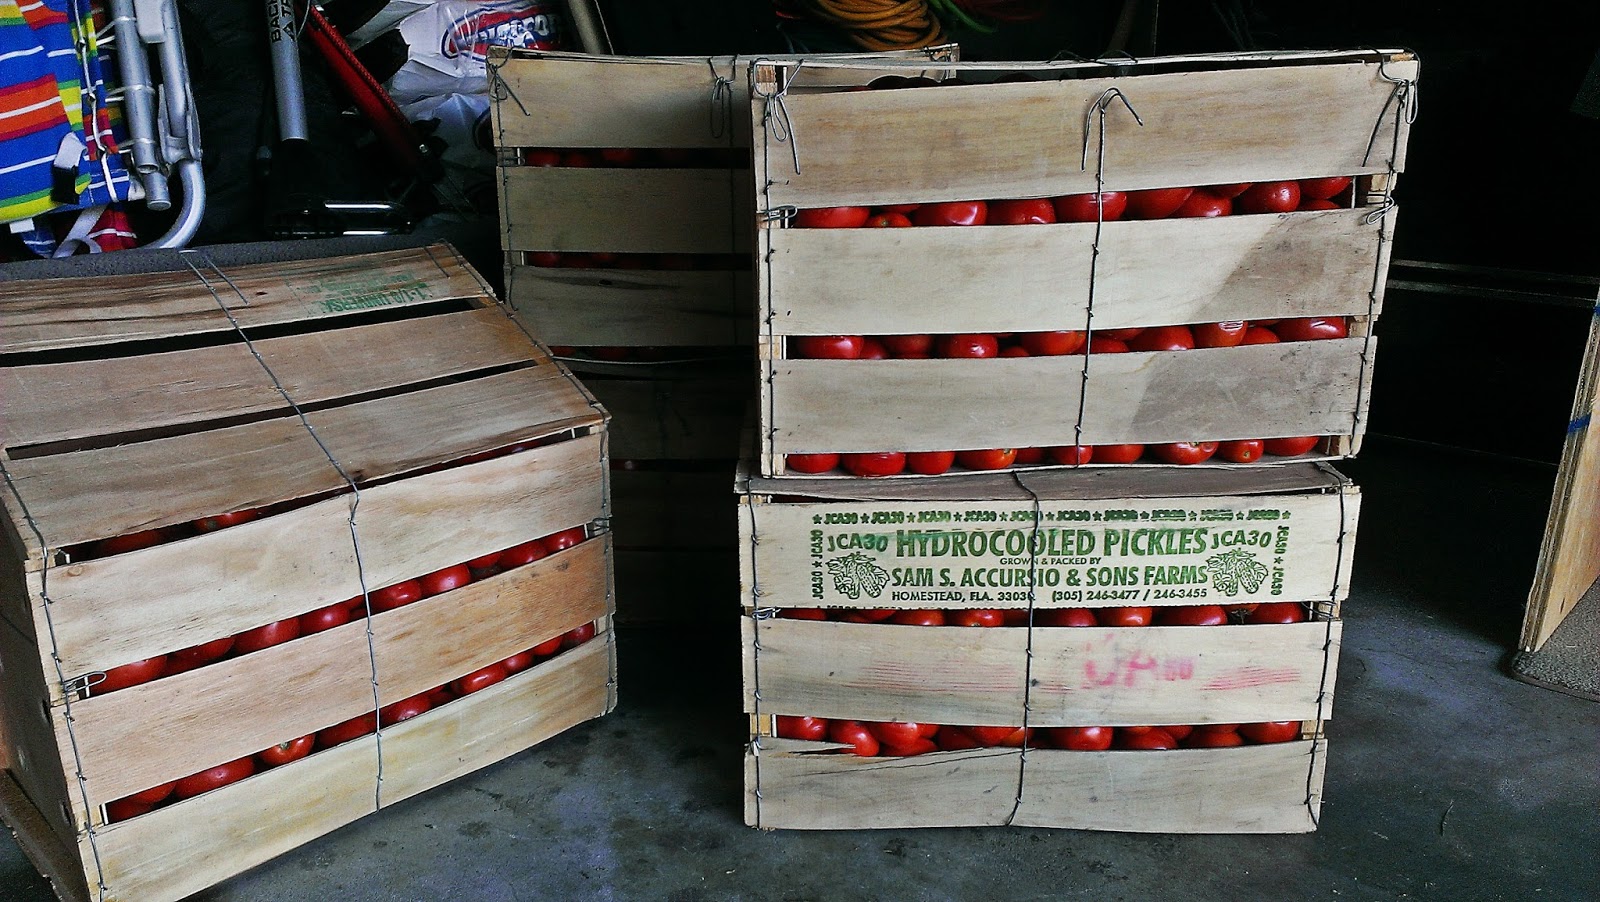
This past weekend was one of epic tomato proportions. Led by the expertise of Chris's parents, we helped put up 500 pounds of tomatoes in two days. We'll have enough jarred tomatoes to last a year. Whew!
First off, we had to acquire tomatoes, because as prolific as our tomatoes were this year, we didn't have that many. After calling around to a few farms, Mellen found a place in Bordentown, NJ that had a good crop of plum tomatoes. Later that day they arrived, SUV filled to the brim with tomatoes, ten crates worth.
For this tomato operation we borrowed a fancy Italian motorized grinder that actually skins and seeds the little fruits and extrudes the bright pink pulpy goodness. It's truly an amazing machine. Chris's parents, and plenty of those before them, used to process tomatoes with a hand crank. Yikes.
For any canning process there are certain preparations that need to happen. The first is gathering supplies, jars, lids, rings, stock pots, ladles, and plenty of towels. The work space should be clean and clear of non-essential items (here, wine to drink during the process is considered essential). We brought the crates into the kitchen, and set up a big table for cutting and grinding.

Emily and Chris unloaded the tomatoes into the kitchen sink filled with water and a little vinegar to
clean the tomatoes. They pulled out each one, gave it a once over and removed "any spots that you wouldn't eat". Overall, the tomatoes were beautifully ripe, with few spots needing removal. (Anything that was removed went to the chickens!). After they were inspected, they were brought to the cutting table where I quartered them and put them in line to be processed. They all go through the top of the grinder, down to an auger that turns and removes the skin and seeds.
We did this for hours; collecting sauce in stock pots and removing the skin and seeds. As we neared time to jar, various pots were put on the stove to bring to a boil and reduce a bit. Any foaminess that bubbles up is scraped off. The lions share of the tomatoes remained plain so that later on it can be used in stews and chilis, or turned into a thicker sauce with other ingredients. Done this way, we have lots of options. (That's not even half of the jars shown below.)
I was always nervous to can things because I was convinced that I wouldn't do it properly, the jars wouldn't seal correctly, and disaster would ensue. However, after doing it with people who know what they're doing, I realized there is nothing to be afraid of! Don't get me wrong, canning is a science, but it's not rocket science.
The sauce is brought to a boil, which ensures that any bad bacteria is killed off. The jars and rings get dunked in boiling water to disinfect and to bring them up to temperature so that the hot sauce doesn't crack the glass. The lids are put in hot, but not boiling, water because it would destroy the rubber vacuum seal. We put a few leaves of basil in the bottom of each jar for a bit of flavor. The sauce is poured in with the help of a funnel and the rim is wiped clean. It's important that nothing disrupts the lids seal. Using a magnetic lid lifter, a lid and ring are put on top, and twisted tightly. Done! Some people put the hot jars back into boiling water to process further, but we skipped that step because we boiled the rings before. After that, they slowly cool, and you hear the chorus of little "pops" as the lids seal down. If the lid can be pressed down then it goes in the fridge right away.
I think after the eighth hour on Sunday night we were getting bit delirious. Chris fashioned the hot jar glove into a puppet... A weekend of hard work, but definitely worth it! Now I'm ready to can everything. No, really. I just bought a book called, Canning for a New Generation: Bold, Fresh Flavors for the Modern Pantry...
First off, we had to acquire tomatoes, because as prolific as our tomatoes were this year, we didn't have that many. After calling around to a few farms, Mellen found a place in Bordentown, NJ that had a good crop of plum tomatoes. Later that day they arrived, SUV filled to the brim with tomatoes, ten crates worth.
For this tomato operation we borrowed a fancy Italian motorized grinder that actually skins and seeds the little fruits and extrudes the bright pink pulpy goodness. It's truly an amazing machine. Chris's parents, and plenty of those before them, used to process tomatoes with a hand crank. Yikes.
For any canning process there are certain preparations that need to happen. The first is gathering supplies, jars, lids, rings, stock pots, ladles, and plenty of towels. The work space should be clean and clear of non-essential items (here, wine to drink during the process is considered essential). We brought the crates into the kitchen, and set up a big table for cutting and grinding.

Emily and Chris unloaded the tomatoes into the kitchen sink filled with water and a little vinegar to
clean the tomatoes. They pulled out each one, gave it a once over and removed "any spots that you wouldn't eat". Overall, the tomatoes were beautifully ripe, with few spots needing removal. (Anything that was removed went to the chickens!). After they were inspected, they were brought to the cutting table where I quartered them and put them in line to be processed. They all go through the top of the grinder, down to an auger that turns and removes the skin and seeds.
We did this for hours; collecting sauce in stock pots and removing the skin and seeds. As we neared time to jar, various pots were put on the stove to bring to a boil and reduce a bit. Any foaminess that bubbles up is scraped off. The lions share of the tomatoes remained plain so that later on it can be used in stews and chilis, or turned into a thicker sauce with other ingredients. Done this way, we have lots of options. (That's not even half of the jars shown below.)
I was always nervous to can things because I was convinced that I wouldn't do it properly, the jars wouldn't seal correctly, and disaster would ensue. However, after doing it with people who know what they're doing, I realized there is nothing to be afraid of! Don't get me wrong, canning is a science, but it's not rocket science.
The sauce is brought to a boil, which ensures that any bad bacteria is killed off. The jars and rings get dunked in boiling water to disinfect and to bring them up to temperature so that the hot sauce doesn't crack the glass. The lids are put in hot, but not boiling, water because it would destroy the rubber vacuum seal. We put a few leaves of basil in the bottom of each jar for a bit of flavor. The sauce is poured in with the help of a funnel and the rim is wiped clean. It's important that nothing disrupts the lids seal. Using a magnetic lid lifter, a lid and ring are put on top, and twisted tightly. Done! Some people put the hot jars back into boiling water to process further, but we skipped that step because we boiled the rings before. After that, they slowly cool, and you hear the chorus of little "pops" as the lids seal down. If the lid can be pressed down then it goes in the fridge right away.
![]() |
![]() |
I think after the eighth hour on Sunday night we were getting bit delirious. Chris fashioned the hot jar glove into a puppet... A weekend of hard work, but definitely worth it! Now I'm ready to can everything. No, really. I just bought a book called, Canning for a New Generation: Bold, Fresh Flavors for the Modern Pantry...
Labels:
eating/drinking,
food,
garden,
homesteading,
pull
Tuesday, August 27, 2013
Meatless Mondays
I often joke that I would make a fantastic vegetarian if I didn't love meat so much. And what I mean by that is simply that I relish eating plenty of fruits, vegetables, and whole grains, and can happily devour meals without meat. It's just that I really really love meat. I am quite aware that there are lots of arguments why we shouldn't eat meat, and have had many a philosophical discussion on the matter. But I always come back to the question, "do you eat to live, or live to eat", and I most definitely fall into the latter. Despite all the reasons, if I restricted myself from enjoying ALL the food in the culinary spectrum I think, truly, life would be a bit more dull for me. But the tiny tree hugger in me tugs at my heartstrings because she's worried about carbon footprints, water usage, ethical treatment of animals and such.
That said, as a household, we make efforts to eat in a more sustainable fashion; by choosing local produce and meat when we can, and raising our own chickens for eggs. We probably eat a vegetarian dinner two, three times a week, just because. But I'd like to try to establish a lifestyle less meat dependent for health, environmental, and economic reasons. In Michael Pollan's book, Food Rules: An Eater's Manual, he lists guidelines in which to eat balanced and healthfully. It's number twenty three that is applicable here...
23. Treat meat as a flavoring or special occasion food
I think that's a great guideline, viewing meat as a treat rather than a daily staple. And I can live with that (Chris too). So, my first step is to join in with the "Meatless Mondays" campaign. Weekly devoting a whole day to not eating animals! If anything, it will encourage me to plan meatless meals more often. We try our best to balance what's good for ourselves, the wellness of our environment, and the limits of our budget, which can be difficult at times! But living the lifestyle we do, we're very lucky to be able to make decisions such as these. So for our first Meatless Monday we had a coconut curry with a variety of beans, carrots, onions and heaps of Thai basil from the garden. The curry was made from simmering coconut milk and Penzey's Bangkok Blend, so fragrant!

UPDATE: I'm the worst! Only one week later I broke Meatless Monday for some IKEA meatballs at lunch. To be fair, I didn't do it knowingly, and it was Labor Day. But still, I need to be a little more conscious in the future...
Friday, August 9, 2013
Pizza Night
I don't remember exactly when my mom started making pizza, but when she started, she didn't look back. Friday nights became pizza night, followed by some quality family television on TGIF on ABC. Remember Boy Meets World? Classic! I've mentioned before that I never took interest in learning to cook as a young'un, and I never thought to learn to make pizza. I just enjoyed being served the cheesy goodness on a weekly basis. Finally, I tried it out for myself, with some direction from my ma.
This dough recipe is quick and easy for relatively instant pizza gratification.
I use:
2 1/2 cups of bread flour
1 cup of warm water
1 teaspoon of sugar
1 teaspoon of salt
1 tablespoon of olive oil
1 packet of "Pizza Crust Yeast"
A pizza stone
Preheat the oven to 450ºF right away. In a bowl, empty the yeast packet, and add the sugar and warm water. Wait about 10 minutes and give it swirl in the bowl. It will get creamy looking.
Add the flour, salt and oil. Mix it right in the bowl with a wooden spoon. Add some more warm water if it looks too dry. When everything is mixed, take out the dough and knead it a few minutes on a lightly floured surface. Put it back in the bowl and let it rest for another 10 minutes. This is great time to prepare your toppings! For this pizza, I used some homemade marinara from our very own San Marzanos. I'll have to share that recipe shortly...
Using the heel of your palms, work the dough out from the center. Stretch and tug 'til you have about a 24" diameter. Sprinkle a light coating of cornmeal on the pizza stone, and transfer the dough carefully to the stone. Add toppings of your choice, get fancy or go simple. A general rule of thumb is no more than three toppings to balance flavor. A classic Margherita has tomato sauce, fresh mozzarella and fresh basil. Use the back of a large spoon to evenly distribute the sauce, I get about a half inch away from the crust. Slice the about a quarter inch thick for perfect cheese melting dispersal.
Put the pizza in the middle rack for 15 - 20 minutes. I put the timer on for 15, check on it and gauge from there. The crust should be golden brown, and the cheese should be bubbling. Remove it and let it cool a minute or two before you slice it up.
This dough recipe is quick and easy for relatively instant pizza gratification.
I use:
2 1/2 cups of bread flour
1 cup of warm water
1 teaspoon of sugar
1 teaspoon of salt
1 tablespoon of olive oil
1 packet of "Pizza Crust Yeast"
A pizza stone
Preheat the oven to 450ºF right away. In a bowl, empty the yeast packet, and add the sugar and warm water. Wait about 10 minutes and give it swirl in the bowl. It will get creamy looking.
Add the flour, salt and oil. Mix it right in the bowl with a wooden spoon. Add some more warm water if it looks too dry. When everything is mixed, take out the dough and knead it a few minutes on a lightly floured surface. Put it back in the bowl and let it rest for another 10 minutes. This is great time to prepare your toppings! For this pizza, I used some homemade marinara from our very own San Marzanos. I'll have to share that recipe shortly...
Using the heel of your palms, work the dough out from the center. Stretch and tug 'til you have about a 24" diameter. Sprinkle a light coating of cornmeal on the pizza stone, and transfer the dough carefully to the stone. Add toppings of your choice, get fancy or go simple. A general rule of thumb is no more than three toppings to balance flavor. A classic Margherita has tomato sauce, fresh mozzarella and fresh basil. Use the back of a large spoon to evenly distribute the sauce, I get about a half inch away from the crust. Slice the about a quarter inch thick for perfect cheese melting dispersal.
Put the pizza in the middle rack for 15 - 20 minutes. I put the timer on for 15, check on it and gauge from there. The crust should be golden brown, and the cheese should be bubbling. Remove it and let it cool a minute or two before you slice it up.
Monday, July 8, 2013
Classic Basil Pesto
There is nothing like the smell or taste of fresh basil. I have three basil plants in our garden this year and I've been using it almost daily, in Caprese salads, on sandwiches and of course, in pesto.
If you've never made pesto before, here is a foolproof classic pesto recipe. It makes a "jar's-worth", shown above:
- 3 large bunches of fresh basil
- 1/2 cup olive oil
- 2 largeish garlic cloves
- About 1/3 cup pine nuts
- 1/2 cup of grated Parmesan or Pecorino Romano cheese
- 1 teaspoon coarse kosher salt
- Juice of a lemon
In a food processor, pack the basil leaves inside and add the olive oil. Give it a pulse or two, enough reduce the volume of the basil. Then you have room to add the garlic, pine nuts, cheese, lemon and salt. A word on pine nuts. Don't be surprised at their price, they're pretty expensive, but a little does go a long way. And they definitely make a difference in the taste of the pesto. Blend everything together until the pesto is smooth. You can store it in the refrigerator for about two days but because of the cheese it won't last too long. Once your pesto is ready you can add it so so many things beyond pasta. Add it to fish, chicken, shrimp, on zucchini or potatoes, as a pizza sauce or in a grilled cheese sandwich. It's so versatile!
Wednesday, July 3, 2013
Tres Tasty Tacos
If you're new to this blog you might not have picked up on the fact that we love Mexican flavors. Just peruse the eating/drinking section and you'll see. Today I'm sharing tips on making delicious tacos with soft corn tortillas. I make no claims of authenticity, only tastiness!
Sour cream base
Sauteed onions
Ground beef with cumin, cinnamon, annato, salt, pepper, hot chili powder, dried oregano
Cilantro, lime, and Cholula hot sauce
Shredded Chicken Thighs and Jalapeno Lime Slaw
Black beans, lime, and a little chicken broth, heated and pureed
Shredded crock pot chicken thighs with adobo, cumin, chili powder, pepper
Thinly shredded cabbage, red cabbage, carrots, red onions, lime juice, fresh jalapenos, cilantro, olive oil, salt and sugar
Queso fresco
Tacos 101:
We prefer soft corn tortillas for a number of reasons.
- They're cheap
- They're much less calories than their flour counterpart
- And they last a long time
A lot of people dislike the corn tacos, and I think it's because they're not preparing them correctly. I speak from trial and error, I was doing it wrong for awhile! These little corn tortillas, right out of the bag, will flake and crumble if you look at them the wrong way. They actually need to be fried a little bit before they are fit to be called a taco...
Depending on how many I'm making, I use a small non stick pan or a big 'ol griddle. I use a little oil misto and VERY lightly coat the surface and turn the heat on to medium low. Heat up the pan and place the tortillas inside. Let them cook about a minute or so on each side. They might get some brown fry marks, but that's good. I usually prepare them last minute so they're ready to be plated right out of the pan. Once they're cooked they no longer have that flaky-tear-apart-while-you-eat-it texture. I've tried steaming them, microwaving them, baking them; I promise you, this is the best technique.
Taco Ideas:
In the summer we probably eat a taco variation at least twice a week. A favorite is breakfast tacos, black beans, scrambled eggs, cilantro and avocado, and some salsa roja. They're just so fast and fresh! And here are a few other ideas...
Sour cream base
Sauteed onions
Ground beef with cumin, cinnamon, annato, salt, pepper, hot chili powder, dried oregano
Cilantro, lime, and Cholula hot sauce
Shredded Chicken Thighs and Jalapeno Lime Slaw
Black beans, lime, and a little chicken broth, heated and pureed
Shredded crock pot chicken thighs with adobo, cumin, chili powder, pepper
Thinly shredded cabbage, red cabbage, carrots, red onions, lime juice, fresh jalapenos, cilantro, olive oil, salt and sugar
Queso fresco
Monday, June 24, 2013
North Third: 801 N. 3rd Street, Northern Liberties
Last Friday, we had to take advantage of the daylight hours of Midsummer's Eve, arguably the best day of the year. With Dante in tow we went to the Northern Liberties area of Philly for dinner and a walk. North Third is fabulous restaurant on the corner of 3rd and Brown Street. We got a sunny table outside; a caveat to bringing small children into this establishment; be prepared to explain the female anatomy, because in one room there is a larger than life painting of breasts, just breasts... Anyway, we've eaten here a handful of times, and the food is always superb.
This time I opted for the lamb burger, on special, with arugula, tzatziki, and big chunks of feta. I felt a little silly, this was my first lamb "burger" and I wasn't aware that the inside is meant to be very pink. It alarmed me at first, but our helpful waiter assured me that's how it's meant to be prepared. Whew. That first reaction aside, it was excellent! The tzatziki was fresh and flavorful, and the chunks of feta were a nice salty addition. I know french fries usually are a filler, but I love my fries, especially doused in malt vinegar and an unhealthy amount of salt and pepper. These were also well done, not too greasy (Dante also approved). And of course they have a killer draft line up to match their menu. If you're in the area, I would suggest eating here, slightly away from the busy Piazza on 2nd street.
After dinner we got to mosey on through the park nearby where they were about to show a film. There's a pretty community garden and lot's of artwork nearby. Lovely painted fences and walls. Every time we're in the city like this, it makes me want to flee dull suburbia in the worst way. Or maybe I should just paint a mural on our garage to liven things up.
This time I opted for the lamb burger, on special, with arugula, tzatziki, and big chunks of feta. I felt a little silly, this was my first lamb "burger" and I wasn't aware that the inside is meant to be very pink. It alarmed me at first, but our helpful waiter assured me that's how it's meant to be prepared. Whew. That first reaction aside, it was excellent! The tzatziki was fresh and flavorful, and the chunks of feta were a nice salty addition. I know french fries usually are a filler, but I love my fries, especially doused in malt vinegar and an unhealthy amount of salt and pepper. These were also well done, not too greasy (Dante also approved). And of course they have a killer draft line up to match their menu. If you're in the area, I would suggest eating here, slightly away from the busy Piazza on 2nd street.
After dinner we got to mosey on through the park nearby where they were about to show a film. There's a pretty community garden and lot's of artwork nearby. Lovely painted fences and walls. Every time we're in the city like this, it makes me want to flee dull suburbia in the worst way. Or maybe I should just paint a mural on our garage to liven things up.
Friday, May 31, 2013
Mangoes for Dinner
My favorite part of cooking is coming up with awesome meals with whatever you've got. Yeah, I could probably plan out even better meals, but where's the fun in that? Last night I had two mangoes that were going to spoil if I didn't use them that second. Okay, Mangoes, you're coming with me.
- 4 tablespoons of avocado oil
- 4 tablespoons of fresh orange ( about the juice of one orange)
- 2 tablespoons of balsamic vinegar
- 1 tablespoon of honey
Here's a Tip! If you haven't done anything to clean your garbage disposal recently, cut up some leftover citrus rinds and toss them in with some coarse salt and ice cubes. Run hot water and let the ice and salt scour, and the citrusy rinds clean and freshen.
![]() |
| This avocado oil must be amazing in your hair, gotta try that sometime... |
I also made coconut mango paletas (fancy mexican ice pops) right away so they could freeze in time for dessert. I highly recommend investing in a popsicle mold for healthy refreshing treats. I could easily eat a gallon of a salted caramel ice cream in one sitting, but when there's nothing but fruity popsicles in the fridge, it helps slake my indulgent ice cream tooth. These were made from...
- One and a half mangoes
- A 1/4 cup of coconut cream, not milk. You can buy in it in a teeny carton, or just scrape the creamy top off a can of coconut milk, then you're left with low fat coconut milk for later.
- About a tablespoon of agave for extra sweetness
- Juice from two limes
Blend away and pop them in the molds! (Best enjoyed with an accompanying margarita.)
![]() |
| Ooo look at that newly mowed lawn! |
Labels:
dessert,
eating/drinking,
food,
main course,
pull,
recipe
Wednesday, May 29, 2013
Freshly Made Dressing
Penzey's Spices is my favorite place to stock up on spice essentials. Penzey's has top of line spices common and uncommon, whole or ground, as well as a plethora of mixes. These dressing mixes are a flavorful and much more frugal (and sustainable) option to store bought bottled dressings. And if you eat salads with any frequency a fresh dressing is the perfect pairing. These spice mixes are also helpful because you can tweak them to your liking and easily substitute ingredients.
The Creamy Peppercorn is hand-mixed from: Tellicherry cracked black pepper, coarse salt, garlic, sugar, thyme, parsley. I prepare mine a little different than suggested...
Our lettuce has steadily been growing. I planted them from seed in a sort of careless manner, and the result was them growing on top of one another. I've been thinning them every so often and feeding them to the chickens, so not a total waste. But now the leaves are big enough for human consumption, yum!
The Creamy Peppercorn is hand-mixed from: Tellicherry cracked black pepper, coarse salt, garlic, sugar, thyme, parsley. I prepare mine a little different than suggested...
- 1 tablespoon of spice mixed with 2 tablespoons of water, let the spices re hydrate for 5 minutes
- Mix in 1/2 cup of plain greek yogurt and 1/2 cup of mayonnaise
- Mix in 2 tablespoons of white vinegar
I also broke down the calories, for science. This recipe will make about 8 servings at 45 calories and 4g of fat. Compared to the store bought dressings I usually get, I'd say this is actually healthier. Now to make something to put it on...
Our lettuce has steadily been growing. I planted them from seed in a sort of careless manner, and the result was them growing on top of one another. I've been thinning them every so often and feeding them to the chickens, so not a total waste. But now the leaves are big enough for human consumption, yum!
I marinated and grilled some butterflied chicken breasts with plenty for leftovers. For the salad I sliced cucumbers and the chicken, then sprinkled some canned corn on top. (Those are some pickled brussel sprouts on the side.)
Now bring on the dressing, so fresh! Even Chris enjoys a giant green salad covered in this.
Friday, May 24, 2013
Bring Out Your Grills!
The past few days in Philly have felt like summer, muggy temperatures in the 80's. And it also happens to be Memorial Day Weekend, the time to respectfully remember those who died in military service. And like all American holidays it's also centralized around food, fine by me. It's time to bring out the grill if you haven't already. Hot dogs and hamburgers are the favorite, I know, but my favorite is America's "other white meat", pork. So tender and juicy, it's hard to mess it up. The other day, I grilled a pork loin and some vegetables. We've also been holding onto a bottle of homemade beet wine from our friend, and Chris's bandmate, Preston. I thought it would compliment our meal nicely.
For Perfectly Grilled Pork loin:
For the Pork loin, I marinated it in some Sweet Baby Rays BBQ Sauce, always a winner. I fired up the gas grill and let it get to about 450°. I seared both sides of the pork, about 5 minutes on each side, then placed the pork over indirect heat and lowered the temperature to 400°. At this time close the grill and prepare the veggies.
For the Veggies:
I sliced two yellow squash in to quarter inch rounds, as well as some mixed radishes, an onion, and threw in some garlic bulbs. I also added a rosemary branch, and liberally doused it all with olive oil, salt and cracked pepper. I've never used the grill basket before so I was a little unsure how they were going to cook...
The grill basket turned out the be a superstar. I didn't lose anything down the grates! The all cooked safely inside the basket. I put the veggies on 15 minutes in over the flame, and then grilled everything another 15 with the pork. I tossed them only a few times to get them a little charred. This was also the first time grilling radishes, and they turned out to be a fantastic addition with the squash. After about a half hour I took the pork off and let it rest for 10 minutes before slicing it up. While the meat was resting, I got out some crusty homemade bread, drizzled it with a basil infused olive oil and grilled it. A grilled feast!
Preston's wine was also delicious! I'd say it had a close flavor to a rosé, with a hint of beet in the aftertaste. We were jokingly calling it "Shrute's Choice". I'll have to learn how to make it, or at least make sure to get a steady supply for him. A lovely meal for a muggy evening.
So go grill something, and enjoy the three day weekend!
Subscribe to:
Posts (Atom)