Showing posts with label eating/drinking. Show all posts

Tuesday, March 25, 2014

Fresh and Local: Stryker Farm

For years I've been buying meat, like anyone else, from the supermarket. Always working within a tight budget, cheap cuts of meats were my go-to. And until recently I didn't really care about where it came from, or how it got to the supermarket, or how it was raised. I just didn't have the time to worry about that sort of stuff. Now, "that sort of stuff" is what I'm most interested in. "That sort of stuff" shapes and affects my health and lifestyle. In time, I've graduated from regular supermarket meat to organic meats. It was only last year I discovered I could get delicious, locally raised meat for less than, say, Whole Foods prices and support my local economy at the same time. Affordable and sustainable? Sign me up!

I learned that buying directly from the farm saves your wallet money and puts more directly towards the farmer's. Only one catch; most often you have to buy the whole animal or a large portion of it. Is that a grisly way of putting it? Oh, well. So, last December we bought an eighth of a cow for Verdant Farms and a quarter of a pig from Stryker Farm in Pennsylvania. Everything came portioned, labeled and frozen, how convenient? Our great meat adventure! We acquired a chest freezer and stocked it with a little under 100 pounds of the freshest meat we could get our paws on and we've been savoring every bite since.

Tonight I made beer brats from Stryker Farms in Saylorsburg, PA. As I pulled them out to defrost, I noticed the ingredients, "Pork ,Weyebacher Ale, Sea Salt, Spices, Turbinado Sugar". No nitrates, no fillers, no unrecognizable ingredients. And not only is the pork fresh and local, but the ale flavor is too!


So far, every cut that we've eaten from Stryker farm has been superb. This post singing it's praise is long overdue. The housemade sausages are fabulous. We've had the breakfast sausages (scrumptious), Irish bangers (bangin') and now the brats. I let them simmer in a pot of "quick" sauerkraut.

My Quick Sauerkraut:
  • A medium sized head of green cabbage
  • 4 strips of thick cut bacon
  • 4 tablespoons of butter
  • 1/3 cup apple cider vinegar
  • 1 tablespoon of juniper berries (optional)
  • Salt and pepper to taste

1.   Start with a heavy bottomed pan. Cut the bacon up into pieces and fry it up.

2.   Slice the head of cabbage into thin ribbons.

3.   When the bacon is cooked, but not crispy, remove it from the pan... and leave all the fatty goodness in there.

4.   On a medium flame add the cabbage and saute for a minute. Add the butter and apple cider vinegar. Traditional sauerkraut is a fermented food, but the vinegar makes this recipe quick, giving it that sour flavor.

5.  There should be a good amount of liquid at the bottom. Add the juniper berries. Add a sprinke of salt and pepper. Let it simmer for a few minutes uncovered.

6.   Make a hole in the middle for the brats to simmer. Turn the heat way down and let the flavors do their thing for a half hour or so, covered. I don't think you can actually overcook this, but personally, I like when the cabbage still has the slightest crunch left to it.

7.   Add the bacon. Did you forget about that bacon? Oh yeah, it's going back in there. I never said this was low cal.

8.   I try to pick out the juniper berries before serving because they're bastards to chomp down on.
I served this with some roasted carrots and onions and a dry white wine. These brats are flavored so nicely, tender and juicy. I'm sure they'd be great grilled on a toasted bun. With fried onions. And mustard. Mmm.

(As I write this Chris moans that I'm making him hungry again. He's threatening to go eat the leftovers before bed. Not on my watch.)


Our friends Mike and Gayla organized the group of people to share all of these wholesale meats, so they also went to the actual farm to pick up the piggie when it was ready. They had nothing but wonderful things to report about the farm and the owners. You can read more about the farm, here. I'm pretty certain there's no going back to "supermarket meat" for us. When we run out of pork, we'll be headed back to Saylorsburg!

Friday, February 28, 2014

Paleo Cauliflower "Rice"

Since Christmas I've been eating and preparing paleo meals (check out this post to catch up on my paleo adventure). Generally it's not too different from how we already eat, and Chris even confessed he hasn't felt deprived of anything. However, I've had to learn a few paleo hacks, if you will, to make up for some previous staples. RICE. We ate rice all the time! It was our go to grain, cheap and easy. But rice isn't a option anymore. So, now what do we eat with our stir frys and curries?

Cauliflower "rice"!


Thursday, February 27, 2014

Paleo Grain-Free Granola

Why would I want to make grain-free granola?

Around Christmas time, way back when in December, I found myself on a paleo food blog. I knew the gist of the paleo "diet", but this blog had me consumed. Look at all of these wonderful things to eat! This doesn't look like a diet at all. And in fact, paleo folks don't call it a diet but rather a lifestyle. And as I read the science behind it, it started making sense. Enough sense that I decided to try it out. So here's the short and fast version...

Your body isn't designed to efficiently use a lot of the food we put in it; grains, sugars, most dairy, legumes, and chemically processed stuff. And evidence of that can be found in obesity, diabetes, peanut allergies, gluten allergies, and lactose intolerance (pretty common stuff, eh?). Instead you should model your diet more like that of our lean and muscular ancestors (cavemen). Eat meat, seafood, lots of vegetables, some fruits, nuts and seeds. Done.

After my varsity athlete days in high school, I learned quickly that my adult body's metabolism wasn't going to keep up with my eating habits. And honestly, since then it's been a bit of a struggle to keep my weight down. I've ate a loose paleo diet from Christmas to January and steadily lost 12 pounds. Even better, I have more energy, and I didn't feel hungry all the time. I felt so good I wanted to give the Whole30 challenge a go, and Emily joined in too! I'm days away from day 30 and I feel, dare I say, awesome.

I'm still no expert on it. But here are some people that are...
Nom Nom Paleo
Eat Drink Paleo
The Healthy Foodie
The Clothes Make The Girl

This fantastic granola came from Irey's kitchen at Eat Drink Paleo.


Friday, February 7, 2014

Homemade Whiskey Beef Jerky

I have a confession. I love jerky. There's something about a dried piece of salty meat that I find so satisfying as a snack. But as much as I love it, I rarely buy it except on the rare festival or camping trip, where it's dried nature actually fulfills it's purpose. I came across this recipe for homemade jerky and I gathered my supplies to make it the same day. Whiskey infused jerky.

Because I also like to eat my alcohol.

homemade whiskey beef jerky

Friday, January 3, 2014

Adult Hot Chocolate

Today is the first snow day of 2014! I love snow, but I knew I became a real grown up when I no longer prayed for giant snowstorms to blanket the roads so that school would be closed. Because unfortunately when you're adult and it snows you still have to go to work. You have to dig out your car, or shovel your sidewalk. Or help your neighborhood shovel their sidewalk. And shovel your driveway. Ugh.

So, after an hour of shoveling this morning I made us some hot chocolate as a well-deserved reward. Not Swiss Miss packets with fake marshmallows, no no. Real hot chocolate, with a kick.

Tuesday, December 17, 2013

Christmas Pizelle

My Italian grandfather always had licorice flavored candies of some description around, and every so often a batch of pretty pizelle cookies from the Italian bakery. Love 'em or hate'em, that's usually the case. And guess what? I love pizelle! Some people are turned off by the traditional anise (licorice) flavor, but I enjoy their light texture and that zingy flavor. Although they are a cookie, they're not terribly sweet, and compliment the Christmas sugar overload nicely. They're delicious with coffee or hot chocolate too!

I was perusing the Crate and Barrel sale section and this CucinaPro pizelle maker jumped out*. I liked the idea of making my own fancy cookies, because I'm historically not great with baking cookies, so this will be foolproof, right?! Reviews told me this model is well-made, and easy to use. Tonight I tried it out with high hopes of becoming a pizelle making machine, maybe it will be a Christmas miracle...


Wednesday, November 27, 2013

Thanksgivingworthy Apple Pie

Apple pie is a Thanksgiving staple in my book. Although I'm an expert at eating them, I'm not an expert at baking them, yet. Emily was with me on Saturday night and walked me through this recipe because she clearly possesses superior baking skills and she's also admitted to making mini versions of this for herself from time to time, check it out here. Why did we make an apple pie a whole week before Thanksgiving? Because we can, that's why.


Friday, November 8, 2013

Coconut Curry Acorn Squash: Two Days, Two Ways

It's the season of the squash! One of my favorite, the acorn squash, is a staple in the supermarket and I always tend to throw a few in the cart. Unlike the unyielding butternut, acorn squashes are easily halved and roasted. Wednesday I wanted to make a mild side to go with Rogan Josh spiced chicken and lentils (very similar to the Maharajah Curry). A smooth and coconutty mashed squash would compliment the heat nicely. Since I had two squashes I roasted them both to make enough for two meals.


DAY ONE:

Thursday, October 24, 2013

Homemade Halloween Candy

As a kid it was a cardinal Trick-or-Treating rule to not eat any homemade or opened items. Which is a shame now because I love the idea of making my own Halloween candy. But who says you have to make it for the Trick-or-Treaters? Instead, be a hit in the office or at a party. Here's a few recipes for better-than-store-bought-candy. Although I've only attempted the peanut butter cups (my favorite) I hope to be indulging my sweet tooth in the next week, and maybe getting a stomachache or two.


Tuesday, October 22, 2013

Beet and Spinach Orzo

So I have to admit I haven't been stellar at keeping up with Meatless Mondays, but we do have a lot of meatless other days. I feel like I've significantly reduced our meat consumption, which is the end goal anyway. And now that the chickens are laying we can get a lot of our protein from eggs. I got some tasty beets from the farmer's market and wanted them to be the star of something. I found this recipe on Food52, I know, I'm on there a lot, but I had this recipe saved and decided to make it last night.

beet and spinach pasta

Thursday, October 3, 2013

Easy as No Bake Vegan Granola Bars

I don't know where the expression "easy as pie" came from, but making pie isn't exactly easy. However, I'll tell you what is easy, this granola recipe by Gena Hamshaw.

Granola ingredients


I've tried to take my own advice and start snacking on healthy things throughout the day, rather than just eating a container of leftover dinner from the night before. This recipe caught my eye because of the "no bake" factor. The last time I attempted baking granola (late at night) after hours of super low temperature baking, I took it out and was immediately puzzled by the fact that it wasn't hard and chewy. Oh, impatience, you strike again.

Do you want your granola ASAP? Quick, to the cupboard! I used:

2 1/2 cups rolled oats
1/2 cup raw pumpkin seeds (pepitas)
1/2 cup of sliced almonds
1/4 cup raisins
1/4 cup dried cranberries
2/3 cups almond butter
1 teaspoon of cinnamon
1/2 cup agave nectar (adjust based on how well things stick together)
1/8 teaspoon sea salt (adjust based on which nut butter you use)

Vegan Granola Bars


Mix the nut butter and agave separately at first to get a homogeneous mixture. Then stir everything together and shape it into a square on a wax paper lined baking sheet. 

Vegan Granola Bars


Pop in the refrigerator for an hour, or so, to harden it up before you cut it into little bars. I got about 16 bars from this square.

Vegan Granola Bars


Healthy snack accomplished! They are a tad sticky and if you hold them in your hand for too long they start to fall apart. But if you're holding onto granola for that long you deserve to get messy ;)

NUTRITION FACTS
Serving Size: 1 bars
Amount per Serving: 
Calories 123, Calories from Fat 83.4
Total Fat 9.27g
Saturated Fat 0.93g
Cholesterol 0mg
Sodium 10.76mg
Total Carbohydrate 22.91g
Dietary Fiber 2.71g
Sugars 9.25g 
Protein 4.48g

Thursday, September 26, 2013

When Peppers Attack

The other day I was on a roll in the kitchen. It was a leisurely Sunday afternoon, I had already baked some bread, roasted some squash for dinner and was in the middle of canning some salsa verde. We got a good amount of poblano peppers this year and I thought I'd add them to some salsa verde in lieu of jalapenos.

poblano pepper


Things were going well, the house smelled of deliciousness and I had nowhere else to be. Unfortunately I was in for a turn of events. This story is going in the misadventure column.

I've previously posted a recipe for salsa verde. Using tomatillos, jalapenos, lime, cilantro, salt and sugar. Check it out here. I decided to double, maybe triple, the amount of poblanos because, to my recollection, they're rather mild. I set up all my canning gear. Stock pot, jar grabbers, jars, lids rings. This would be a small batch, about 5 pints worth. As I let the tomatillos boil, I halved the peppers and started roasting them.

As many peppers as I have cut up, I've never had a problem with pepper oil burning me in awful places. I've heard horror stories of burning hands, eyes, and even genitalia... BUT it's never happened to me. Until then. As it's allergy season, I rub my nose a lot. Suddenly I felt the burning at the top of my lip, then at the base of my nose, around my nose, and up inside my nose. Oh, crap. As I breathe in, I can feel the intense burning travelling further up my nose. All I knew was that attempting to wash it off would only spread it further. I quickly left everything that was happening in the kitchen and flew upstairs to where Chris was enjoying his afternoon. "Quick, Google something to counteract pepper oil on your skin!", I say in a panic. In my hypochondriac mind, I'd be asphyxiating in mere minutes...

I'll save you from the drama in between. The lesson learned here, is that lemon juice will relieve your skin from a run in with peppers on your skin. Chris's dad was the hero in the end, telling me to just go ahead and rub that lemon juice all up my nose. As the juice dried it put out the flames in and around my nose. Phew.

Don't worry, I continued to can the salsa! It was totally worth it.
salsa verde

Tuesday, September 24, 2013

Microwaved Eggplant: I'm a Believer

If the title of this didn't scare you away, but rather intrigued you, I promise you won't be disappointed. This was another recipe I found through Food52, one of "genius" proportions that involves microwaving eggplant. It was quite timely because I found this the day after I wrote the post on Baba Ganoush, and the neediness of eggplant, for lack of a better word. Eggplant ripens just at the end of the summer and most times it's still way too hot to be using your oven. Enter, the microwave. Barbara Kafka's Marinated Eggplant Recipe has made a believer out of me; you can microwave eggplant, and it will be glorious.

chinese eggplant


You'll need:
  • 1/4 cup tamari or soy sauce
  • 2 tablespoons loosely packed cilantro leaves
  • 1 tablespoon rice wine vinegar
  • 1 tablespoon toasted sesame oil
  • 1 1/2 medium-size cloves garlic
  • 3/8 ounces fresh peeled ginger (a 1-by- 1/4-inch piece), cut crosswise into 1/4-inch slices
  • 4 small Chinese eggplants (2 to 3 ounces each)
Method:
  1. Combine all ingredients, except eggplants, in a blender. Process until smooth.
  2. Prick the eggplants several times with a fork and pull off the leaves. Cut in half lengthwise. On the open side of each half, make three deep diagonal slashes in each direction. Place eggplants skin side down in a 13-by-9-by-2-inch microwave-safe oval dish.
  3. Spoon 1 1/2 teaspoons of the marinade over each eggplant half. Rub the marinade into the flesh so that it runs into the cuts. Turn eggplants skin side up. Pour remaining marinade into dish. Let stand for 45 minutes.
  4. Turn eggplants skin side down. Cover tightly with lid or microwave plastic wrap. Cook at 100 percent power in a high-power oven for 10 minutes. Prick plastic to release steam.
  5. Remove from microwave and uncover. Serve warm or at room temperature.
So you'll notice this requires the use of microwaving plastic wrap. My first thought was, "that's not safe, right?" The one unused roll of SARAN wrap I had in my drawer actually says, "microwave safe" on the box. I did a quick search, and it seems as though these plastics have tiny perforations to let out steam. Okay. I'll go along with it. 

In my excitement to try this out, I failed to notice the "marinate for 45 minutes". At the time, I was really impatient, but I think it's a crucial part.

microwave eggplant


After the eggplant is microwaved, it comes out looking like it's been roasted for a long time. They're not spongy, they're smooth and completely infused with the marinade. Wow. I decided to make some soba noodles and extra cilantroed shrimp with this. Shrimp wouldn't be my first choice, but it was all I had, and it tasted mighty fine. In the future, I might include some marinated, pan-fried tofu. OR just eat the eggplant on it's own because it was DE-lish.

shrimp eggplant soba noodles


Now I know we're at the end of September, and you can probably use your ovens without sweating all over the kitchen, but this dish will still be awesome. Quick, go out and get some eggplant before you start spending all your days making roasts and stews! 

Tuesday, September 17, 2013

End of Summer Apple and Fennel Soup

I recently purchased some fennel from the farmers market with the intent on grilling them, but I came across this soup on Food52. A tart apple and fennel soup sounded perfect for a Meatless Monday meal. This soup was so light and sweet. With apple season at our door, I'll certainly be making this again!

apple and fennel

I used:

2 tablespoons unsalted butter
1 large shallot, diced
1 garlic clove, minced
1 large bulb fennel, cored and cut into 1/2-inch chunks
2 large Granny Smith, cut into 1/2-inch chunks
2 stalks celery, sliced in 1/2-inch pieces, leaves and all
1 tablespoon lemon juice
1 tablespoon honey
1/2 teaspoon kosher salt plus more to taste
3 cups chicken stock
1 cup watercress
3 tablespoons chopped fresh mint
1 teaspoon chopped fresh thyme
2 tablespoons chopped fennel fronds
1/2 cup Greek yogurt (I didn't have any heavy cream as suggested, but I thought this was an acceptable lighter option)

As it says in the title, this soup really did only take 20 minutes. Saute the minced shallot, garlic and butter in a heavy bottomed sauce pan. After a minute or two, add the cubed fennel, apple, celery, chicken stock, honey, lemon. Simmer for 10 -15 minutes so that everything gets soft. Add the herbs and puree. The recipe says to strain the puree, but I prefer a little texture. Stir in the yogurt last, and garnish with more herbs. In the future I might swap butter for reserved bacon fat. I think a lil' hint 'o bacon will give it extra oompf. But for Meatless Monday it was perfection!

apple and fennel soup

Thursday, September 12, 2013

Grapefruit Gin & Tonic

I've been enjoying G & T's recently during (hopefully) our last muggy weeks of the season. When I ran out of limes, I used lemons, and when I ran out of lemons, I bought a grapefruit. Probably one of the lesser favorites of the citrus family, I really enjoy it's flavor and tartness. As I mixed this, I recalled a lovely cocktail served to me before the ceremony of an outdoor summer wedding. It definitely was grapefruit based, maybe with champagne? But what stuck me was the sprig of lavender that stuck out. It was so delicately fragrant as you sipped the drink, and went so well with the grapefruit. I had just clipped out bunch of lavender to dry, so I popped one in the glass for a little fanciness.

To make you own incredibly refreshing cocktail you'll need...

  • A glass half full of ice
  • About a shot of gin
  • A shot or two of freshly squeezed grapefruit 
  • Top off the glass with tonic
  • A sprig of lavender for fragrance
Best enjoyed outside with a good book!

Tuesday, September 10, 2013

Dim Sum at the Imperial Inn

Last Saturday was perfect weather for anything but being indoors, so we put our lengthy weekend to-do list aside and hopped on a train into Philly, destination: Chinatown.

Philadelphia Chinatown


Philadelphia boasts the fourth largest Chinatown in the country, located in Center City between 11th and 8th streets. Chris is lucky to work nearby, so he and co-workers can pop into Chinatown for delicious and authentic eats. Chris has spoke of the Imperial Inn before, as it's touted as one of the best dim sum establishments in Philly. So Saturday afternoon I went for my first dim sum experience!

Imperial Inn Philadelphia


My knowledge of dim sum comes from a mix of food and travel shows, so I was expecting a Chinese tapas sort of dining. Close, but not quite. A dim sum experience goes something like this... You are seated and are offered a pot of tea. Waitstaff pushes carts piled high with various small dishes. Much like a Brazilian steak house, as they pass by they offer whatever they have on their cart and then they mark what you've taken on your table's bill. After you've eaten your fill, you take your bill up to the counter to pay.

Here's a Serious Eats article on dim sum etiquette. In short, always share, and when in doubt, just eat it! Because there's no menu, I asked a lot of questions, "what's this, what's that?" But generally it's just fun to go by what looks appealing, and just try it because it's most likely delicious. Since Chris had been before he knew a few staples, wide rice noodles, sticky rice wrapped in lotus leaves and bao, below. We tried to get a variety of dishes, but there is only so much two people can eat. Which is why dim sum is perfect for a group to share dishes.

dim sum


dim sumdim sum

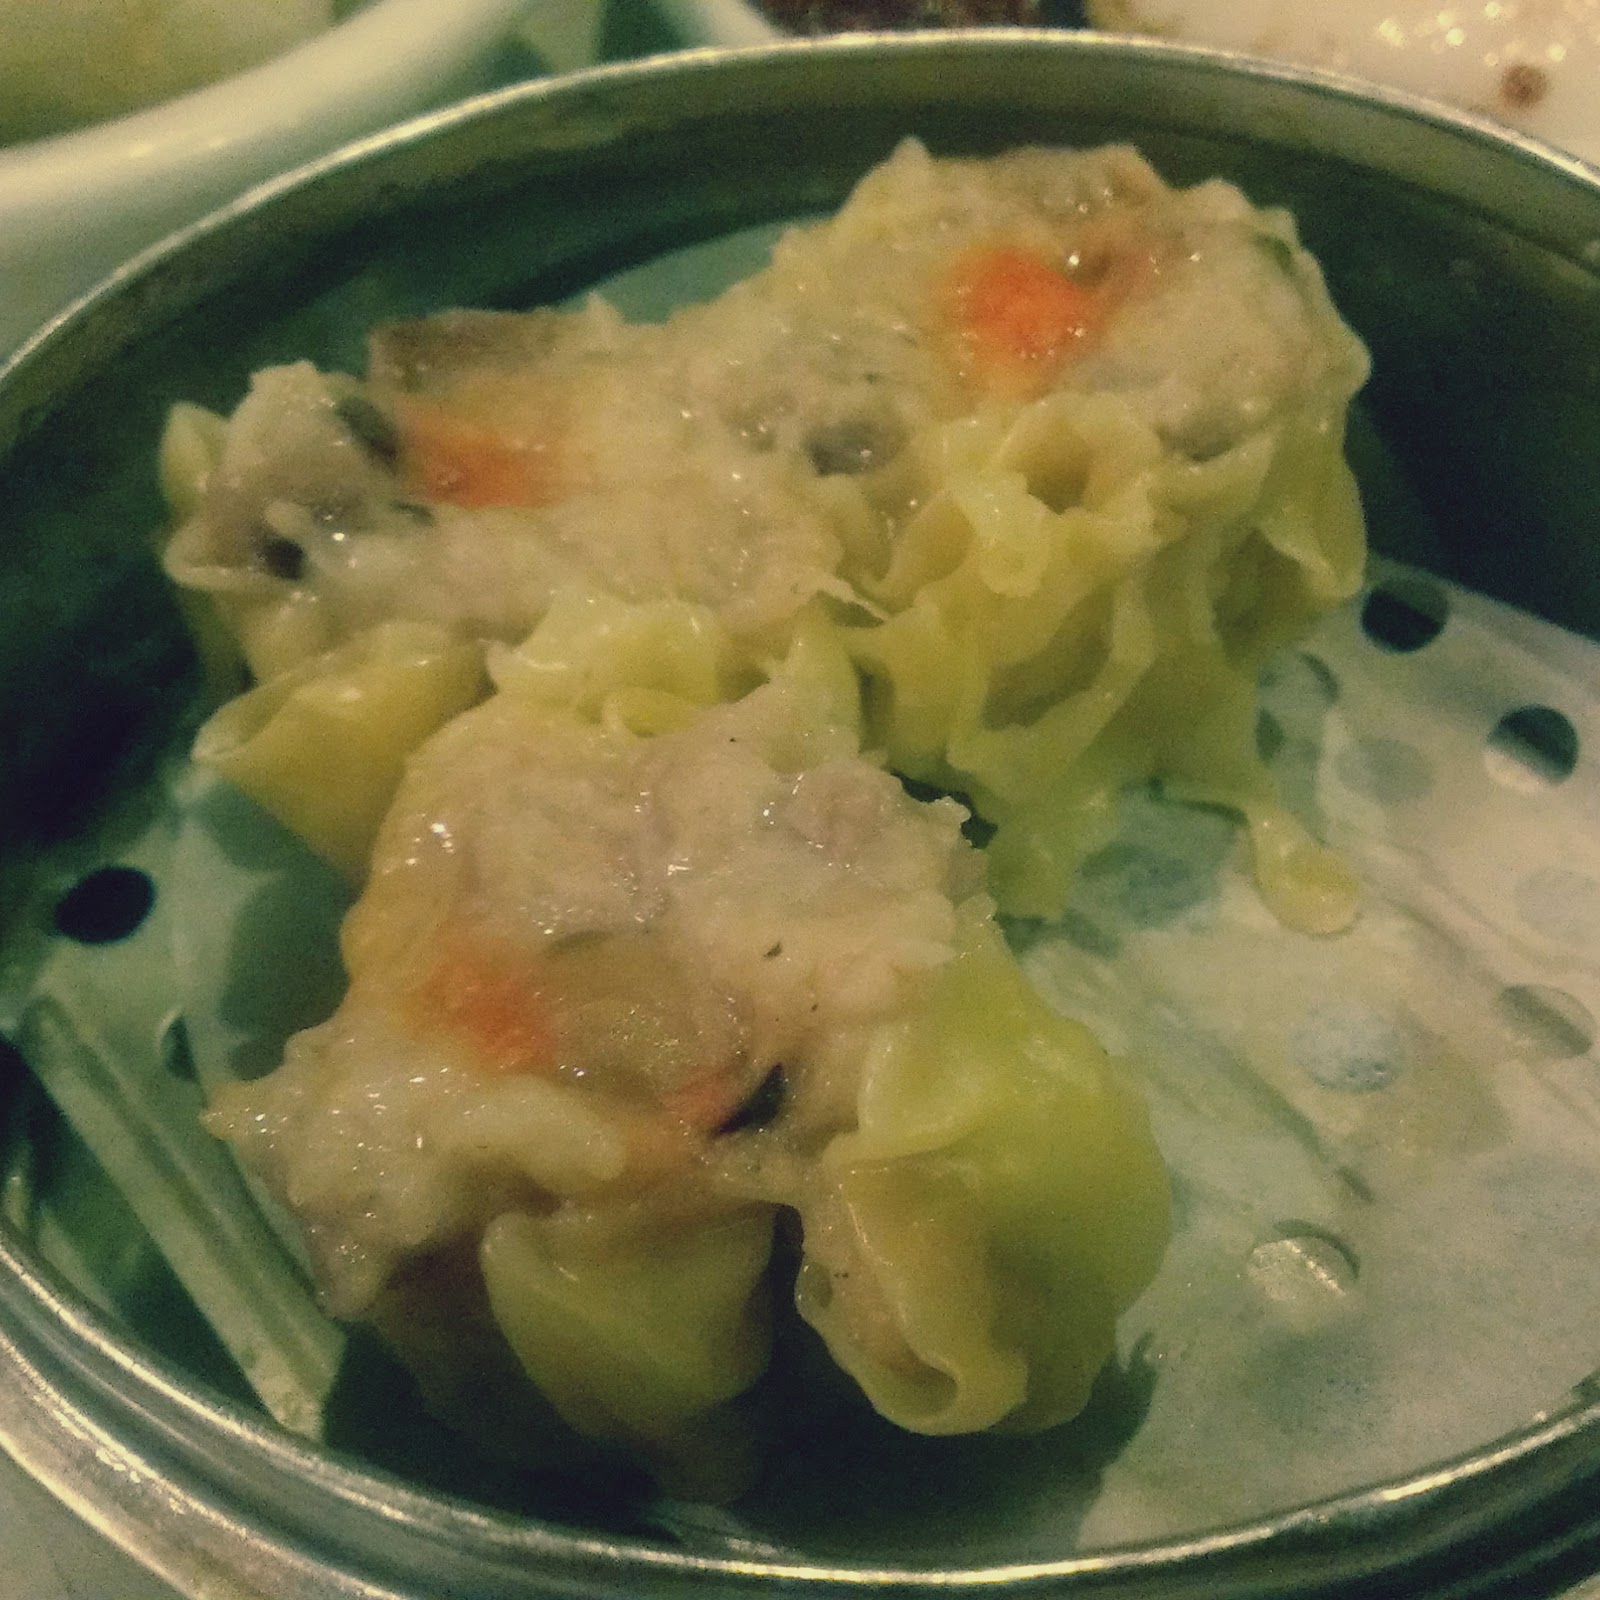
Shown above; pork and shrimp dumplings, beef rice noodles, and scallion bao. The sticky rice is steamed with various meats and spices inside a giant lotus leaf. This was the one dish that I wasn't too keen on. There was a flavor, I'm assuming from the leaf, that hit me the wrong way. It was reminiscent to an earthy tea aftertaste. My favorite were the scallion bao, oniony pork filling inside a glutinous steamed bun. The photos aren't the best representation because the inside of the restaurant was very dark, no windows, just typically ornately decorated with Chinese artwork. And on a side note, I hate taking photos of my food while I'm out! I feel like it takes away from the dining experience. But what's a blog without photos, right?

The restaurant was pleasantly busy, and you could tell that all the food coming out was fresh from the kitchen. Next to us was a table of older gentlemen that seem to be locals. It looked as if they were already there for hours, conversing, eating and enjoying tea. They seemed know how to spend an afternoon right. It's fitting that dim sum translates to "touch your heart", because isn't that what good food does?

chinese cats
I really wanted to get one of these, maybe next time...


Thursday, September 5, 2013

Eggplants at Their Best: Baba Ganoush

I haven't ever gotten too excited over eggplant. Done right, they are heavenly, but there are so many ways to do them wrong. Under-cooked, they're weirdly spongy, and a bit bland. To me, they seem to require a little more finesse than other veggies, so admittedly I don't cook with them often. My eggplant love affair began after eating baba ganoush at an Israeli restaurant. I think, up until then, I imagined it was just a different type of hummus, au contraire! Baba ganoush is like hummus in that it also uses a tahini base, but instead of chick peas, the superstar is roasted eggplant. After reading the gist of the recipe, I thought, "that seems too easy"... To the kitchen!

baba ganoush


I got this recipe from David Lebovitz, go ahead and read the entire post because he muses on dining in France, where baba ganoush is called caviar d’aubergines. Fancy.

Ready? You'll need:

3 medium-sized eggplants (perfect timing because eggplants are in season)
1/2 cup tahini (sesame paste)
1 1/4 teaspoons coarse salt
3 tablespoons freshly-squeezed lemon juice
3 cloves garlic, peeled and smashed
1/8 teaspoon chile powder (I also added a pinch of Hungarian paprika for more smokiness)
1 tablespoon olive oil
a half bunch picked flat-leaf parsley or cilantro leaves

Pre-heat the oven to 375°. After you've picked out your prize winning eggplants, poke them a few times with a fork. If you have a gas stove top, turn your burner on, and put those eggplants right on the burner, one a piece. If you don't have a gas burner, that's okay. Just pierce them and move on to the next step.

charring eggplants


Rotate them to evenly char the skin for 5-10 minutes, based on how smokey you'd like them. Before making this I've never put any vegetables directly on my stove top, but it's a really helpful technique! Apparently you can skin red peppers easily this way too. Watch them, otherwise they could set off the smoke detector. The skin gets charred and papery. I used tongs to transfer them to a baking sheet.

charring eggplants


Bake them for 20 - 30 minutes. A knife should easily slide in without resistance. I put the timer on for 20 and test them. 

Let them cool before halving them and scooping out the roasted goodness. The skin should peel right off, if not, they could probably use some more oven time.

roasted eggplant


Blend the innards with the rest of the ingredients. *Be careful when scooping out the tahini. The oil naturally separates and sits on the top, so it's best to try to mix it up a bit. Easy as baba ganoush! 

Serve with fresh pita, toasted bread, or if you're like me, and have giant bags of Stacy's pita chips hanging around, use them. David remarks on how this would actually be a little more flavorful if you made it a day or two in advance, making it excellent for entertaining. For that extra presentation panache, when you're ready to serve, put the spread in a bowl and using a spoon swirl a spiral in the top. Drizzle some olive oil over and let it nestle in the indentations. Top with finely chopped parsley.

baba ganoush


*Kitchen casualty! While mixing the tahini a big glob of oil sloshed out. I didn't realize it also got to the floor... Later I noticed a big oil slick on Dante's head; looks like he was helping himself to it!

Thursday, August 29, 2013

Puttin' Up Tomatoes

This past weekend was one of epic tomato proportions. Led by the expertise of Chris's parents, we helped put up 500 pounds of tomatoes in two days. We'll have enough jarred tomatoes to last a year. Whew!

Putting up tomatoes


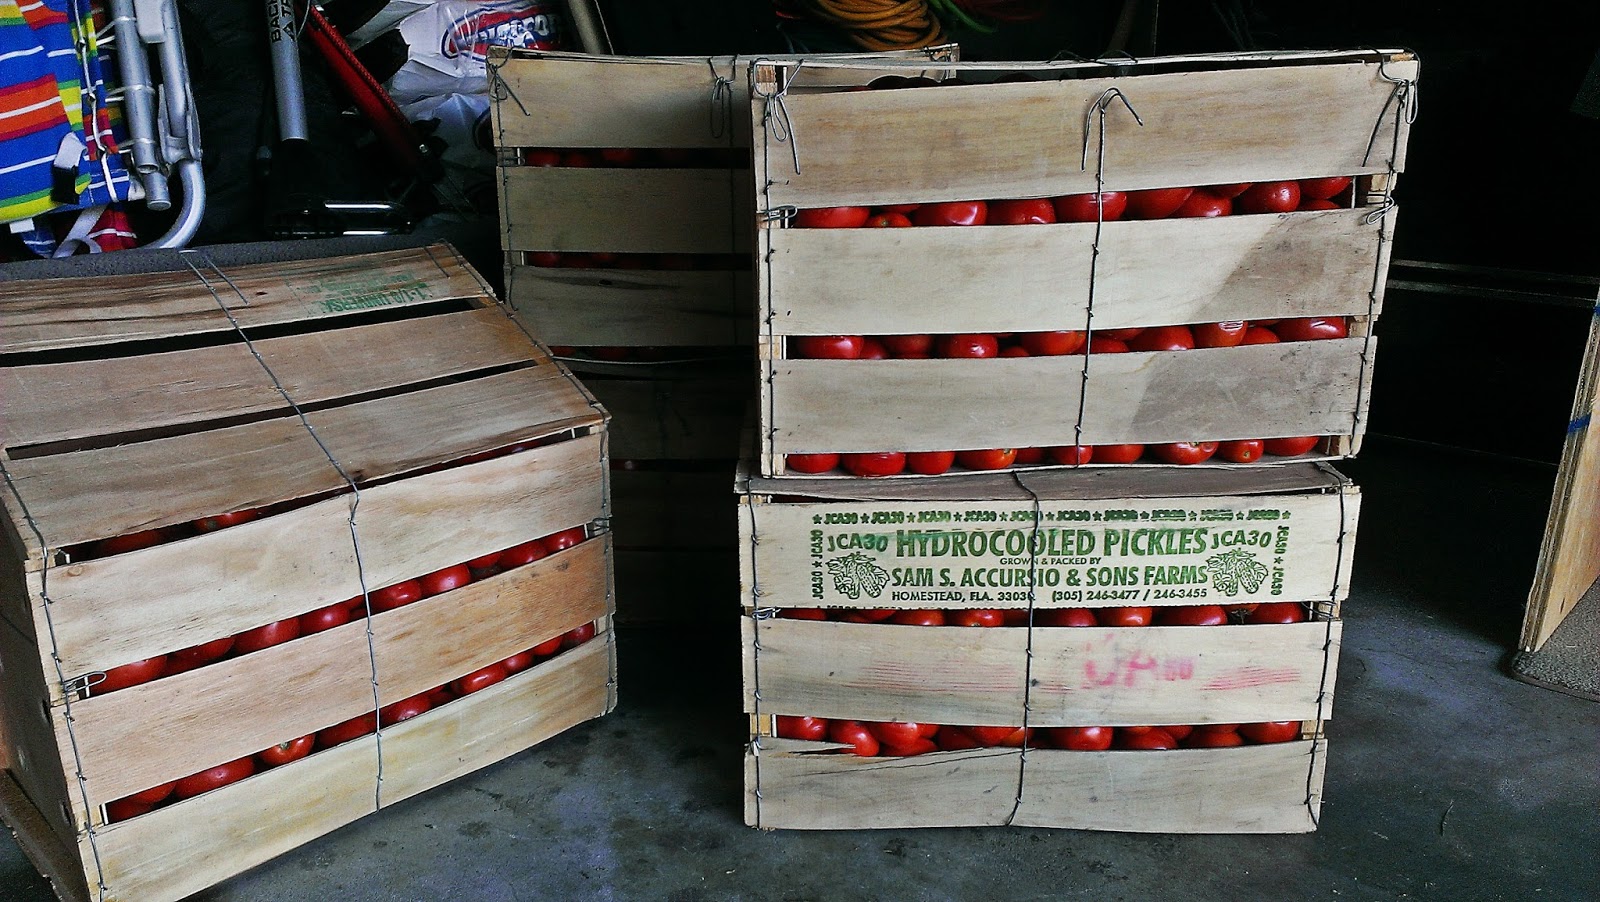
First off, we had to acquire tomatoes, because as prolific as our tomatoes were this year, we didn't have that many. After calling around to a few farms, Mellen found a place in Bordentown, NJ that had a good crop of plum tomatoes. Later that day they arrived, SUV filled to the brim with tomatoes, ten crates worth.

crates of tomatoes


For this tomato operation we borrowed a fancy Italian motorized grinder that actually skins and seeds the little fruits and extrudes the bright pink pulpy goodness. It's truly an amazing machine. Chris's parents, and plenty of those before them, used to process tomatoes with a hand crank. Yikes.

For any canning process there are certain preparations that need to happen. The first is gathering supplies, jars, lids, rings, stock pots, ladles, and plenty of towels. The work space should be clean and clear of non-essential items (here, wine to drink during the process is considered essential). We brought the crates into the kitchen, and set up a big table for cutting and grinding.

Putting up tomatoes


Putting up tomatoes

Emily and Chris unloaded the tomatoes into the kitchen sink filled with water and a little vinegar to
clean the tomatoes. They pulled out each one, gave it a once over and removed "any spots that you wouldn't eat". Overall, the tomatoes were beautifully ripe, with few spots needing removal. (Anything that was removed went to the chickens!). After they were inspected, they were brought to the cutting table where I quartered them and put them in line to be processed. They all go through the top of the grinder, down to an auger that turns and removes the skin and seeds.

tomato grinder


tomato puree

We did this for hours; collecting sauce in stock pots and removing the skin and seeds. As we neared time to jar, various pots were put on the stove to bring to a boil and reduce a bit. Any foaminess that bubbles up is scraped off. The lions share of the tomatoes remained plain so that later on it can be used in stews and chilis, or turned into a thicker sauce with other ingredients. Done this way, we have lots of options. (That's not even half of the jars shown below.)

canning supplies


I was always nervous to can things because I was convinced that I wouldn't do it properly, the jars wouldn't seal correctly, and disaster would ensue. However, after doing it with people who know what they're doing, I realized there is nothing to be afraid of! Don't get me wrong, canning is a science, but it's not rocket science.

The sauce is brought to a boil, which ensures that any bad bacteria is killed off. The jars and rings get dunked in boiling water to disinfect and to bring them up to temperature so that the hot sauce doesn't crack the glass. The lids are put in hot, but not boiling, water because it would destroy the rubber vacuum seal. We put a few leaves of basil in the bottom of each jar for a bit of flavor. The sauce is poured in with the help of  a funnel and the rim is wiped clean. It's important that nothing disrupts the lids seal. Using a magnetic lid lifter, a lid and ring are put on top, and twisted tightly. Done! Some people put the hot jars back into boiling water to process further, but we skipped that step because we boiled the rings before. After that, they slowly cool, and you hear the chorus of little "pops" as the lids seal down. If the lid can be pressed down then it goes in the fridge right away.

Putting up tomatoes Putting up tomatoes

I think after the eighth hour on Sunday night we were getting bit delirious. Chris fashioned the hot jar glove into a puppet... A weekend of hard work, but definitely worth it! Now I'm ready to can everything. No, really. I just bought a book called, Canning for a New Generation: Bold, Fresh Flavors for the Modern Pantry...


Tuesday, August 27, 2013

Meatless Mondays

I often joke that I would make a fantastic vegetarian if  I didn't love meat so much. And what I mean by that is simply that I relish eating plenty of fruits, vegetables, and whole grains, and can happily devour meals without meat. It's just that I really really love meat. I am quite aware that there are lots of arguments why we shouldn't eat meat, and have had many a philosophical discussion on the matter. But I always come back to the question, "do you eat to live, or live to eat", and I most definitely fall into the latter. Despite all the reasons, if I restricted myself from enjoying ALL the food in the culinary spectrum I think, truly, life would be a bit more dull for me. But the tiny tree hugger in me tugs at my heartstrings because she's worried about carbon footprints, water usage, ethical treatment of animals and such.

That said, as a household, we make efforts to eat in a more sustainable fashion; by choosing local produce and meat when we can, and raising our own chickens for eggs. We probably eat a vegetarian dinner two, three times a week, just because. But I'd like to try to establish a lifestyle less meat dependent for health, environmental, and economic reasons. In Michael Pollan's book, Food Rules: An Eater's Manual, he lists guidelines in which to eat balanced and healthfully. It's number twenty three that is applicable here...

23. Treat meat as a flavoring or special occasion food

I think that's a great guideline, viewing meat as a treat rather than a daily staple. And I can live with that (Chris too). So, my first step is to join in with the "Meatless Mondays" campaign. Weekly devoting a whole day to not eating animals! If anything, it will encourage me to plan meatless meals more often. We try our best to balance what's good for ourselves, the wellness of our environment, and the limits of our budget, which can be difficult at times! But living the lifestyle we do, we're very lucky to be able to make decisions such as these. So for our first Meatless Monday we had a coconut curry with a variety of beans, carrots, onions and heaps of Thai basil from the garden. The curry was made from simmering coconut milk and Penzey's Bangkok Blend, so fragrant!


UPDATE: I'm the worst! Only one week later I broke Meatless Monday for some IKEA meatballs at lunch. To be fair, I didn't do it knowingly, and it was Labor Day. But still, I need to be a little more conscious in the future...

Thursday, August 22, 2013

Orange Ginger Banana Bread

I've said a few times already, I'm not a great baker. My cookies are passable and cakes are questionable, so I was hesitant to try turning my spotty bananas into anything but future smoothies. Whatever it was that insisted I try my hand at banana bread, probably my stomach, I'm so glad I did. I finally baked something sweet and delicious! I started out with a simple recipe from the Food Network and added a few things.

orange ginger banana bread


Ingredients:

1 cup granulated sugar (or 2/3 agave nectar*)
8 tablespoons (1 stick) unsalted butter, room temperature
2 large eggs (or 3 Monica sized eggs)
3 ripe bananas
1 tablespoon milk
1 teaspoon ground cinnamon
2 cups all-purpose flour
1 teaspoon baking powder
1 teaspoon baking soda
1 teaspoon salt
2 teaspoon ground ginger 
1 teaspoon vanilla extract
2 teaspoons orange extract
1/2 cup of crushed pecans

*All About Agave has a helpful agave substitute guide here.

Preheat the oven to 325° F. Butter a 9 x 5 x 3 inch loaf pan.

Mix the butter and sugar in a mixer until it's fluffy. Add the eggs one at a time.

In another bowl, mash up the bananas, add the milk, and spices. In another bowl, mix the dry ingredients.

Add the banana mixture slowly to the mixing bowl, stirring slowly. Add the dry ingredients and mix until the flour disappears. Fold in the pecans.

Pour the batter into the greased pan, and bake for 1 hour and 10 minutes. Flip it out of the pan, and allow it to cool before you slice it up.

This turned out oh so chewy and moist. It's best fresh out of the oven with some melty butter. In the future, I think I'd splurge on some orange zest and freshly grated ginger. It would also be good with some ice cream on top, vanilla bean or dulce de leche... That reminds me, I should get some ice cream.