A few weeks ago I was posting about how I have "Chicken Envy" of people with backyard chickens. The chicks we got around Easter have officially come our way, and we made them a pretty sweet home this past weekend. Emily and Chrissy have been graciously brooding the chicks for the past month in their home, probably a little messier than we anticipated. But now that they have their feathers and the nights aren't too cold, they are ready to move outside! They've been living in a giant plastic storage container, so I'm sure they were ready to feel some grass under their little feet. We needed to put our coop plans into action. We still have a bit of finishing touches left, but it's fully functional for the chickens now. Eventually I'll put up plans if anyone would like to try to replicate, "The Penncroft Hen House". (See the building progression after the jump).
DAY ONE:
Chris and I did some research, read some books, stole some ideas, and drew up a plan. Chris' dad, a carpenter by profession, helped us with the actual building. Dante is by the garage making sure the chickens don't escape...
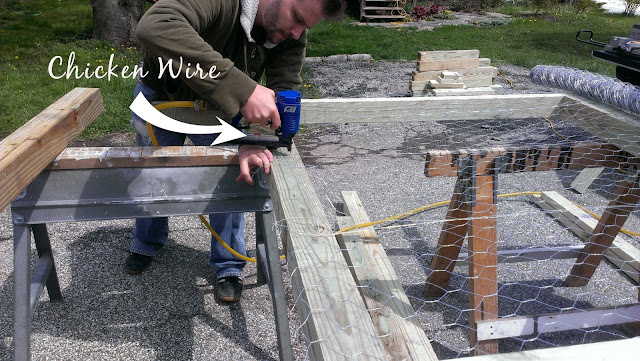
We decided to build modulely, so that we could take it apart and move it. So the first steps were building each side of the run. A frame of 4x4s and 2x4s covered in chicken wire. The wire was pulled taut and stapled to the frame.
Next, the frame of coop was constructed in place. We buried a few bricks where the 4x4s will stand for level construction.
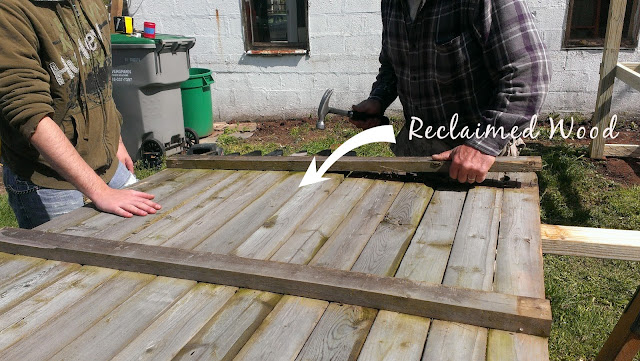
We were lucky to have some old fencing that we would have thrown out anyway. We took them apart and re-purposed the slats as coop siding. It saved money and gives it a rustic appeal. Chickens love the rustic look.
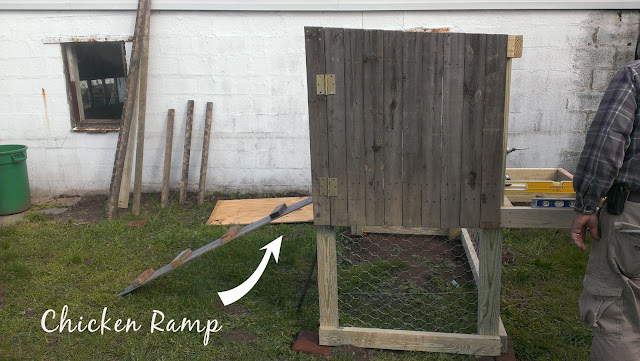
Why is the coop slanted? Well, we'll be collecting water run off in a rain barrel to water the chickens and the nearby raised beds. The door frame was cut and fit into the side of the coop.
The slats were nailed across the frame and sit flush with the outside of the coop, very secure. A small, two slat section of fencing was saved for the ramp.
The nesting box extends in the back, and will be enough for 3 boxes. That's where you go for the eggs. Mmm mmm.
DAY TWO:
The coop was nearly finished on Saturday; this is what it looked like on Sunday morning. And we were lucky to have Chris' parents help us again! We made two doors, one on either side of the coop for easy access and cleaning.
The nesting box was also paneled, and will have additional slats on the lid.
A little door was put on the opposite side of the nesting box, for privacy. Mellen tests it out, it works!
The run panels were added onto the coop. They were leveled and attached along the sides. The door for us to get in was framed out like the coop door.
Corrugated metal roofing was used for shade, rain collection and it's slightly cheaper than the fiberglass option. It was nailed to the frame of the coop and the run.
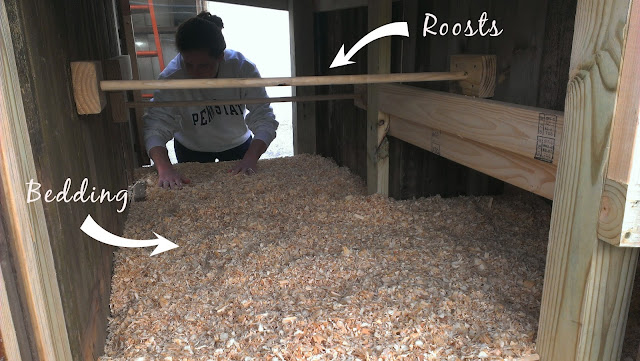
Emily and Chrissy stopped by too! Just in time for finishing touches. There are two roosts for sleeping and luxurious pine shavings for bedding. The nesting boxes don't have dividers yet, but the hens are still 2 months away from laying anything.
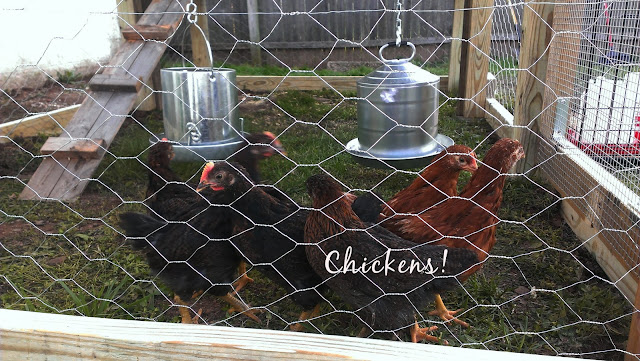
The tiny chicken door will need a pulley to so we can open it from outside the run. There are two galvanized feeders for food and water that will stay cool in the summer, hanging from the rafter. And we still have to lay a perimeter of bricks for predators.
Ta da! Chickens! Technically three hens and three roosters... Remember when we named them after characters on Friends? Well they actually turned out to be three boys and three girls. So we'll be selling little Chandler, Joey and Ross shortly. Sorry guys. Our coop could comfortably hold 8 hens so we'll build our flock up with time. They were scared at first, but as soon as they realized there were bugs to eat, they settled in quite nicely. They were very appreciative of everyone's hard work!
Monday morning I let them out, well-rested, in their new digs.








I'm still so impressed by you guys! The coop looks fantastic!
ReplyDeleteThanks! It came out way better than I expected, a little help goes a long way :)
Delete