To all my dedicated readers (the handful of friends and family that tell me they read this!),
I know it's been a long time since I've posted anything on here. But fret not, it's because I've been busy working with (sister-in-law) Emily on a brand new blog! We've decided to combine forces to create the Penncroft Homestead, a lifestyle blog that will focus on things that embody sustainability, affordability and beauty. It will be a lot of DIY projects, upcycling goods, and making things from scratch. Additionally it will be a resource for thrifty living in the Philadelphia area, listing good consignment shops, farmers markets and the like.
I've kept up with this blog for about a full year now, my how time flies! I've enjoyed recording and sharing projects and interests. And it's probably the closest thing to a diary that I've ever kept, a modest accomplishment for me. But I'm looking forward to working with Emily, and focusing our efforts on projects that we're really passionate about. I hope if you ever enjoyed reading my posts here you'll start to follow us at the Penncroft Homestead!
Showing posts with label homesteading. Show all posts
Monday, April 21, 2014
Tuesday, November 19, 2013
Homemade Horseradish Sauce
My aunt gave me a horseradish plant in the spring. Fun, I like horseradish. I planted it in a sunny spot outside of the garden beds because I was warned that it will take up a lot of space. The plant flourished throughout the growing season, producing long large leaves that sprouted into a big dome shape. I never watered it or tended to it, it just grew in the corner of the yard. Yesterday as we prepped the lawn for winter, mowing, raking and mulching, I figured it was time to unearth the horseradish that I had all but forgotten about.

Tuesday, October 15, 2013
Using Natural Dyes
I have the pleasure of volunteering with Greener Partners, a non-profit in the Greater Philly area. I'm working specifically with their organic farm, Longview Farm and Market. Basically I get to hang out around the farm and attend awesome events and workshops! I was excited to attend this one, presented by the Marafiki Arts, about dyeing with natural plant dyes. It's one of those things that I've wanted to try but haven't got around to it. It turns out that the process is pretty simple...
The instructor already had three colors going. Big stainless steel pots simmering with the "dye", water and vinegar. The vinegar acts as a fixative to the fabric. Shown below are marigold flowers, which yield a brilliant golden yellow. They also have a magnificent fragrance as they simmer. In true sustainable fashion, the marigolds were grown at Longview over the summer. It makes me want to grow my own marigolds next year. I'm pretty certain chickens are fans of them as well, bonus!
There also was a brilliant purple made from a crushed South American insect, ew, but it made a gorgeous color. The third color was indigo, that was also harvested from the farm. I knew what the color looked like, but not the plant. The color is made from the dried leaves of the plant, below. The color in the pot looks like a dark sea green, but when the dyed fabric hits the air and oxidizes it turns into that bright blue.
These little wooden flowers made a cute pattern. After the dyeing process, you set the color by rinsing it in cold water, then allowing it to dry.
This is most definitely an art. Because of the nature of the method you could spend a lot of trial and error tweaking your process to achieve the perfect colors. I think I'd like to use natural dyes to do some batiks, where you use wax to draw your patterns. Pioneer Thinking has an extensive list of dye sources and the color they produce, here. Think of all the colors you can create!
The instructor already had three colors going. Big stainless steel pots simmering with the "dye", water and vinegar. The vinegar acts as a fixative to the fabric. Shown below are marigold flowers, which yield a brilliant golden yellow. They also have a magnificent fragrance as they simmer. In true sustainable fashion, the marigolds were grown at Longview over the summer. It makes me want to grow my own marigolds next year. I'm pretty certain chickens are fans of them as well, bonus!
We started off with white pieces of cloth and used various techniques to create patterns. Ah, brings me back to the childhood days of messy tie-dying... We used rubber bands, washers and clamps to make designs. the tiny clamps were really handy and effective at securing the pattern.
Look at that color! You can achieve an endless amount of hues by leaving the fabric in the dye for varying times.
There also was a brilliant purple made from a crushed South American insect, ew, but it made a gorgeous color. The third color was indigo, that was also harvested from the farm. I knew what the color looked like, but not the plant. The color is made from the dried leaves of the plant, below. The color in the pot looks like a dark sea green, but when the dyed fabric hits the air and oxidizes it turns into that bright blue.
These little wooden flowers made a cute pattern. After the dyeing process, you set the color by rinsing it in cold water, then allowing it to dry.
This is most definitely an art. Because of the nature of the method you could spend a lot of trial and error tweaking your process to achieve the perfect colors. I think I'd like to use natural dyes to do some batiks, where you use wax to draw your patterns. Pioneer Thinking has an extensive list of dye sources and the color they produce, here. Think of all the colors you can create!
Labels:
art,
diy,
garden,
homesteading,
philadelphia,
pull
Thursday, September 19, 2013
Chickens and Yogurt
Chris's mom told me to give our chickens yogurt, "it's hilarious to watch"...
Why, yes, it is quite hilarious.
Well, besides being a hoot to watch them get it all over themselves, it is a good source of probiotics. Poultry probiotics are sold as a supplement, but why spend so much when my plain Greek yogurt has the same cultures? However, it is important to remember that it is a treat. Too many treats, of anything, isn't great for them. It's best to offer feed that has been specially designed for a balanced diet, and to let them forage for insects naturally. Here's the most comprehensive resource I've found for what, and what not, to feed your flock.
Why, yes, it is quite hilarious.
Well, besides being a hoot to watch them get it all over themselves, it is a good source of probiotics. Poultry probiotics are sold as a supplement, but why spend so much when my plain Greek yogurt has the same cultures? However, it is important to remember that it is a treat. Too many treats, of anything, isn't great for them. It's best to offer feed that has been specially designed for a balanced diet, and to let them forage for insects naturally. Here's the most comprehensive resource I've found for what, and what not, to feed your flock.
Thursday, August 29, 2013
Puttin' Up Tomatoes
This past weekend was one of epic tomato proportions. Led by the expertise of Chris's parents, we helped put up 500 pounds of tomatoes in two days. We'll have enough jarred tomatoes to last a year. Whew!
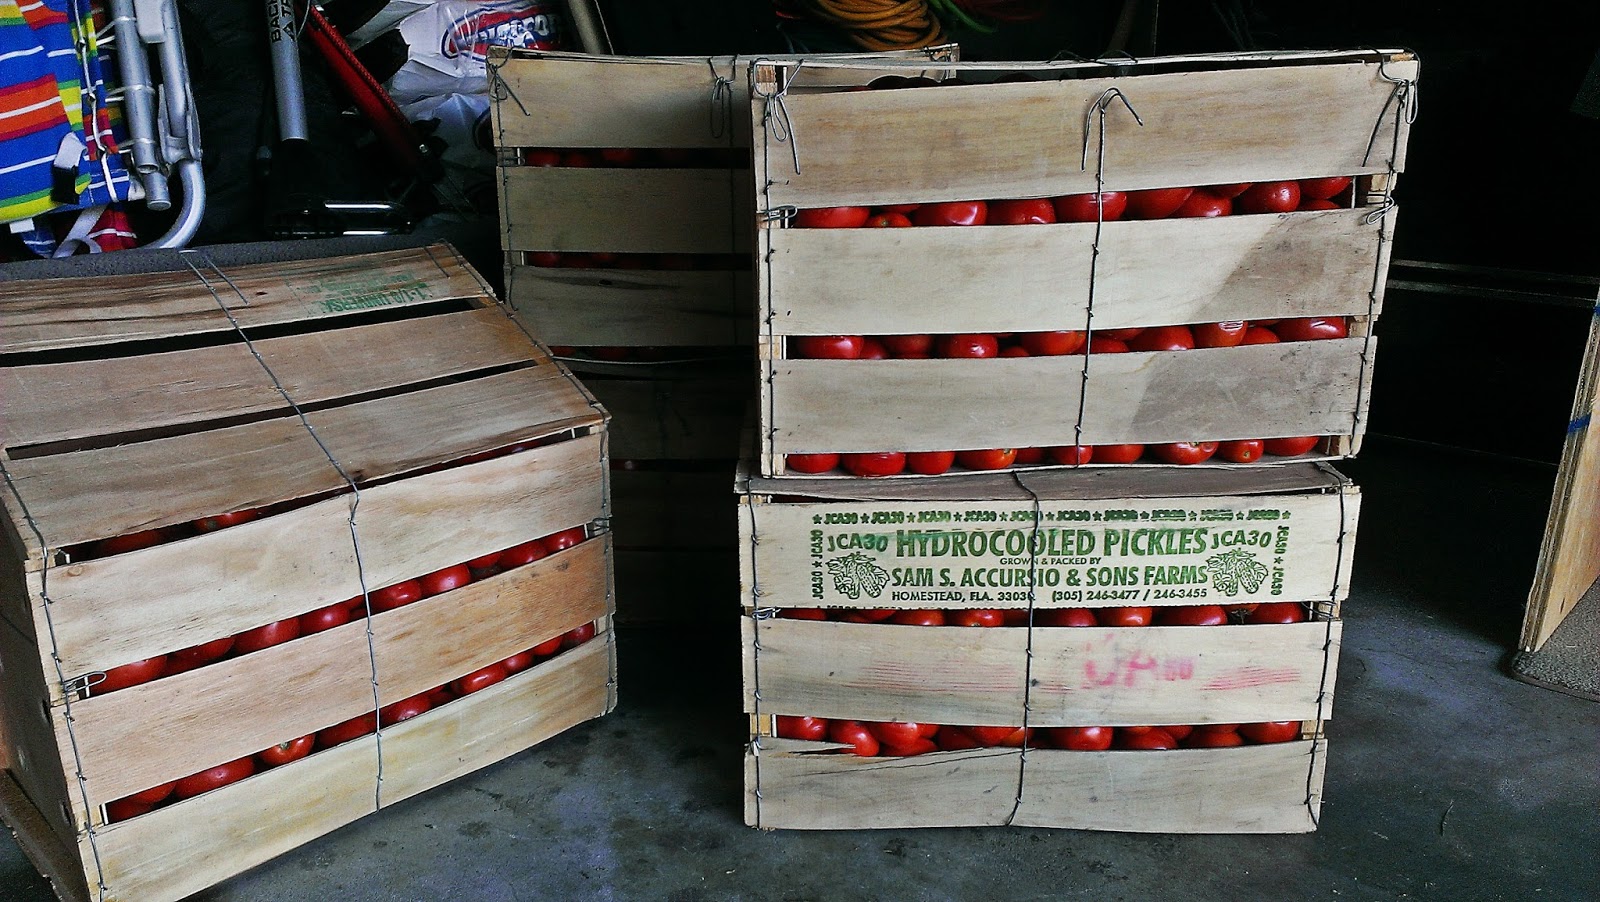
First off, we had to acquire tomatoes, because as prolific as our tomatoes were this year, we didn't have that many. After calling around to a few farms, Mellen found a place in Bordentown, NJ that had a good crop of plum tomatoes. Later that day they arrived, SUV filled to the brim with tomatoes, ten crates worth.
For this tomato operation we borrowed a fancy Italian motorized grinder that actually skins and seeds the little fruits and extrudes the bright pink pulpy goodness. It's truly an amazing machine. Chris's parents, and plenty of those before them, used to process tomatoes with a hand crank. Yikes.
For any canning process there are certain preparations that need to happen. The first is gathering supplies, jars, lids, rings, stock pots, ladles, and plenty of towels. The work space should be clean and clear of non-essential items (here, wine to drink during the process is considered essential). We brought the crates into the kitchen, and set up a big table for cutting and grinding.

Emily and Chris unloaded the tomatoes into the kitchen sink filled with water and a little vinegar to
clean the tomatoes. They pulled out each one, gave it a once over and removed "any spots that you wouldn't eat". Overall, the tomatoes were beautifully ripe, with few spots needing removal. (Anything that was removed went to the chickens!). After they were inspected, they were brought to the cutting table where I quartered them and put them in line to be processed. They all go through the top of the grinder, down to an auger that turns and removes the skin and seeds.
We did this for hours; collecting sauce in stock pots and removing the skin and seeds. As we neared time to jar, various pots were put on the stove to bring to a boil and reduce a bit. Any foaminess that bubbles up is scraped off. The lions share of the tomatoes remained plain so that later on it can be used in stews and chilis, or turned into a thicker sauce with other ingredients. Done this way, we have lots of options. (That's not even half of the jars shown below.)
I was always nervous to can things because I was convinced that I wouldn't do it properly, the jars wouldn't seal correctly, and disaster would ensue. However, after doing it with people who know what they're doing, I realized there is nothing to be afraid of! Don't get me wrong, canning is a science, but it's not rocket science.
The sauce is brought to a boil, which ensures that any bad bacteria is killed off. The jars and rings get dunked in boiling water to disinfect and to bring them up to temperature so that the hot sauce doesn't crack the glass. The lids are put in hot, but not boiling, water because it would destroy the rubber vacuum seal. We put a few leaves of basil in the bottom of each jar for a bit of flavor. The sauce is poured in with the help of a funnel and the rim is wiped clean. It's important that nothing disrupts the lids seal. Using a magnetic lid lifter, a lid and ring are put on top, and twisted tightly. Done! Some people put the hot jars back into boiling water to process further, but we skipped that step because we boiled the rings before. After that, they slowly cool, and you hear the chorus of little "pops" as the lids seal down. If the lid can be pressed down then it goes in the fridge right away.
I think after the eighth hour on Sunday night we were getting bit delirious. Chris fashioned the hot jar glove into a puppet... A weekend of hard work, but definitely worth it! Now I'm ready to can everything. No, really. I just bought a book called, Canning for a New Generation: Bold, Fresh Flavors for the Modern Pantry...
First off, we had to acquire tomatoes, because as prolific as our tomatoes were this year, we didn't have that many. After calling around to a few farms, Mellen found a place in Bordentown, NJ that had a good crop of plum tomatoes. Later that day they arrived, SUV filled to the brim with tomatoes, ten crates worth.
For this tomato operation we borrowed a fancy Italian motorized grinder that actually skins and seeds the little fruits and extrudes the bright pink pulpy goodness. It's truly an amazing machine. Chris's parents, and plenty of those before them, used to process tomatoes with a hand crank. Yikes.
For any canning process there are certain preparations that need to happen. The first is gathering supplies, jars, lids, rings, stock pots, ladles, and plenty of towels. The work space should be clean and clear of non-essential items (here, wine to drink during the process is considered essential). We brought the crates into the kitchen, and set up a big table for cutting and grinding.

Emily and Chris unloaded the tomatoes into the kitchen sink filled with water and a little vinegar to
clean the tomatoes. They pulled out each one, gave it a once over and removed "any spots that you wouldn't eat". Overall, the tomatoes were beautifully ripe, with few spots needing removal. (Anything that was removed went to the chickens!). After they were inspected, they were brought to the cutting table where I quartered them and put them in line to be processed. They all go through the top of the grinder, down to an auger that turns and removes the skin and seeds.
We did this for hours; collecting sauce in stock pots and removing the skin and seeds. As we neared time to jar, various pots were put on the stove to bring to a boil and reduce a bit. Any foaminess that bubbles up is scraped off. The lions share of the tomatoes remained plain so that later on it can be used in stews and chilis, or turned into a thicker sauce with other ingredients. Done this way, we have lots of options. (That's not even half of the jars shown below.)
I was always nervous to can things because I was convinced that I wouldn't do it properly, the jars wouldn't seal correctly, and disaster would ensue. However, after doing it with people who know what they're doing, I realized there is nothing to be afraid of! Don't get me wrong, canning is a science, but it's not rocket science.
The sauce is brought to a boil, which ensures that any bad bacteria is killed off. The jars and rings get dunked in boiling water to disinfect and to bring them up to temperature so that the hot sauce doesn't crack the glass. The lids are put in hot, but not boiling, water because it would destroy the rubber vacuum seal. We put a few leaves of basil in the bottom of each jar for a bit of flavor. The sauce is poured in with the help of a funnel and the rim is wiped clean. It's important that nothing disrupts the lids seal. Using a magnetic lid lifter, a lid and ring are put on top, and twisted tightly. Done! Some people put the hot jars back into boiling water to process further, but we skipped that step because we boiled the rings before. After that, they slowly cool, and you hear the chorus of little "pops" as the lids seal down. If the lid can be pressed down then it goes in the fridge right away.
![]() |
![]() |
I think after the eighth hour on Sunday night we were getting bit delirious. Chris fashioned the hot jar glove into a puppet... A weekend of hard work, but definitely worth it! Now I'm ready to can everything. No, really. I just bought a book called, Canning for a New Generation: Bold, Fresh Flavors for the Modern Pantry...
Labels:
eating/drinking,
food,
garden,
homesteading,
pull
Monday, August 12, 2013
Everything You Could Want To Know About Eggs
I realized that once the hens finally starting laying, I really didn't know what to do with the eggs. I got a cute ceramic egg carton and started storing them in there. Should I refrigerate them? How long do they last? For how long can they be outside in the coop? After some research I can answer all these questions and more!
What Are The Benefits of Fresh Eggs?
One of the primary reasons we started raising chickens is for the eggs. We eat eggs regularly, and it's nice to know where they come from. I know exactly what they chickens eat, and that they live without hormones or antibiotics. Additionally, it has been proven that free range eggs are arguably "healthier".
They contain:
Less Cholesterol: According to the study there was 1/3 less cholesterol in the free-range eggs.
Less Saturated Fat: Mother Earth News found 25% less saturated fat in the pastured chicken eggs. Saturated fat is a buzz word in the food world now, with reason, so anything with less is always a plus.
More Vitamin A and E: Vitamin A helps in all sorts of areas including vision, skin health, immune function, and so much more. There isn't as much information out there on Vitamin E, but I think we can assume it does have a purpose.
Extra Omega-3s: We are constantly learning more about the Omega-3s, but there has already been a lot of research pointing to benefits for people with heart concerns. Double the Omega-3s is a good thing!
Read the entire article here.
Chickens have about two good egg laying years in their life and after that they slow down production, because just like humans, they have a finite amount of eggs stored in them from the get-go.
Where Do The Chickens Lay?
The chickens will lay where they feel they are safe, wherever that may be. We built nesting boxes into our coop, so that we can easily access eggs. The problem is that you have to train them to lay there. The first egg I found was randomly in a bit of high grass, just waiting to be stepped on. It was suggested to us to put some golf balls or ping pong balls in the the nesting boxes to give them the hint, but what I really think helped was keeping them in the run all day. It sort of forced them to start laying in the nesting boxes. Now we get two eggs in the same box daily.
What Are The Benefits of Fresh Eggs?
One of the primary reasons we started raising chickens is for the eggs. We eat eggs regularly, and it's nice to know where they come from. I know exactly what they chickens eat, and that they live without hormones or antibiotics. Additionally, it has been proven that free range eggs are arguably "healthier".
They contain:
Less Cholesterol: According to the study there was 1/3 less cholesterol in the free-range eggs.
Less Saturated Fat: Mother Earth News found 25% less saturated fat in the pastured chicken eggs. Saturated fat is a buzz word in the food world now, with reason, so anything with less is always a plus.
More Vitamin A and E: Vitamin A helps in all sorts of areas including vision, skin health, immune function, and so much more. There isn't as much information out there on Vitamin E, but I think we can assume it does have a purpose.
Extra Omega-3s: We are constantly learning more about the Omega-3s, but there has already been a lot of research pointing to benefits for people with heart concerns. Double the Omega-3s is a good thing!
Read the entire article here.
Chicken Egg Cycle
A hen's egg laying cycle is about 25 hours long, which is why they produce about an egg a day. That's amazing, especially when you compare that to a human egg cycle which is about a month! This little infographic explains why you don't need a rooster for eggs. We gave away all of our roosters because we don't want any of our egg fertilized, and they're just too noisy for our suburban environment.
Where Do The Chickens Lay?
The chickens will lay where they feel they are safe, wherever that may be. We built nesting boxes into our coop, so that we can easily access eggs. The problem is that you have to train them to lay there. The first egg I found was randomly in a bit of high grass, just waiting to be stepped on. It was suggested to us to put some golf balls or ping pong balls in the the nesting boxes to give them the hint, but what I really think helped was keeping them in the run all day. It sort of forced them to start laying in the nesting boxes. Now we get two eggs in the same box daily.
How To Store Fresh Eggs
Generally, fresh eggs should be collected daily, and stored in the refrigerator for up to 6 weeks. They can stay out on the counter for a week, if you'd like to display them. Washing eggs is unnecessary and actually harmful to the eggs. Eggs are naturally equipped with a porous membrane in the shell that keeps out bad bacteria. By washing an egg, you destroy the natural protection. Eggs bought at the store are refrigerated because they have been pasteurized, and their protection gone. There is special egg wash that you can buy, but I don't feel that it's necessary. When we collect the eggs they're relatively clean (Check out the top photo). Sometimes I might knock off some straw, but other than that they don't require any cleaning.
Bad Eggs?
If you're suspicious of an egg, there is a easy test to find out whether it's still safe to eat. Place the egg in a glass of water, if it floats, it's no good, if it's sinks, fry it up!
Generally, fresh eggs should be collected daily, and stored in the refrigerator for up to 6 weeks. They can stay out on the counter for a week, if you'd like to display them. Washing eggs is unnecessary and actually harmful to the eggs. Eggs are naturally equipped with a porous membrane in the shell that keeps out bad bacteria. By washing an egg, you destroy the natural protection. Eggs bought at the store are refrigerated because they have been pasteurized, and their protection gone. There is special egg wash that you can buy, but I don't feel that it's necessary. When we collect the eggs they're relatively clean (Check out the top photo). Sometimes I might knock off some straw, but other than that they don't require any cleaning.
Bad Eggs?
If you're suspicious of an egg, there is a easy test to find out whether it's still safe to eat. Place the egg in a glass of water, if it floats, it's no good, if it's sinks, fry it up!
Wednesday, August 7, 2013
And Then There Were Five
It's time for a chicken update! Lots of things have happened in the Penncroft Hen House in the last week. Last Tuesday, I pulled up in our driveway and found a chicken outside of their fenced area. "Oh bugger", I thought. As I tried to lure her back through the gate, I happened upon a tiny light brown egg. Yay! Our first egg from our flock! My surprise was quickly replaced by worry when I started counting chickens, and came up short. Crap. At the same time my very sweet neighbor was walking up the driveway, and alerted me to the fact my missing chicken was in my adjacent neighbors yard. Double crap. Together we caught her and returned her to the fenced area. Naughty chickens!
Later that night as we observed them we quickly realized that the chickens have learned that they can fly the coop. Alighting onto the fence and hopping down, they pay no heed to our boundaries. This is a problem, we decided, for our future selves. In the meantime, they'll just go back to hanging out in their spacious run.
But if that weren't enough chicken drama, the very next day, whilst engaging in my morning pre-work routine, I heard a very loud, very distinct, "Cock-a-doodle-doooooo!" Seriously? My neighbors were probably already less than happy with us for the roaming chicken incident the day before, and now we've got roosters on our hands. Everything at once, right? Luckily that same day we were able to find a new home for the two roos, and then there were five...
Phoebe - Rhode Island Red, 19 weeks
Phoebe's egg was the first I found. It's smaller and lighter in color, and she's laid about 3 in the last week. She was also the one in the neighbors yard.
Monica - Speckled Sussex, 19 weeks
Monica is our egg laying superstar, already. Since she started last week, she's been delivering an egg a day.
Cybil - Americuana, 15 weeks
Cybil is secretly my favorite as the tiniest of the flock. She gets picked on, but she's learning to speak up for herself.
Rowena - Americuana, 15 weeks
Shy Rowena has beautiful iridescent green in her black feathers already.
Chris thinks it's crazy that I can tell them apart, well, just call me the Crazy Chicken Lady. Check back later for a post about all you could want to know about fresh eggs!
Later that night as we observed them we quickly realized that the chickens have learned that they can fly the coop. Alighting onto the fence and hopping down, they pay no heed to our boundaries. This is a problem, we decided, for our future selves. In the meantime, they'll just go back to hanging out in their spacious run.
But if that weren't enough chicken drama, the very next day, whilst engaging in my morning pre-work routine, I heard a very loud, very distinct, "Cock-a-doodle-doooooo!" Seriously? My neighbors were probably already less than happy with us for the roaming chicken incident the day before, and now we've got roosters on our hands. Everything at once, right? Luckily that same day we were able to find a new home for the two roos, and then there were five...
Phoebe - Rhode Island Red, 19 weeks
Phoebe's egg was the first I found. It's smaller and lighter in color, and she's laid about 3 in the last week. She was also the one in the neighbors yard.
We can determine that Rachel isn't laying yet because of the three her comb isn't a brilliant crimson yet. She's one of the most brazen, by far. She's one of the escapees.
Monica is our egg laying superstar, already. Since she started last week, she's been delivering an egg a day.
Cybil - Americuana, 15 weeks
Cybil is secretly my favorite as the tiniest of the flock. She gets picked on, but she's learning to speak up for herself.
Shy Rowena has beautiful iridescent green in her black feathers already.
Chris thinks it's crazy that I can tell them apart, well, just call me the Crazy Chicken Lady. Check back later for a post about all you could want to know about fresh eggs!
Monday, July 29, 2013
Whole Foods Cajun Pickle
I've been pulling carrots here and there all season. But didn't realize they should be harvested sooner than later before they start to get squishy. So out they went. And then we had a lot of carrots to eat. The overabundance of a particular food is the plight of many a gardener. And in a time like this I like to pickle things!
I tried out this Whole Foods recipe for a veggie pickle last year and it turned out wonderfully. The perfect balance of spicy, garlicky goodness.
Salt
1/2 pound green beans, trimmed
1/2 pound carrots, trimmed and cut into ½-inch wide sticks
3 cloves garlic, crushed
3 whole black peppercorns
1/2 teaspoon celery seeds
1/2 teaspoon coriander seeds
1/2 teaspoon yellow mustard seeds
1/4 teaspoon cayenne (or a small whole cayenne pepper)
1 dried bay leaf
1/2 small yellow onion, thinly sliced
1 1/2 cup distilled white vinegar
1/3 cup sugar
These were a hit last year. They're great to bring with you to barbecues as a little gift (tie the lid with some raffia, so cute!) or just to snack on at home. Because they're not actually canned they won't last forever. But left unopened in the fridge I say they could keep for a few months. Use your best judgement, no fingers in the jar! And if you see signs of haziness then best to toss them. But we never got to that point because they went so fast!
Next post will be about too many tomatoes... (No such thing!)
I tried out this Whole Foods recipe for a veggie pickle last year and it turned out wonderfully. The perfect balance of spicy, garlicky goodness.
Pickled Cajun Green Beans and Carrots: by Whole Foods
These amounts will make about 2 pint jars or one large jar, so plan accordingly for the quantity of veggies you have
1/2 pound green beans, trimmed
1/2 pound carrots, trimmed and cut into ½-inch wide sticks
3 cloves garlic, crushed
3 whole black peppercorns
1/2 teaspoon celery seeds
1/2 teaspoon coriander seeds
1/2 teaspoon yellow mustard seeds
1/4 teaspoon cayenne (or a small whole cayenne pepper)
1 dried bay leaf
1/2 small yellow onion, thinly sliced
1 1/2 cup distilled white vinegar
1/3 cup sugar
Start a large pot of salted boiling water to blanch the veggies. Put the cut and washed veggies into the boiling water and let them cook for 2-3 minutes, just until tender. Have a large bowl filled with ice ready. Strain the veggies and immediately put them over the ice, then fill the rest of the bowl with water. This will stop them from cooking any longer.
Slice up the onions super thin, I use a mandolin. And peel and crush the garlic cloves. Put all of the spices in your jar(s).
Combine the vinegar and sugar in a pan and cook on low heat 'til the sugar dissolves. While you let the vinegar cool, strain the veggies and with clean hands or tongs pack the veg in the jar(s). When the vinegar solution has cooled you can add it to the jar leaving a quarter inch of room on top. Let them cool a bit more, lid them, give them a good shake, and refrigerate them. Don't crack into them for at least 24 hours.
These were a hit last year. They're great to bring with you to barbecues as a little gift (tie the lid with some raffia, so cute!) or just to snack on at home. Because they're not actually canned they won't last forever. But left unopened in the fridge I say they could keep for a few months. Use your best judgement, no fingers in the jar! And if you see signs of haziness then best to toss them. But we never got to that point because they went so fast!
Next post will be about too many tomatoes... (No such thing!)
Friday, July 12, 2013
Mischievous Chickens Caught in the Act
We were truly excited to attempt to grow our own hops this summer. We got three different varieties of hops rhizomes and planted them in the spring. Since then, the area around where they were planted has become a home to raised beds and the chickens.
We laid down a considerable amount of woodchips around the raised beds to hinder growth of weeds in and around the beds. But now that the chickens are "free ranging" they love to scratch up the woodchips and unearth bugs and creepy crawlies underneath. I was surprised that the netting around the beds is enough to keep out the hungry beaks, but it didn't even occur to me that they might get into the unprotected hops...
I had only just put up twine for the baby hops bines emerging from the ground, and the very next day there was only a hole left where I planted them. Who would do such a thing?!
I caught them the other day in the act, scratching away at the hops that never were. How could I be so naive to think they wouldn't demolish them unprotected? Oh well, there's always next year. Naughty naughty chickens.
We laid down a considerable amount of woodchips around the raised beds to hinder growth of weeds in and around the beds. But now that the chickens are "free ranging" they love to scratch up the woodchips and unearth bugs and creepy crawlies underneath. I was surprised that the netting around the beds is enough to keep out the hungry beaks, but it didn't even occur to me that they might get into the unprotected hops...
I had only just put up twine for the baby hops bines emerging from the ground, and the very next day there was only a hole left where I planted them. Who would do such a thing?!
I caught them the other day in the act, scratching away at the hops that never were. How could I be so naive to think they wouldn't demolish them unprotected? Oh well, there's always next year. Naughty naughty chickens.
Tuesday, June 4, 2013
Backyard Chickens and Your Dog
Our nine pound Chihuahua, Dante, loves our backyard chickens. In fact, he loves them so much, he wants to eat them! Well, I guess dogs will be dogs...
I thought I'd share how the chickens have been fitting into Dante's life, as well as our own. I think I was secretly hoping that Dante and the chicks would miraculously be BFFs, but like most things in life, their relationship is taking more time and patience, ugh, there's that "p" word again. So if you have a dog and you're thinking about getting some backyard chickens, here's some things that I've learned.
1. Consider where your chickens will live in relation to your dog. We're in the process of fencing in a portion of the yard so that the chickens can free range in safety with their coop. Currently there's no fence, just a thin chicken wire barrier. The holes are perfectly sized for a little Chihuahua mouth.
2. Introductions. Don't bring your chicks home at midnight and put them in the basement until the coop is built. That's unfortunately how Dante first met them, tiny feathered intruders in his home! He picked up on their presence in seconds, tore down the stairs and starting barking and nipping at feathers. When we finally built the coop we went about it a much better way. We made sure Dante had a long walk and was good and tired. Since he was still leashed we approached the chickens very slowly and gradually. It's also a good idea to have a favorite toy with you to distract them every so often. They have to learn that the chickens aren't a threat, and don't need to be the focus of attention when he's in the yard. After awhile we took him off the leash and played fetch. He played for a bit, then remembered about the chickens and ran back to start the process all over again.
3. Patience! Take the dog out on the leash frequently to see and sniff them until they seem calm around the coop. If your chickens will always be in a coop, then you're good to go. Eventually the dog will just get used to them and won't even feel the need to watch them. But since we'd like our chickens to free range, we have to go a little further with training.
4. Meeting face to face. The other night we not only let the chickens free range without the fence up, but we brought Dante out too. He whined a lot, but soon tired himself out and laid down. The funny part is that the chickens could care less about him. I thought they would be skittish, but maybe they're just not that smart.
I thought I'd share how the chickens have been fitting into Dante's life, as well as our own. I think I was secretly hoping that Dante and the chicks would miraculously be BFFs, but like most things in life, their relationship is taking more time and patience, ugh, there's that "p" word again. So if you have a dog and you're thinking about getting some backyard chickens, here's some things that I've learned.
![]() |
| The chicken area of the yard is still under construction, I'm hoping the girls will just eat all the weeds for me! |
2. Introductions. Don't bring your chicks home at midnight and put them in the basement until the coop is built. That's unfortunately how Dante first met them, tiny feathered intruders in his home! He picked up on their presence in seconds, tore down the stairs and starting barking and nipping at feathers. When we finally built the coop we went about it a much better way. We made sure Dante had a long walk and was good and tired. Since he was still leashed we approached the chickens very slowly and gradually. It's also a good idea to have a favorite toy with you to distract them every so often. They have to learn that the chickens aren't a threat, and don't need to be the focus of attention when he's in the yard. After awhile we took him off the leash and played fetch. He played for a bit, then remembered about the chickens and ran back to start the process all over again.
3. Patience! Take the dog out on the leash frequently to see and sniff them until they seem calm around the coop. If your chickens will always be in a coop, then you're good to go. Eventually the dog will just get used to them and won't even feel the need to watch them. But since we'd like our chickens to free range, we have to go a little further with training.
4. Meeting face to face. The other night we not only let the chickens free range without the fence up, but we brought Dante out too. He whined a lot, but soon tired himself out and laid down. The funny part is that the chickens could care less about him. I thought they would be skittish, but maybe they're just not that smart.
![]() |
| Lemme at 'em! |
![]() |
| The chickens don't really stray too far from the coop anyway. |
![]() |
| At this point Dante has given up on a chicken dinner. |
Friday, May 17, 2013
Eggs!
More adventures in chicken keeping... Last weekend we acquired more chickens from a small animal auction near Lancaster, PA. We said goodbye to our roos and got 8 eight week old Americaunas. Chris' parents live nearby and have also joined the backyard chicken bandwagon, so there's a whole lot of chicken swapping going on...
Mellen bought two beautiful egg laying hens, a lavender Orpington and a white Silkie.
![]() |
| We've been calling them "Fozzy" and "Babette" for their time with us. |
Because they don't have a coop built yet their hens have been bunking with ours for the past week. The girls earn their keep by giving us eggs!
![]() |
| They haven't been using the nesting boxes, so maybe we'll tweak the design. |
Which is fun because our hens won't start laying for a couple of weeks. The little Silkie is a very consistent layer, she gives us one small and slightly shiny egg every afternoon. The larger Orpington has only given us one large egg, more matte looking, and we've eaten them all! Mmmm, can't wait for our own hens to do their thing.
![]() |
| Orpington egg on top, two Silkie eggs on the bottom |
So the other eight Americaunas have been living with Chris' parents until they're ready to go outside, probably another week. We'll split them up with Chris' parents. Those girls will bring our flock count up to around seven. And soon enough we'll have more eggs than we can eat ourselves!
![]() |
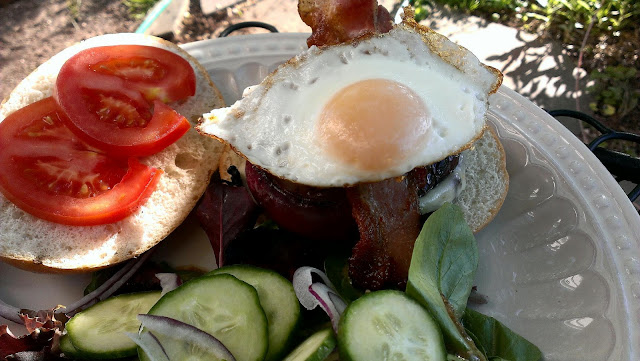
| Bacon and egg burger |
![]() |
| Tiny Silkie egg and goat cheese on homemade toasted bread; breakfast of champions! |
Wednesday, May 15, 2013
Homemade Bread: Just Make It Already
I'm a terrible baker. I just am. But I can make some darn good bread. I had never even humored the idea of bread baking because my lack of skills until my father in law started making these divine crusty loaves and convinced me that the recipe he uses is really easy. OK fine, twist my arm.

I actually ended up starting with this recipe from Makes and Takes. It took a batch or two to actually get comfortable with the process. Because a lot of factors affect bread dough, it's essential to know what each step is supposed to look like, and not necessarily follow a strict amount of ingredients. I'd wager the temperature and amount of water has the largest bearing on the dough. So here's my bread steps. Again I'm an awful baker, so don't be afraid!
Ready for the extensive list of ingredients?
Once risen, preheat your oven to 450°. Prepare a pizza stone with a dusting of cornmeal. Sprinkle some flour on a surface for kneading. (I use regular flour instead of bread flour just because it's a little cheaper, and you don't knead to be wasting your precious bread flour. Pun?) Also dust your hands with some flour while you're at it, otherwise your fingers become a useless doughy mess.
I rarely bought sliced bread, just the occasional baguette or rolls when needed. Now, I've gotten into the routine of preparing the dough Friday night or Saturday morning and baking Saturday. One batch of dough will usually last us a week or so. Additionally this bread freezes nicely. One loaf stays out, and the other gets frozen and pulled to defrost when needed. You could alternatively divide the dough and keep it in the fridge for a week to bake on demand. So many options! Just try it and see what works best for you.

I actually ended up starting with this recipe from Makes and Takes. It took a batch or two to actually get comfortable with the process. Because a lot of factors affect bread dough, it's essential to know what each step is supposed to look like, and not necessarily follow a strict amount of ingredients. I'd wager the temperature and amount of water has the largest bearing on the dough. So here's my bread steps. Again I'm an awful baker, so don't be afraid!
Ready for the extensive list of ingredients?
- 3 cups lukewarm water
- 1 1/2 tablespoons active dry yeast
- 1 1/2 tablespoons kosher or other coarse salt
- 6 1/2 cups bread flour (I use King Arthur)
- cornmeal (for dusting the pizza stone)
In a large bowl add the flour, yeast and salt.
Use a candy thermometer to get 3 cups of water to 100-110° F. I think that this is actually an important factor. Too cold and the yeast takes forever to activate and too hot the yeast will die. Dead yeast!!
Add the water one cup at a time while you stir. Yes, you could use a stand mixer. I have my mom's hand-me-down Kitchen Aid that's older than me, but I hand stir the bread. Why? A few reasons, 1. The original recipe told me so 2. My mom claims that the mixer would take out the airy bubbles this bread gets 3. I'm lazy. Your move. Stir with some elbow grease and a sturdy wooden spoon. All the flour should be incorporated. Add more water or flour depending on the consistency. It shouldn't look wet, but it should still be sticky.
Dampen a tea towel with warm water and cover the bowl. Put it in a warm area. On top of the dryer. On top of the oven that's already on. Or outside on a sunny day. Let the dough rise.
Rise time will vary 1-8 hours. SO just know that the dough must double in size.
Once risen, preheat your oven to 450°. Prepare a pizza stone with a dusting of cornmeal. Sprinkle some flour on a surface for kneading. (I use regular flour instead of bread flour just because it's a little cheaper, and you don't knead to be wasting your precious bread flour. Pun?) Also dust your hands with some flour while you're at it, otherwise your fingers become a useless doughy mess.
Carefully pull the dough out of the bowl and give it a few kneads. Doesn't require too much. Divide the dough. I make two loaves. Shape them and place them on the stone. Score the tops for presentation. Then let them rest just like that for a half hour. While they rest put a rimmed baking sheet in the bottom rack of the oven. When you put the bread in fill that heated pan with water. The steam helps put a golden crust on the bread.
Bake for 30-35 minutes. Again, bake times will vary. Keep an eye on them. They'll be ready when the top is golden, and sounds hollow when you tap it.
As much as you want to, don't slice up the bread just yet. Let them cool on a baking rack first, the middle still will be a little doughy. And that's it! This bread can be sliced thin for sandwiches or thick for slabs of butter and honey. It also makes great croutons.
The hands on process takes 5 minutes.
I rarely bought sliced bread, just the occasional baguette or rolls when needed. Now, I've gotten into the routine of preparing the dough Friday night or Saturday morning and baking Saturday. One batch of dough will usually last us a week or so. Additionally this bread freezes nicely. One loaf stays out, and the other gets frozen and pulled to defrost when needed. You could alternatively divide the dough and keep it in the fridge for a week to bake on demand. So many options! Just try it and see what works best for you.
Subscribe to:
Posts (Atom)