Showing posts with label garden. Show all posts

Monday, March 24, 2014

The First Signs of Spring

“If we had no winter, the spring would not be so pleasant: if we did not sometimes taste of adversity, prosperity would not be so welcome."
- Anne Bradstreet


Tuesday, November 19, 2013

Homemade Horseradish Sauce

My aunt gave me a horseradish plant in the spring. Fun, I like horseradish. I planted it in a sunny spot outside of the garden beds because I was warned that it will take up a lot of space. The plant flourished throughout the growing season, producing long large leaves that sprouted into a big dome shape. I never watered it or tended to it, it just grew in the corner of the yard. Yesterday as we prepped the lawn for winter, mowing, raking and mulching, I figured it was time to unearth the horseradish that I had all but forgotten about.

homemade horseradish

Tuesday, October 15, 2013

Using Natural Dyes

I have the pleasure of volunteering with Greener Partners, a non-profit in the Greater Philly area. I'm working specifically with their organic farm, Longview Farm and Market. Basically I get to hang out around the farm and attend awesome events and workshops! I was excited to attend this one, presented by the Marafiki Arts, about dyeing with natural plant dyes. It's one of those things that I've wanted to try but haven't got around to it. It turns out that the process is pretty simple...

The instructor already had three colors going. Big stainless steel pots simmering with the "dye", water and vinegar. The vinegar acts as a fixative to the fabric. Shown below are marigold flowers, which yield a brilliant golden yellow. They also have a magnificent fragrance as they simmer. In true sustainable fashion, the marigolds were grown at Longview over the summer. It makes me want to grow my own marigolds next year. I'm pretty certain chickens are fans of them as well, bonus!

marigold natural dye
We started off with white pieces of cloth and used various techniques to create patterns. Ah, brings me back to the childhood days of messy tie-dying... We used rubber bands, washers and clamps to make designs. the tiny clamps were really handy and effective at securing the pattern.

clamps and washers to dye
Look at that color! You can achieve an endless amount of hues by leaving the fabric in the dye for varying times. 

marigold natural dye

There also was a brilliant purple made from a crushed South American insect, ew, but it made a gorgeous color. The third color was indigo, that was also harvested from the farm.  I knew what the color looked like, but not the plant. The color is made from the dried leaves of the plant, below. The color in the pot looks like a dark sea green, but when the dyed fabric hits the air and oxidizes it turns into that bright blue.

indigo plant


These little wooden flowers made a cute pattern. After the dyeing process, you set the color by rinsing it in cold water, then allowing it to dry.

natural fabric dye


This is most definitely an art. Because of the nature of the method you could spend a lot of trial and error tweaking your process to achieve the perfect colors. I think I'd like to use natural dyes to do some batiks, where you use wax to draw your patterns. Pioneer Thinking has an extensive list of dye sources and the color they produce, here. Think of all the colors you can create!

Thursday, August 29, 2013

Puttin' Up Tomatoes

This past weekend was one of epic tomato proportions. Led by the expertise of Chris's parents, we helped put up 500 pounds of tomatoes in two days. We'll have enough jarred tomatoes to last a year. Whew!

Putting up tomatoes


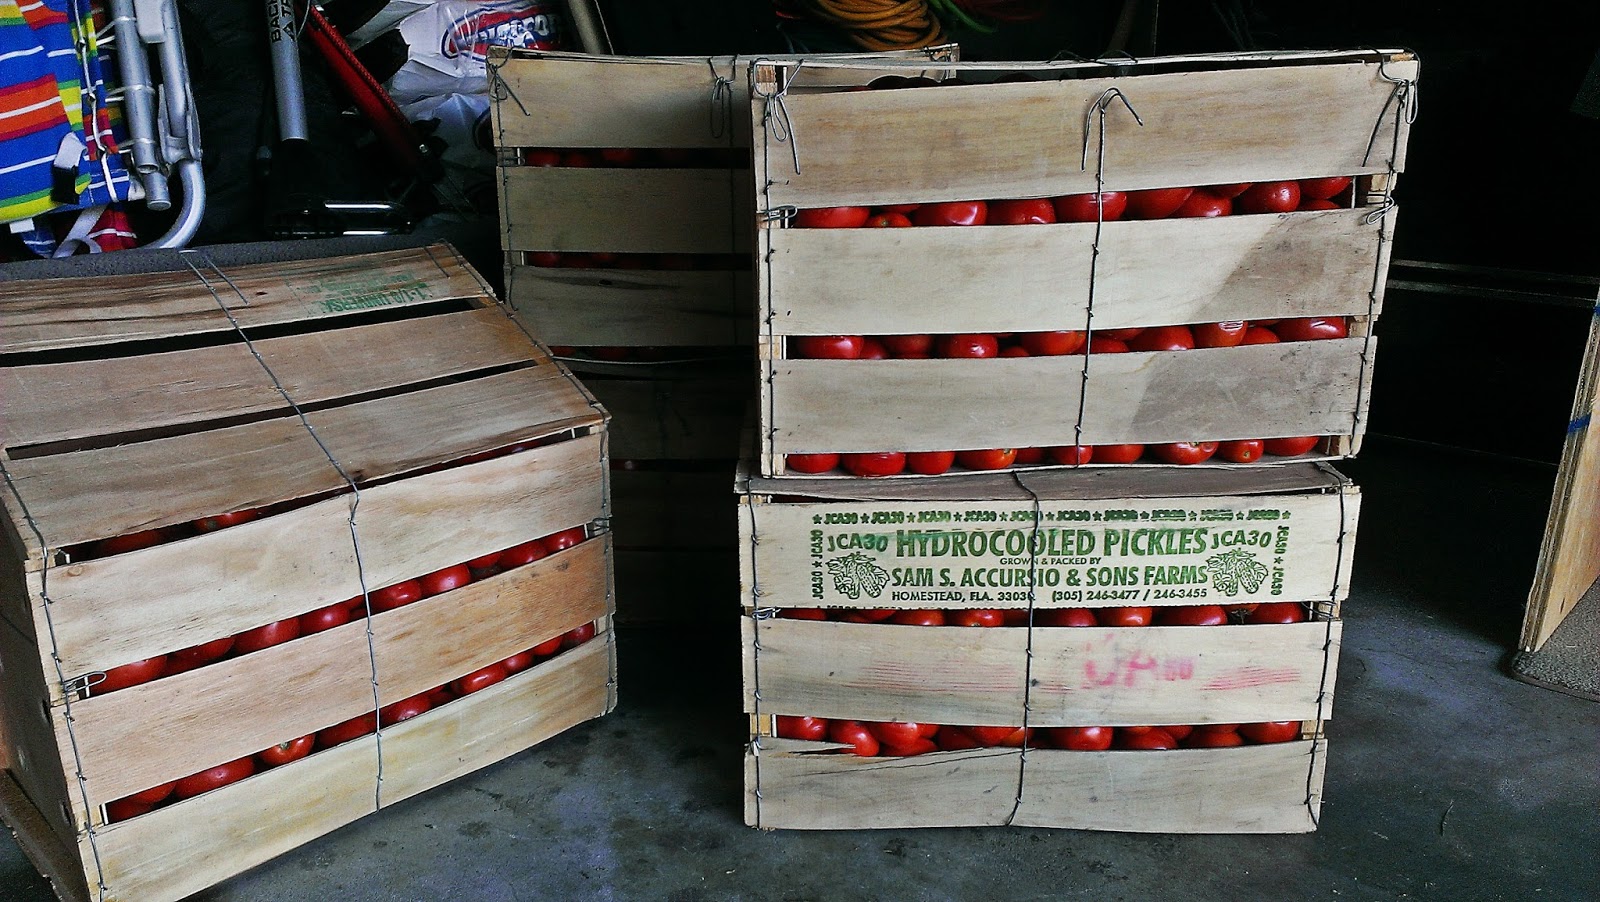
First off, we had to acquire tomatoes, because as prolific as our tomatoes were this year, we didn't have that many. After calling around to a few farms, Mellen found a place in Bordentown, NJ that had a good crop of plum tomatoes. Later that day they arrived, SUV filled to the brim with tomatoes, ten crates worth.

crates of tomatoes


For this tomato operation we borrowed a fancy Italian motorized grinder that actually skins and seeds the little fruits and extrudes the bright pink pulpy goodness. It's truly an amazing machine. Chris's parents, and plenty of those before them, used to process tomatoes with a hand crank. Yikes.

For any canning process there are certain preparations that need to happen. The first is gathering supplies, jars, lids, rings, stock pots, ladles, and plenty of towels. The work space should be clean and clear of non-essential items (here, wine to drink during the process is considered essential). We brought the crates into the kitchen, and set up a big table for cutting and grinding.

Putting up tomatoes


Putting up tomatoes

Emily and Chris unloaded the tomatoes into the kitchen sink filled with water and a little vinegar to
clean the tomatoes. They pulled out each one, gave it a once over and removed "any spots that you wouldn't eat". Overall, the tomatoes were beautifully ripe, with few spots needing removal. (Anything that was removed went to the chickens!). After they were inspected, they were brought to the cutting table where I quartered them and put them in line to be processed. They all go through the top of the grinder, down to an auger that turns and removes the skin and seeds.

tomato grinder


tomato puree

We did this for hours; collecting sauce in stock pots and removing the skin and seeds. As we neared time to jar, various pots were put on the stove to bring to a boil and reduce a bit. Any foaminess that bubbles up is scraped off. The lions share of the tomatoes remained plain so that later on it can be used in stews and chilis, or turned into a thicker sauce with other ingredients. Done this way, we have lots of options. (That's not even half of the jars shown below.)

canning supplies


I was always nervous to can things because I was convinced that I wouldn't do it properly, the jars wouldn't seal correctly, and disaster would ensue. However, after doing it with people who know what they're doing, I realized there is nothing to be afraid of! Don't get me wrong, canning is a science, but it's not rocket science.

The sauce is brought to a boil, which ensures that any bad bacteria is killed off. The jars and rings get dunked in boiling water to disinfect and to bring them up to temperature so that the hot sauce doesn't crack the glass. The lids are put in hot, but not boiling, water because it would destroy the rubber vacuum seal. We put a few leaves of basil in the bottom of each jar for a bit of flavor. The sauce is poured in with the help of  a funnel and the rim is wiped clean. It's important that nothing disrupts the lids seal. Using a magnetic lid lifter, a lid and ring are put on top, and twisted tightly. Done! Some people put the hot jars back into boiling water to process further, but we skipped that step because we boiled the rings before. After that, they slowly cool, and you hear the chorus of little "pops" as the lids seal down. If the lid can be pressed down then it goes in the fridge right away.

Putting up tomatoes Putting up tomatoes

I think after the eighth hour on Sunday night we were getting bit delirious. Chris fashioned the hot jar glove into a puppet... A weekend of hard work, but definitely worth it! Now I'm ready to can everything. No, really. I just bought a book called, Canning for a New Generation: Bold, Fresh Flavors for the Modern Pantry...


Monday, July 29, 2013

Whole Foods Cajun Pickle

I've been pulling carrots here and there all season. But didn't realize they should be harvested sooner than later before they start to get squishy. So out they went. And then we had a lot of carrots to eat. The overabundance of a particular food is the plight of many a gardener. And in a time like this I like to pickle things!


I tried out this Whole Foods recipe for a veggie pickle last year and it turned out wonderfully. The perfect balance of spicy, garlicky goodness.

Pickled Cajun Green Beans and Carrots: by Whole Foods
These amounts will make about 2 pint jars or one large jar, so plan accordingly for the quantity of veggies you have

Salt
1/2 pound green beans, trimmed
1/2 pound carrots, trimmed and cut into ½-inch wide sticks
3 cloves garlic, crushed
3 whole black peppercorns
1/2 teaspoon celery seeds
1/2 teaspoon coriander seeds
1/2 teaspoon yellow mustard seeds
1/4 teaspoon cayenne (or a small whole cayenne pepper)
1 dried bay leaf
1/2 small yellow onion, thinly sliced
1 1/2 cup distilled white vinegar
1/3 cup sugar

Start a large pot of salted boiling water to blanch the veggies. Put the cut and washed veggies into the boiling water and let them cook for 2-3 minutes, just until tender. Have a large bowl filled with ice ready. Strain the veggies and immediately put them over the ice, then fill the rest of the bowl with water. This will stop them from cooking any longer.

Slice up the onions super thin, I use a mandolin. And peel and crush the garlic cloves. Put all of the spices in your jar(s). 


Combine the vinegar and sugar in a pan and cook on low heat 'til the sugar dissolves. While you let the vinegar cool, strain the veggies and with clean hands or tongs pack the veg in the jar(s). When the vinegar solution has cooled you can add it to the jar leaving a quarter inch of room on top. Let them cool a bit more, lid them, give them a good shake, and refrigerate them. Don't crack into them for at least 24 hours.


These were a hit last year. They're great to bring with you to barbecues as a little gift (tie the lid with some raffia, so cute!) or just to snack on at home. Because they're not actually canned they won't last forever. But left unopened in the fridge I say they could keep for a few months. Use your best judgement, no fingers in the jar! And if you see signs of haziness then best to toss them. But we never got to that point because they went so fast!

Next post will be about too many tomatoes... (No such thing!)

Friday, July 12, 2013

Mischievous Chickens Caught in the Act

We were truly excited to attempt to grow our own hops this summer. We got three different varieties of hops rhizomes and planted them in the spring. Since then, the area around where they were planted has become a home to raised beds and the chickens.

We laid down a considerable amount of woodchips around the raised beds to hinder growth of weeds in and around the beds. But now that the chickens are "free ranging" they love to scratch up the woodchips and unearth bugs and creepy crawlies underneath. I was surprised that the netting around the beds is enough to keep out the hungry beaks, but it didn't even occur to me that they might get into the unprotected hops...

I had only just put up twine for the baby hops bines emerging from the ground, and the very next day there was only a hole left where I planted them. Who would do such a thing?!
suburban chickens


I caught them the other day in the act, scratching away at the hops that never were. How could I be so naive to think they wouldn't demolish them unprotected? Oh well, there's always next year. Naughty naughty chickens.

suburban chickens


Friday, June 14, 2013

Minty Melon Pops & A Nifty Storage Technique

Sure I could make ice pops all year round, but they're just not as satisfying as when it's hot outside and it's a race to eat them before they melt down your hand. Remember when you were a kid and your biggest problem in the summer was getting that last little bit of Popsicle off the stick? Biting one side and quickly flipping it over before the other half met it's end...

I'd like to think that my tastes have matured slightly from orangesicles and red,white and blue rocket flavors. Using fresh fruit is tasty and healthy to boot. I've made melon pops before, but this time I added some mint for double the freshness.


Minty Melon Pops


  • A smallish melon. I used a honeydew hybrid, I swear it was called *"dewlicious"
  • About 2 tablespoons of agave for extra oompf
  • 4 sprigs of mint. 2 regular spearmint and 2 grapefruit mint
  • A pinch of salt

Carve up the melon, and throw everything into a blender.


Puree it 'til smooth. Distribute into your molds. I had a little leftover so it became a mini smoothie for me while I cooked. So refreshing! I'm not a fan of melon as a fruit, too spongey or slimey, I'm not sure. But the flavor, is a whole different story. The melon pairs so nicely with the mint it's hard to tell where one flavor ends and the other begins. As for the mint addition, I honestly don't think I can taste a difference using half grapefruit mint, but the plant itself was pretty so I thought I'd have a go at it.


A Nifty Technique


Recently with all my pop making, I was trying to think of a way to get the pops out of the molds to make way for a different flavor, because who doesn't love a choice in dessert? What I've come up with is wax paper.


After the pops are completely frozen, get them out and wrap them in wax paper, then store in a freezer safe container. Because they're already frozen they won't stick to the paper. And the container is important because you don't want them to pick up freezer taste. Blech. Once they're stowed away your mold is ready for the next batch! This would also be a helpful method if you're entertaining lots of people hungry for ice pops.

* The chickens got the rinds and loved them. One of their favorite fruits to date!

Wednesday, June 12, 2013

All Natural Bug Spray

I don't know about you, but mosquitoes love me. Each summer I will inevitably become covered with golf ball sized welts. Additionally, I hate the thought of covering myself in a choking haze of bug spray. So now my first line of defense is some homemade spray.

all natural bug spray
There are actually plants that bugs don't like. Citronella is a big one. Yes, citronella is a plant, not just a type of candle! And if you add the right combo of things bugs don't like to smell, then they'll stay away for the most part. 

You don't need too many supplies, but once you have everything you can make enough for yourself and others. You could also use the same essential oils for bug repelling candles, but that's a post for another day. You'll need...

  • A 2 oz, dark spray bottle in blue or brown. They sell them in Whole Foods or a site like, Specialty Bottle
  • Witch Hazel, which you can pick up at any drug store
  • Essential Oils: Citronella, Cedarwood, Tea Tree and Lavender

Fill the bottle 3/4 of the way with witch hazel. Then add 20 drops of citronella, 10 of cedarwood, 10 of tea tree and 10 lavender. You can spray it liberally on your legs and arms, but I wouldn't spray it close to your face and eyes. I keep this by the door so it's handy for a spritz on my legs before I go in the garden or take the dog for a walk. I won't tout that it works as well as any chemically enhanced stuff, but if you're concerned about what goes on your skin, this is a great alternative. 

Wednesday, May 29, 2013

Freshly Made Dressing

Penzey's Spices is my favorite place to stock up on spice essentials. Penzey's has top of line spices common and uncommon, whole or ground, as well as a plethora of mixes. These dressing mixes are a flavorful and much more frugal (and sustainable) option to store bought bottled dressings. And if you eat salads with any frequency a fresh dressing is the perfect pairing. These spice mixes are also helpful because you can tweak them to your liking and easily substitute ingredients.

Penzey's Creamy Peppercorn Dressing
The Creamy Peppercorn is hand-mixed from: Tellicherry cracked black pepper, coarse salt, garlic, sugar, thyme, parsley. I prepare mine a little different than suggested...

  • 1 tablespoon of spice mixed with 2 tablespoons of water, let the spices re hydrate for 5 minutes
  • Mix in 1/2 cup of plain greek yogurt and 1/2 cup of mayonnaise
  • Mix in 2 tablespoons of white vinegar
I also broke down the calories, for science. This recipe will make about 8 servings at 45 calories and 4g of fat. Compared to the store bought dressings I usually get, I'd say this is actually healthier. Now to make something to put it on...

Penzey's Creamy Peppercorn Dressing

Our lettuce has steadily been growing. I planted them from seed in a sort of careless manner, and the result was them growing on top of one another. I've been thinning them every so often and feeding them to the chickens, so not a total waste. But now the leaves are big enough for human consumption, yum!

homegrown lettuce

I marinated and grilled some butterflied chicken breasts with plenty for leftovers. For the salad I sliced cucumbers and the chicken, then sprinkled some canned corn on top. (Those are some pickled brussel sprouts on the side.) 

grilled chicken salad

Now bring on the dressing, so fresh! Even Chris enjoys a giant green salad covered in this.

grilled chicken salad


Thursday, May 23, 2013

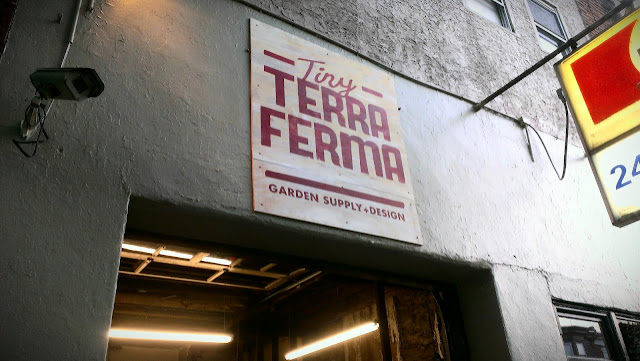
Tiny Terra Ferma

Last night we attended Tiny Terra Ferma's launch party celebrating the farmer's market in Pretzel Park, Manayunk. Yay for buying local! They provided delicious fresh food, live music, and a raffle (no winners here, though). We discovered this garden and landscaping supplier this past weekend, and I've already purchased a fig plant, and some Irish moss for our walkway. Check them out! Or chat with their super friendly staff in person at 4324 Main Street, Philadelphia.

Tiny Terra Ferma Manayunk
The storefront on Main Street.
Some jazzy tunes.
Tiny Terra Ferma Manayunk
BYO and they were selling some tremendous homemade cider.

Tiny Terra Ferma Manayunk
Some pretty flowers for sale.

Manayunk Bridge
The canal and a view of the Manayunk Bridge.

Tuesday, May 14, 2013

The Hops Have Arrived

I like beer and I like plants, so it just seems natural to try to grow some hops, right? Although we haven't tried to brew our own beer, we have friends that do, and at the very least the vines make pretty dried decoration. My grandfather, knows his stuff, and assured me that growing hops is very easy, and that the vine will grow as tall as you let it in the summer. So we've decided to to give it a try and see what happens!

We pre-ordered our rhizomes from Keystone Home Brewing. Rhizomes are the little root bit of the plant that you bury. We were recommended to buy two plants of the same variety. So we got three varieties, two each: Cascade, Columbus, and Mt. Hood.


They look sort of sad. The Columbus had a bit of mold on it, but from what I gather it'll grow just fine in properly drained soil.

The Columbus hops are a good dual purpose hop for both bitterness and strong aroma, perfect for pale ales and IPAs. Named after the Cascade mountains in Northwest US, these hops are the most widely used variety by craft breweries in the States. They have a medium strength aroma, spicy and citrusy.


The Mt. Hood's low acidity makes it primarily used for aroma. It's a descendant of the German Hallertau.

We'd love to build a trellis behind the raised beds, but for now they're just going in the ground. We dug holes for each rhizome, laid them in and covered them with some potting soil. We arranged them in three pairs, 4 foot apart, alphabetically, so I'd remember what's what.


Once they start growing we can stake them and maybe think about building a trellis. I'll let you know when we see something! So, I just found this photo on Monday Night Brewing. This is exactly what we had in mind, the fence even looks the same...


UPDATE: As of 6/13/13 still no signs of emerging hops. I'm not sure if we did something wrong or if I'm not being patient enough...


Monday, April 22, 2013

Garden Journal 4.18.13

Bugleweed Red Columbine
sedum Purple Phlox
Saxifrage Tulip


My mom kept a garden journal of when things needed to be planted or divided, landscaping plans, and so forth. I'm not that organized yet, but this weekend I thought I'd start a photo journal of when things bloom.

The new additions this year are the Columbine and the Saxifrage. I'm familiar with Columbine, a beautiful perennial that grows like a wildflower. I never seen Saxifrage before, but I was smitten with the little red flowers, and the mounding quality will look nice around the border of our path. I planted the Phlox last year, and they're in full swing now. And I can't extol the wonderfulness of sedums enough. These low lying ground covers are easy to grow, they take root anywhere from a cutting, and they have beautiful color all year round. What more could you ask for? The Bugleweed is one of those plants that could be considered a weed depending on where they grow. I don't mind them in the middle of our lawn because of the dainty purple flowers, but if you grow them in a bed they're an excellent ground cover that will quickly spread. And lastly the tulips are in full bloom. This is their third year, and I've decided I need to plant three times more of them! I love the differences in color, size, and curly leaves. So Springy.

* As a side note, the real weekend activities were spent building our coop, The Penncroft Hen House! Photos to come...